Want to keep n8n running 24/7 without leaving your laptop on? This guide walks through the exact AWS EC2 and Docker workflow, with screenshots at each practical step so you can follow along without guessing where to click.
The core idea is simple: instead of using a free hosting middleman that may sleep after inactivity, you run n8n directly on an AWS EC2 virtual machine. AWS Free Tier can cover an eligible micro instance for the first 6 months, as long as you stay within the free-tier limits.

The article starts by showing the common limitation with some free hosting platforms: the server can spin down when inactive. That is risky for automations because scheduled workflows need the server available even when you are not watching it.
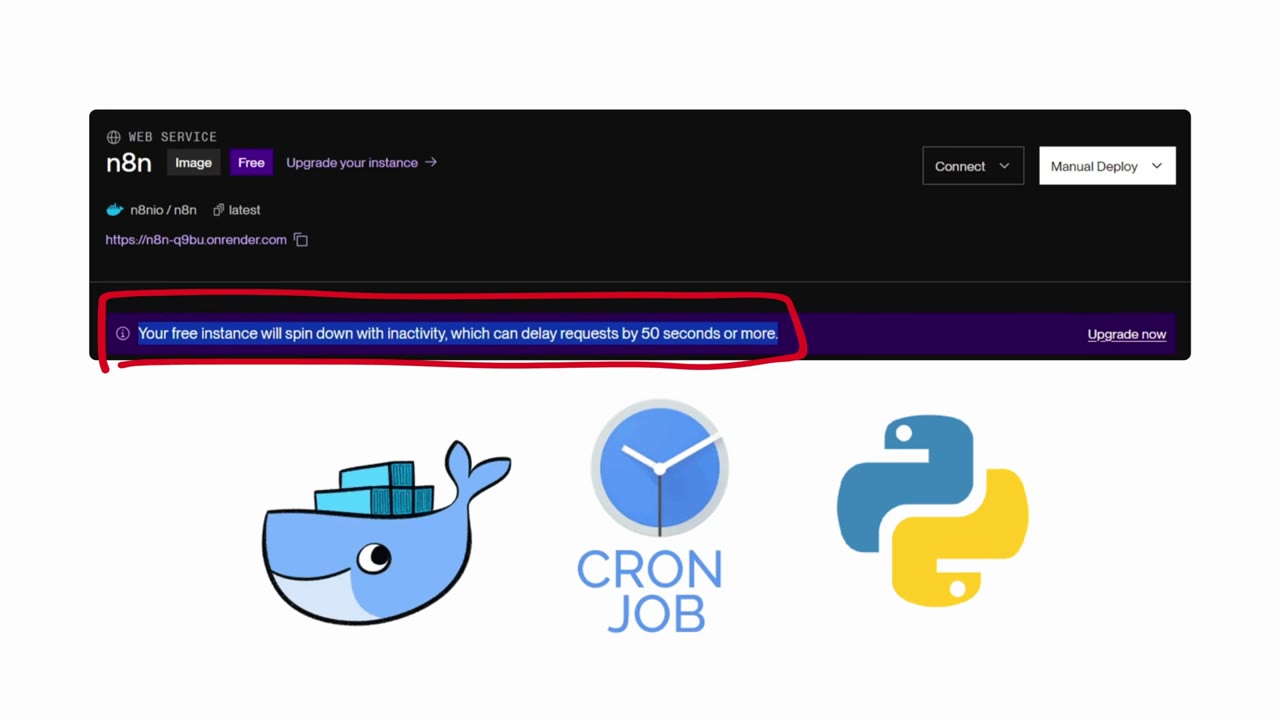
Render is shown on AWS Marketplace to make the larger point: many platforms are built on top of cloud infrastructure. For this tutorial, you go closer to the source and use AWS EC2 directly.
What You Will Build
By the end, you will have n8n running on an Ubuntu EC2 instance, inside Docker, reachable from your browser at your EC2 public IP address on port 5678.
- An AWS EC2 Ubuntu server running continuously.
- Docker installed on the server.
- An n8n Docker container running in detached mode.
- Port 5678 opened in the EC2 security group.
- A browser-accessible n8n setup screen and dashboard.
Step 1: Understand Why EC2 Works for n8n
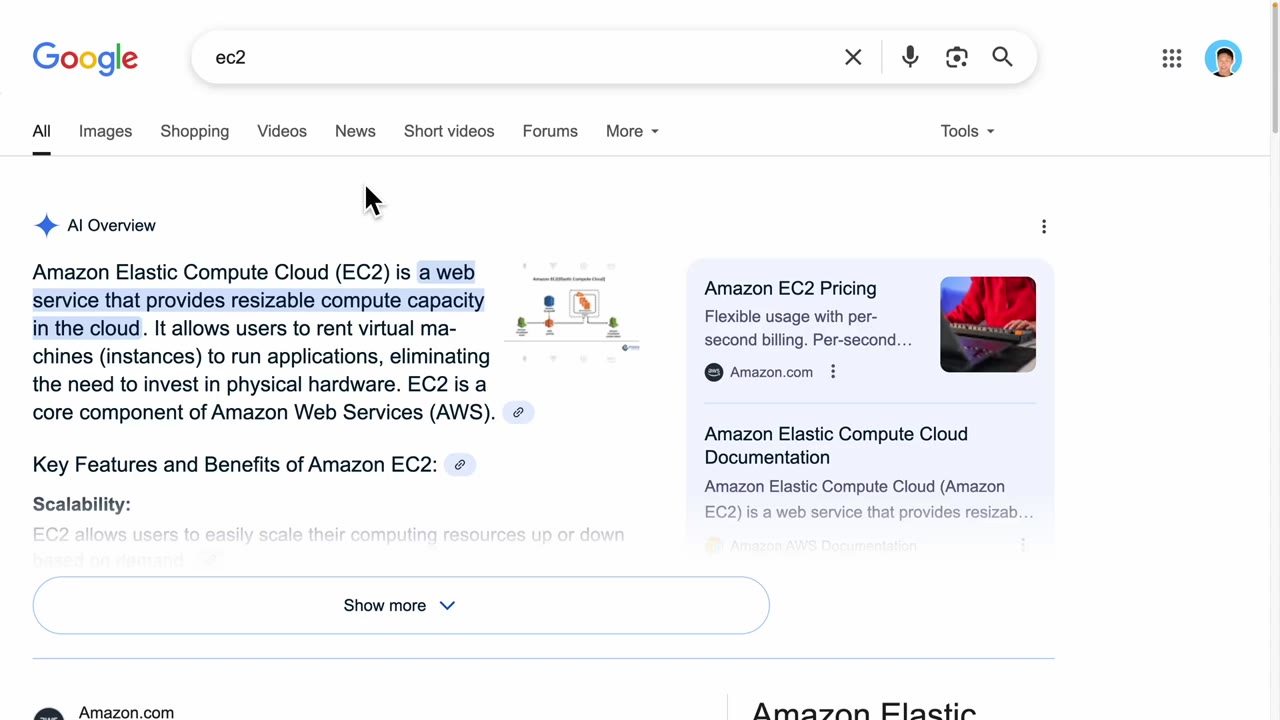
Amazon EC2 is a cloud compute service. You can think of it as a virtual machine hosted by AWS. Because n8n is a server application, EC2 is a natural fit: you install Docker once, run the n8n container, and let the server stay online.
The free-tier angle matters. The article highlights 750 hours per month for 6 months. Since a month has about 720 to 744 hours, that allowance can cover one eligible micro instance running continuously during the free-tier period.
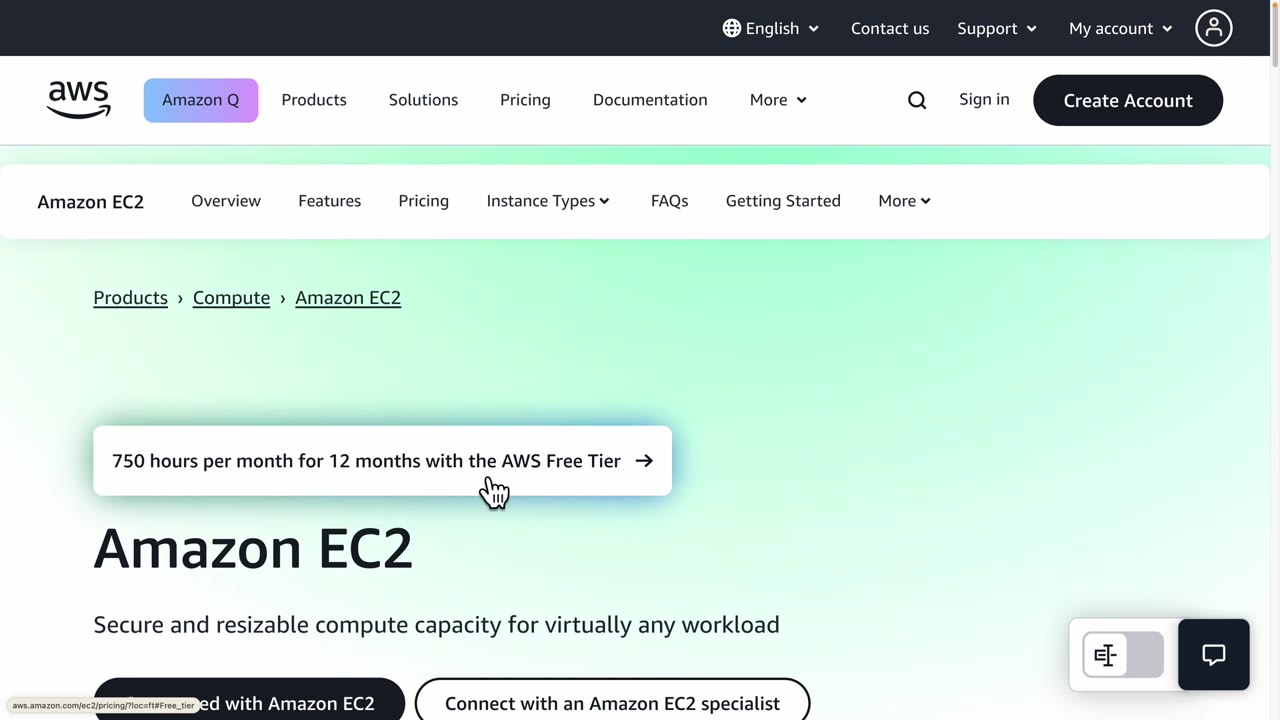
Important: AWS pricing rules can vary by account age, region, instance type, and usage. Stay on a free-tier-eligible instance type and monitor billing so you do not accidentally create paid resources.
Step 2: Open EC2 in the AWS Console
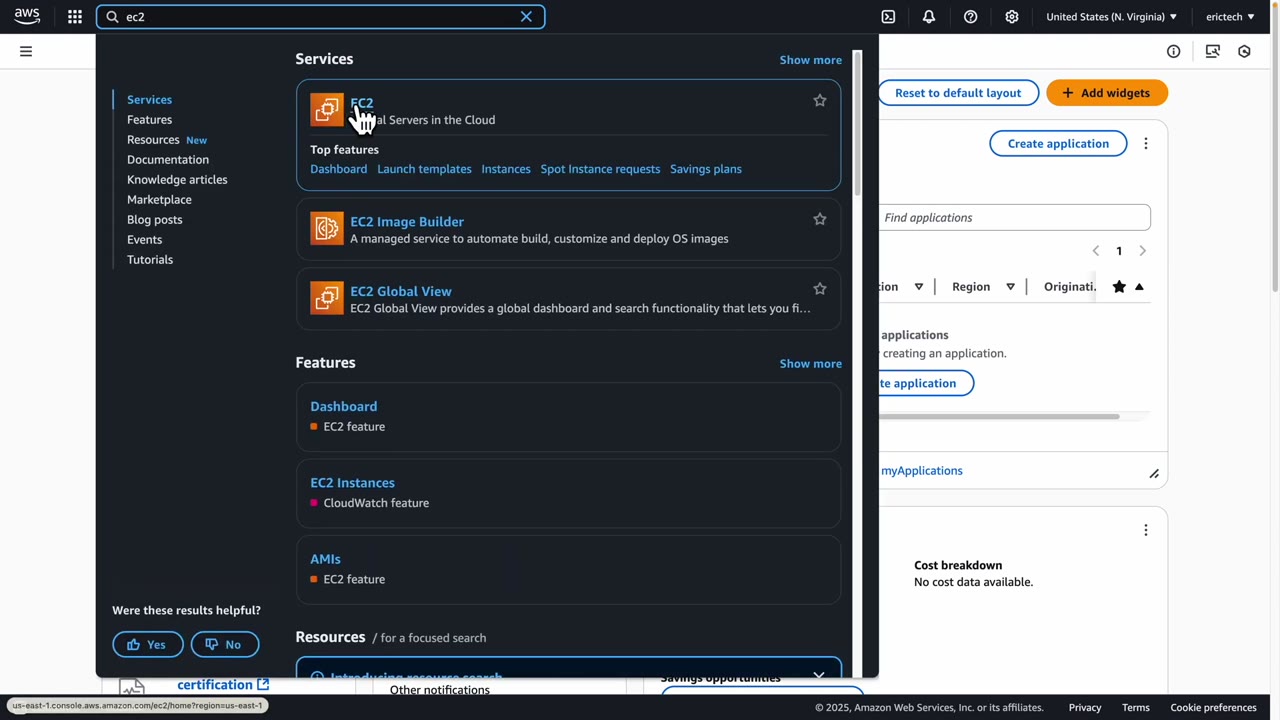
After creating or signing into your AWS account, use the top search bar and search for EC2. Open the EC2 service from the results.
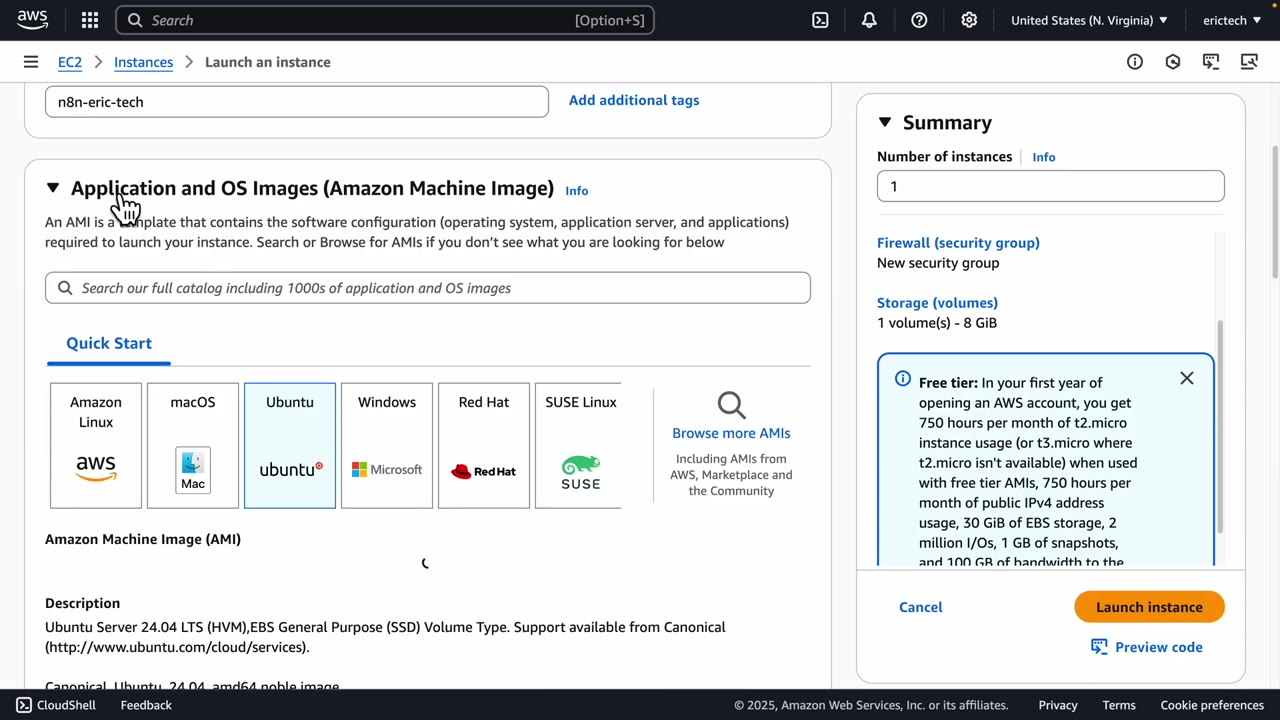
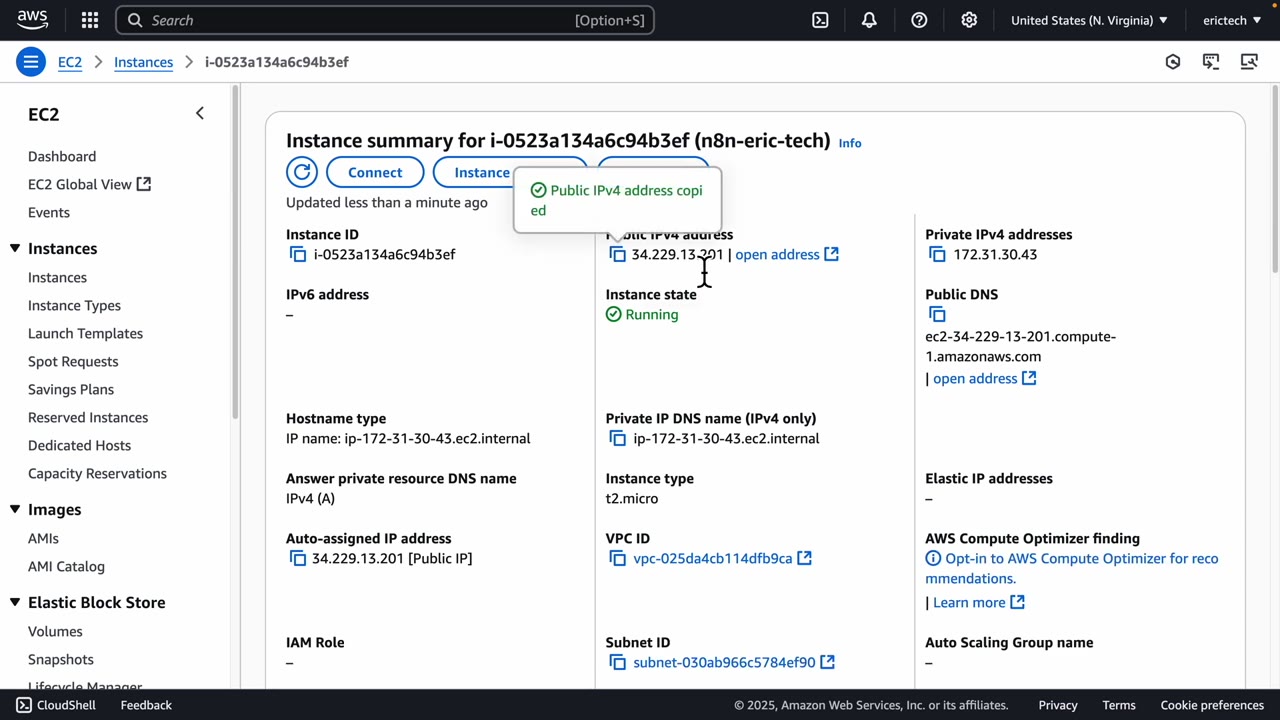
Inside EC2, choose Launch instance. Give the instance a recognizable name. In the following image, the server is named n8n-eric-tech. For the operating system, select Ubuntu from the quick-start options.
Step 3: Create and Download the Key Pair
The key pair is what lets your computer securely connect to the EC2 server over SSH. Treat this file like a password. Download it and keep it somewhere safe because AWS will not show the private key again later.
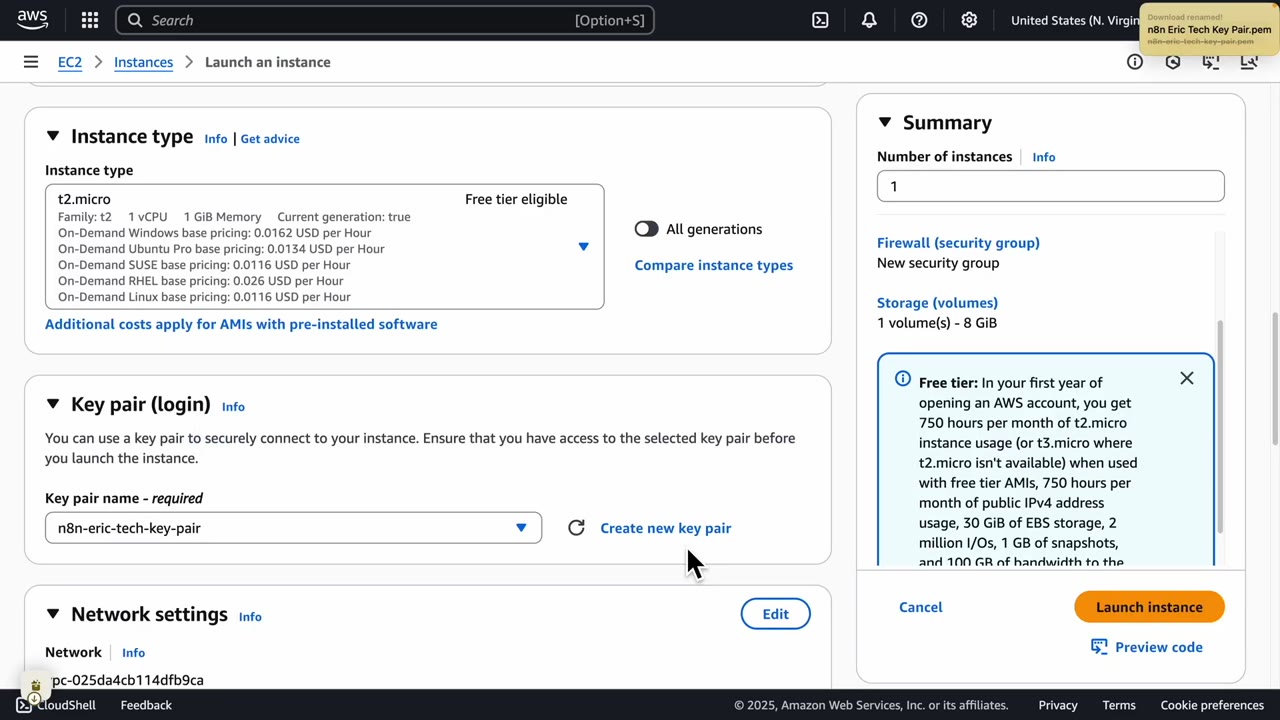
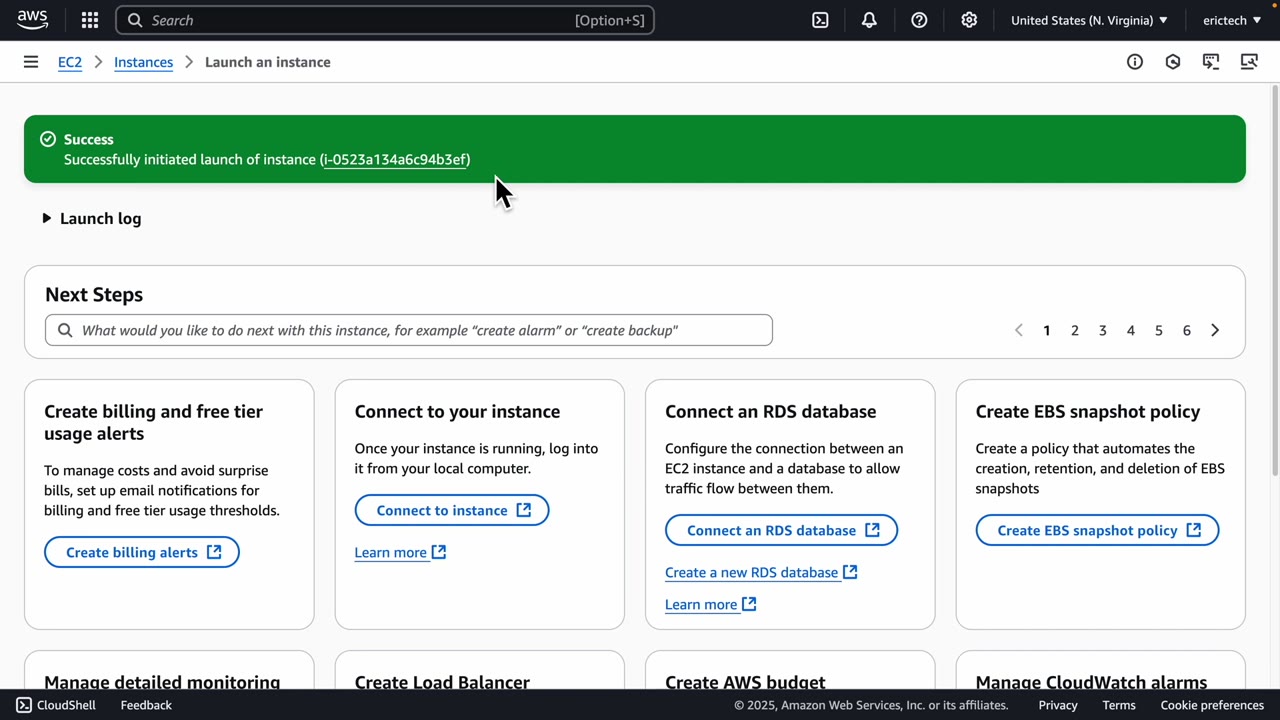
Keep the default key pair settings unless you have a specific reason to change them. Once the key pair is downloaded, continue and launch the instance.
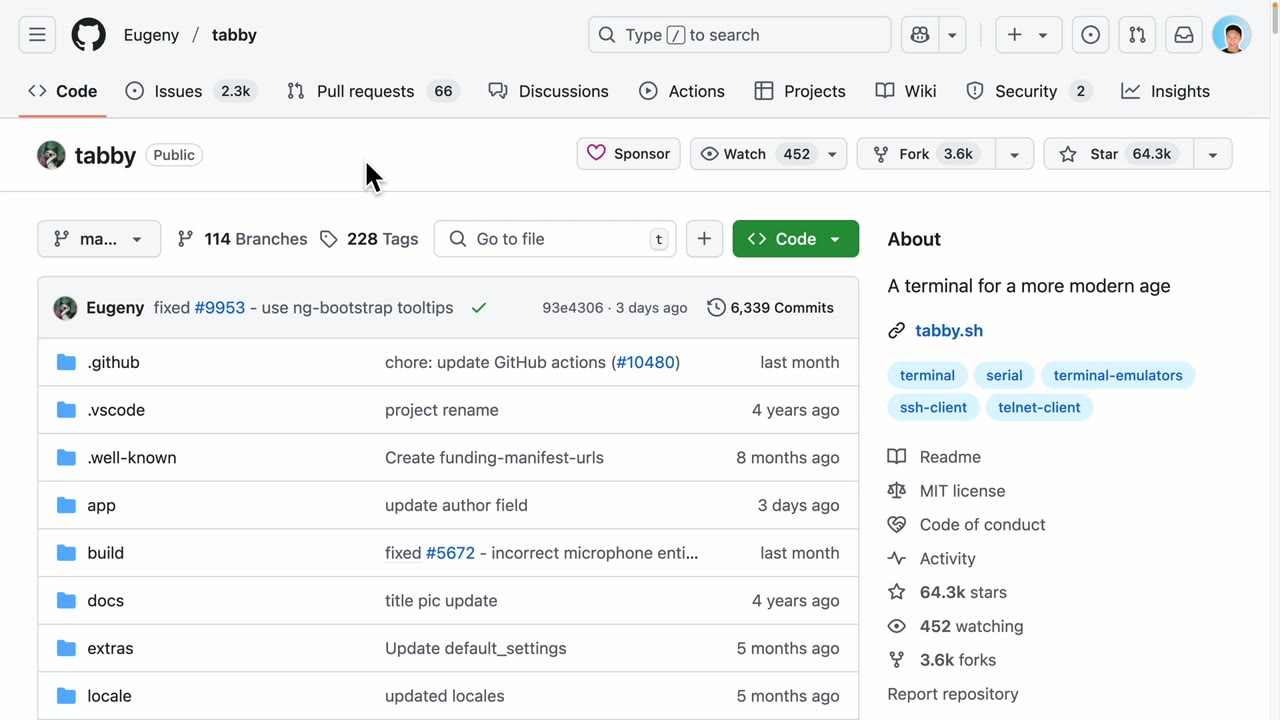
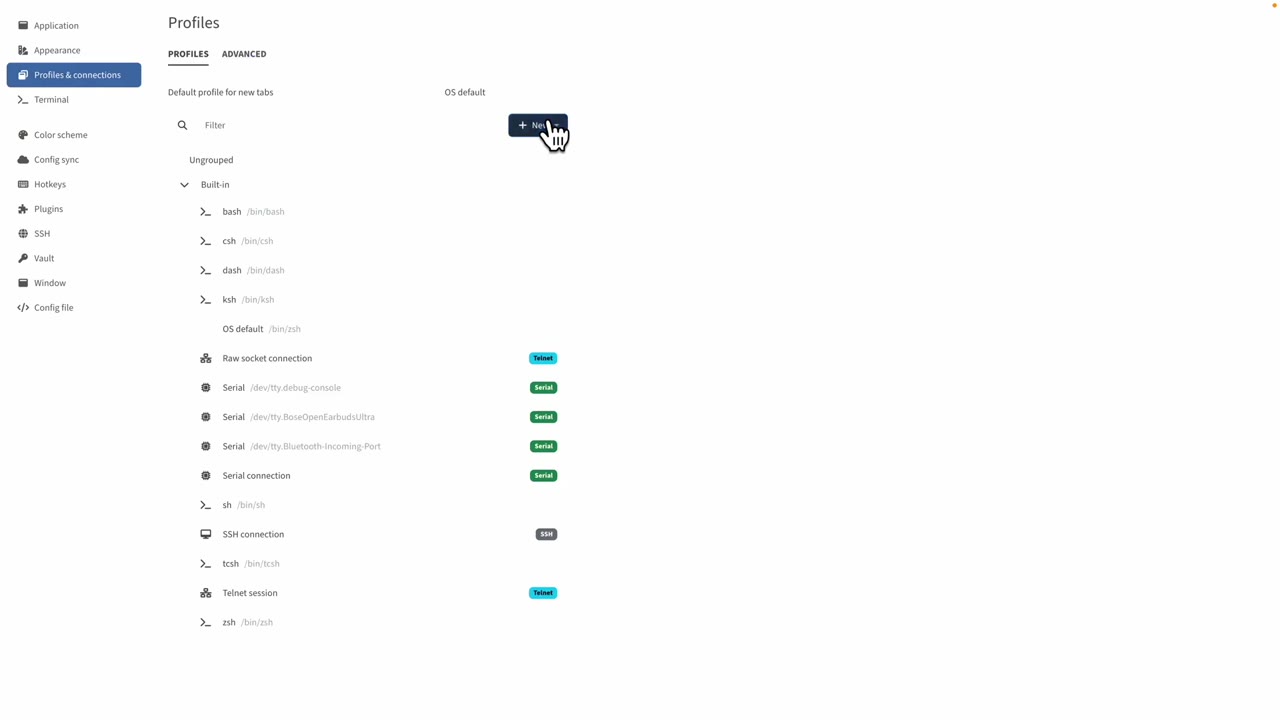
Step 4: Prepare an SSH Client with Tabby
You can SSH from your normal terminal, but the video uses Tabby because it makes profiles and private key management easier. Download the version that matches your operating system from the Tabby releases page.
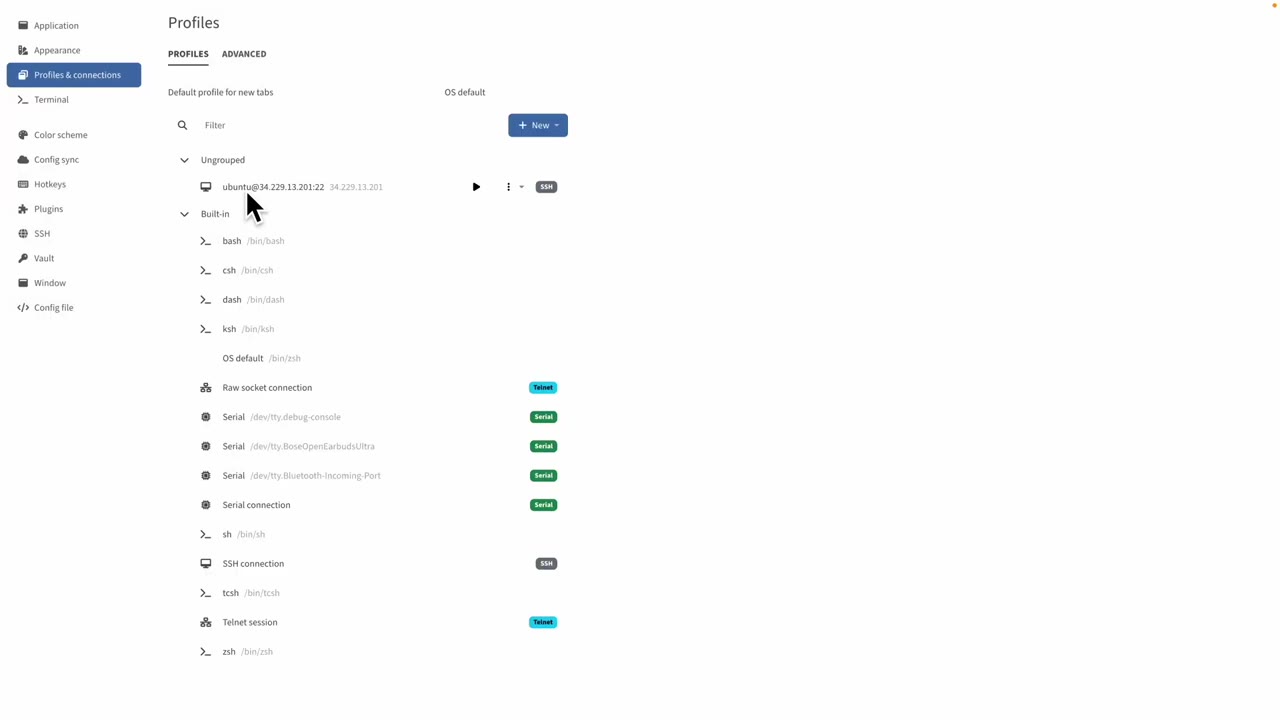
In Tabby, open Settings, then Profiles and Connections, and create a new SSH profile.
Return to AWS, open the EC2 instance details, and copy the public IPv4 address. In Tabby, paste that value into the host field. Use ubuntu as the username for an Ubuntu EC2 instance, then attach the private key file you downloaded earlier.
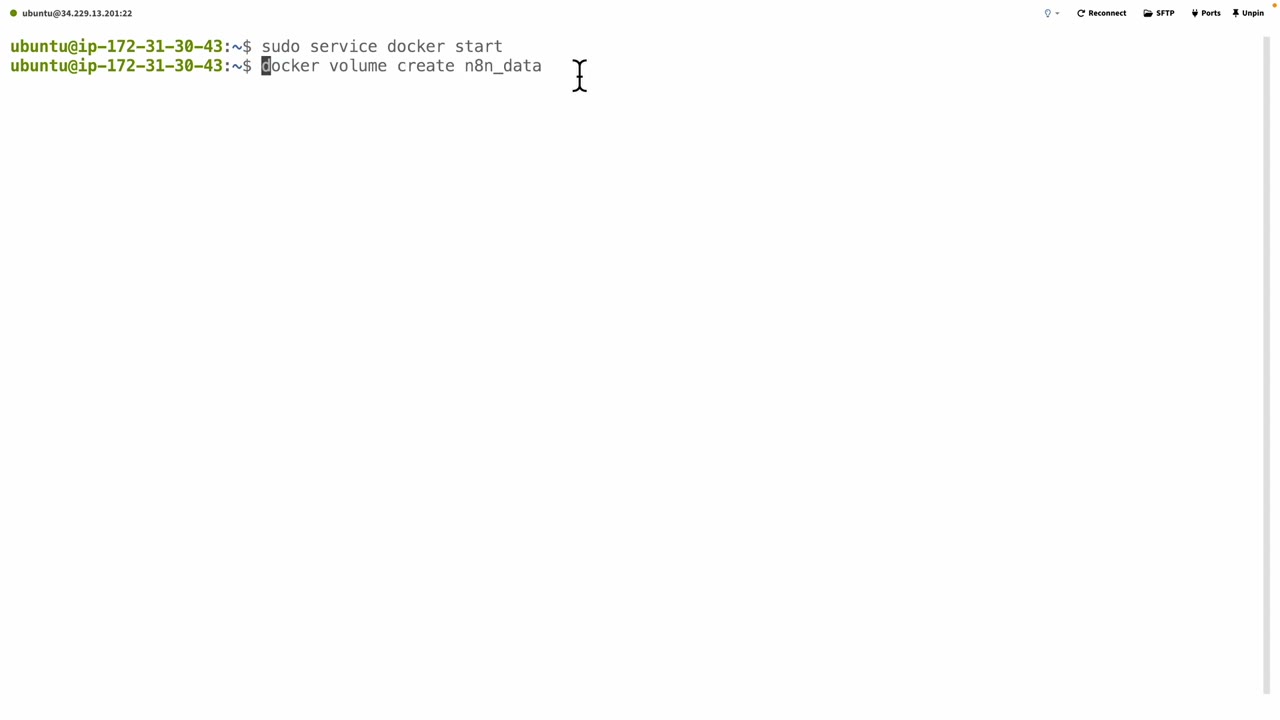
Step 5: Install Docker on the EC2 Server
Start the Tabby profile to connect to the EC2 instance. Once the terminal opens, install Docker using the command shown in the video.
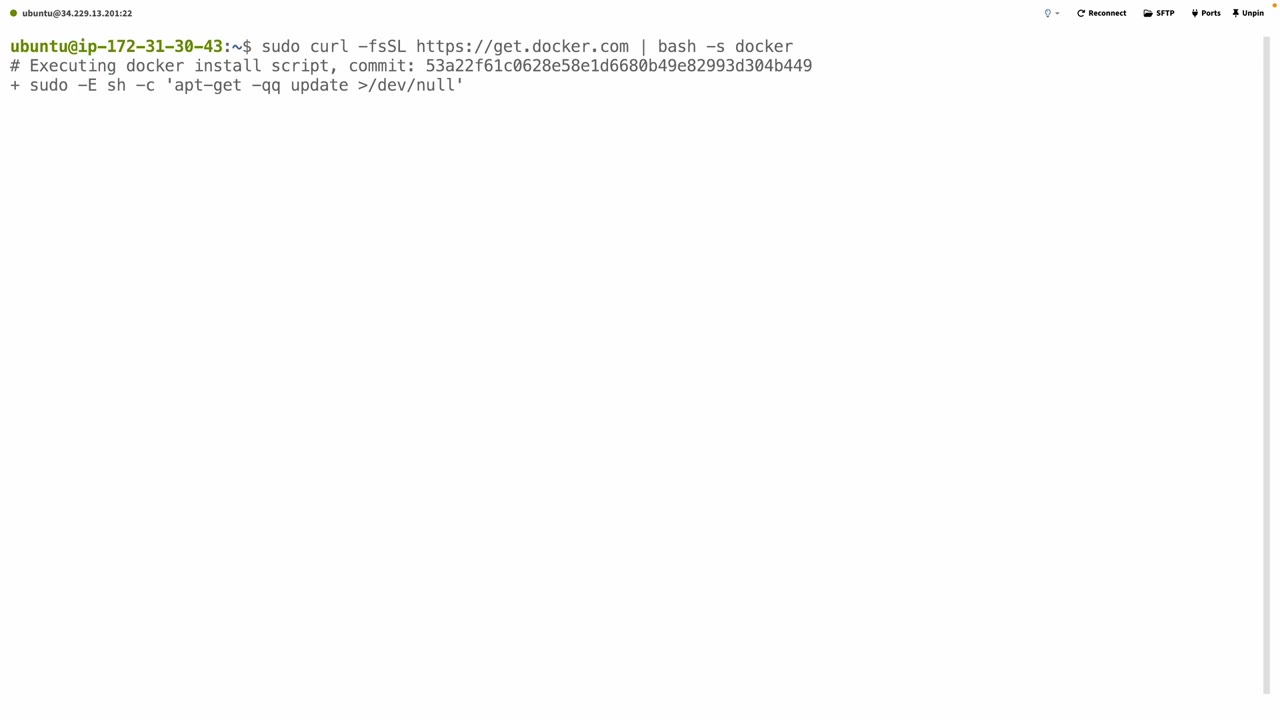
sudo curl -fsSL https://get.docker.com | bash -s dockerAfter Docker installs, start the Docker service.
sudo service docker startStep 6: Create n8n Storage and Run the Docker Container
The n8n GitHub quick-start section provides the Docker commands. The first command creates a Docker volume so your n8n data can persist beyond a container restart.
sudo docker volume create n8n_dataNext, run the n8n container. The video modifies the command so it runs in detached mode, maps port 5678, and disables secure cookies for this HTTP-only IP-address setup.
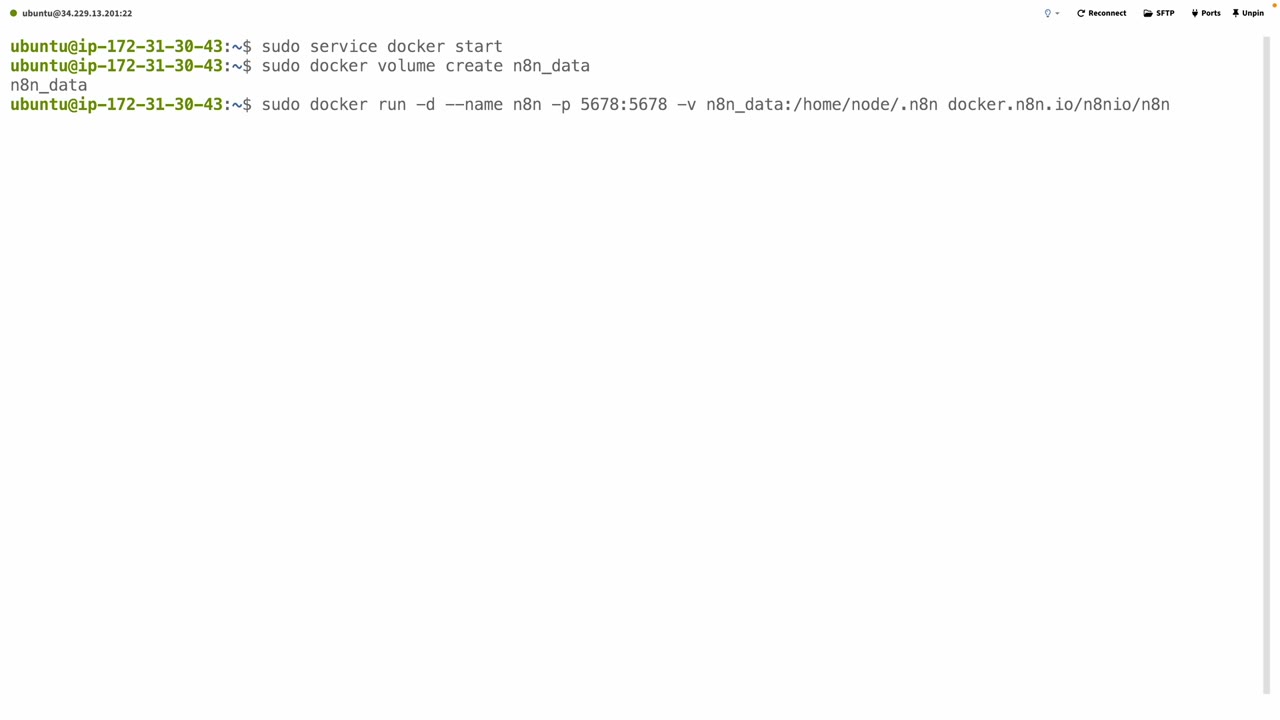
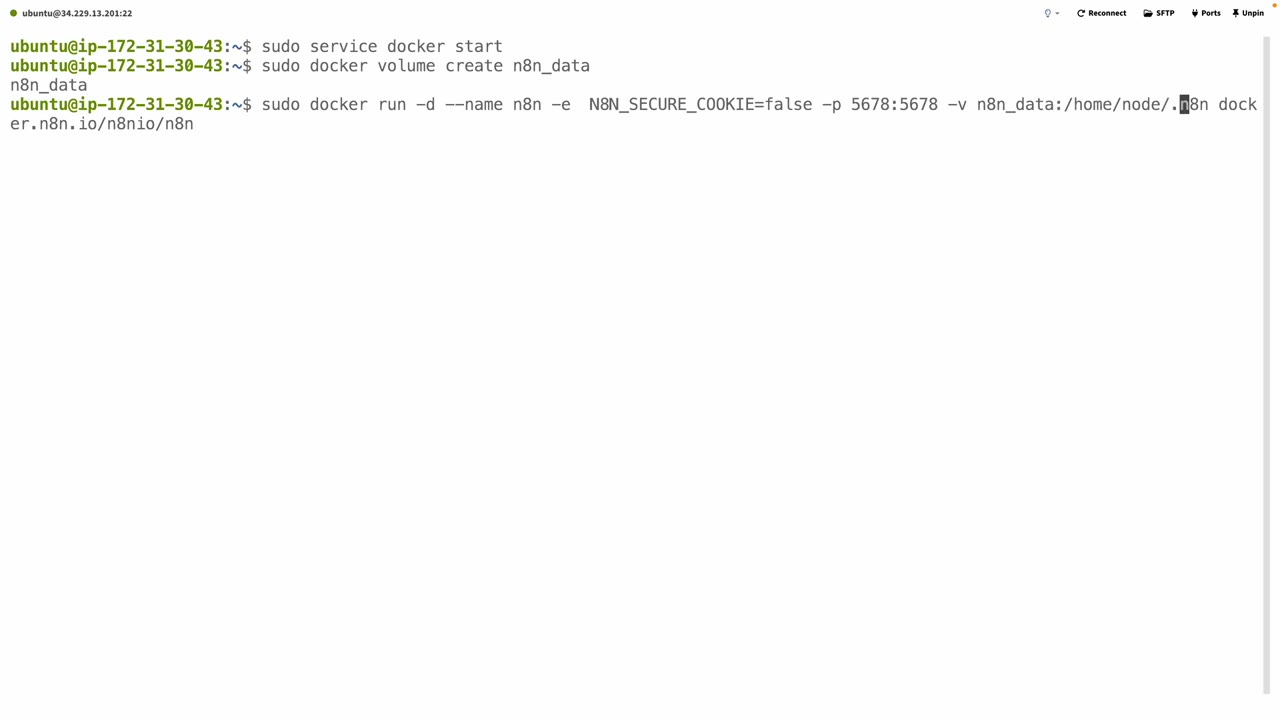
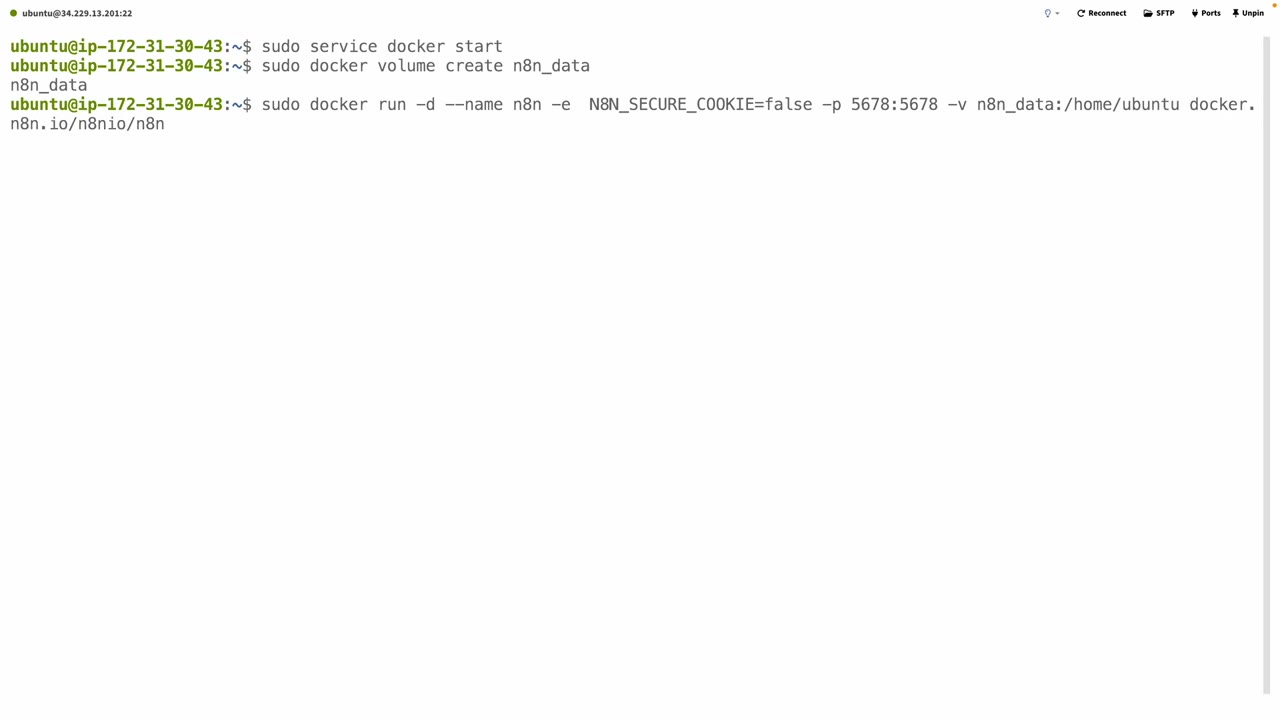
sudo docker run -d --name n8n -e N8N_SECURE_COOKIE=false -p 5678:5678 -v n8n_data:/home/ubuntu docker.n8n.io/n8nio/n8nNote: N8N_SECURE_COOKIE=false is useful for the simple IP-address demo shown in the video. For a more production-ready setup, use a domain name and HTTPS, then remove that workaround.
Step 7: Open Port 5678 in the EC2 Security Group
At this point n8n is running on the server, but your browser still needs permission to reach it. In AWS, open the EC2 instance’s Security tab, click the attached security group, then edit inbound rules.
Add a new inbound rule with these values:
- Type: Custom TCP
- Port range: 5678
- Source: 0.0.0.0/0
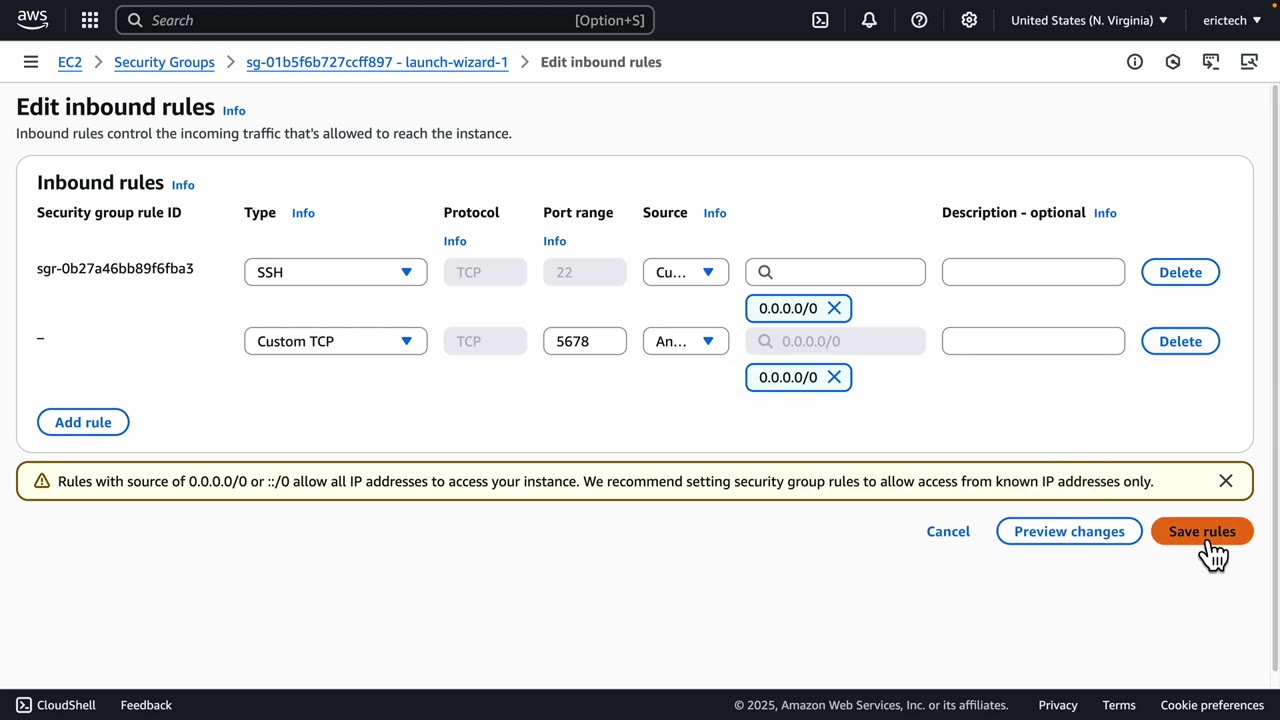
Security note: 0.0.0.0/0 allows traffic from anywhere. It is convenient for a tutorial, but for a real production server you should use HTTPS, strong n8n credentials, and tighter network rules where possible.
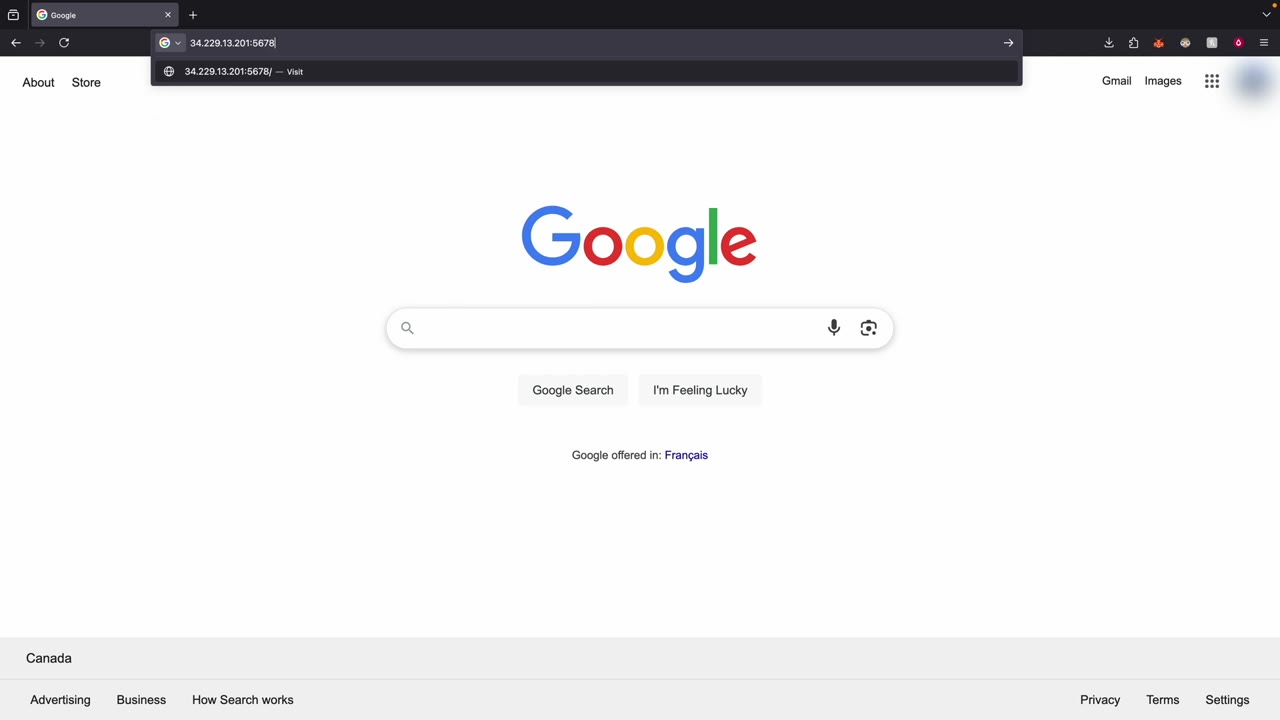
Step 8: Open n8n in Your Browser
Copy the public IP address from the EC2 instance, then open it in the browser with port 5678 at the end. The format is:
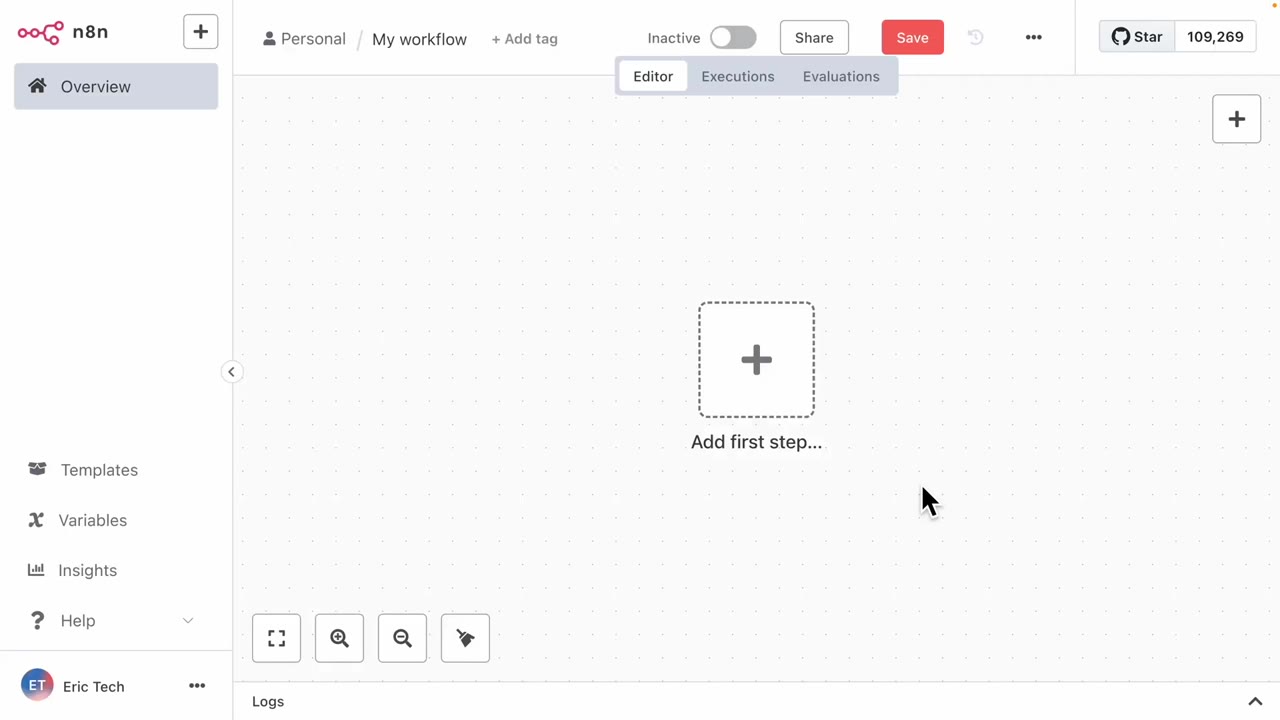
http://YOUR_PUBLIC_IP:5678If everything is working, you will see the n8n owner account setup screen.
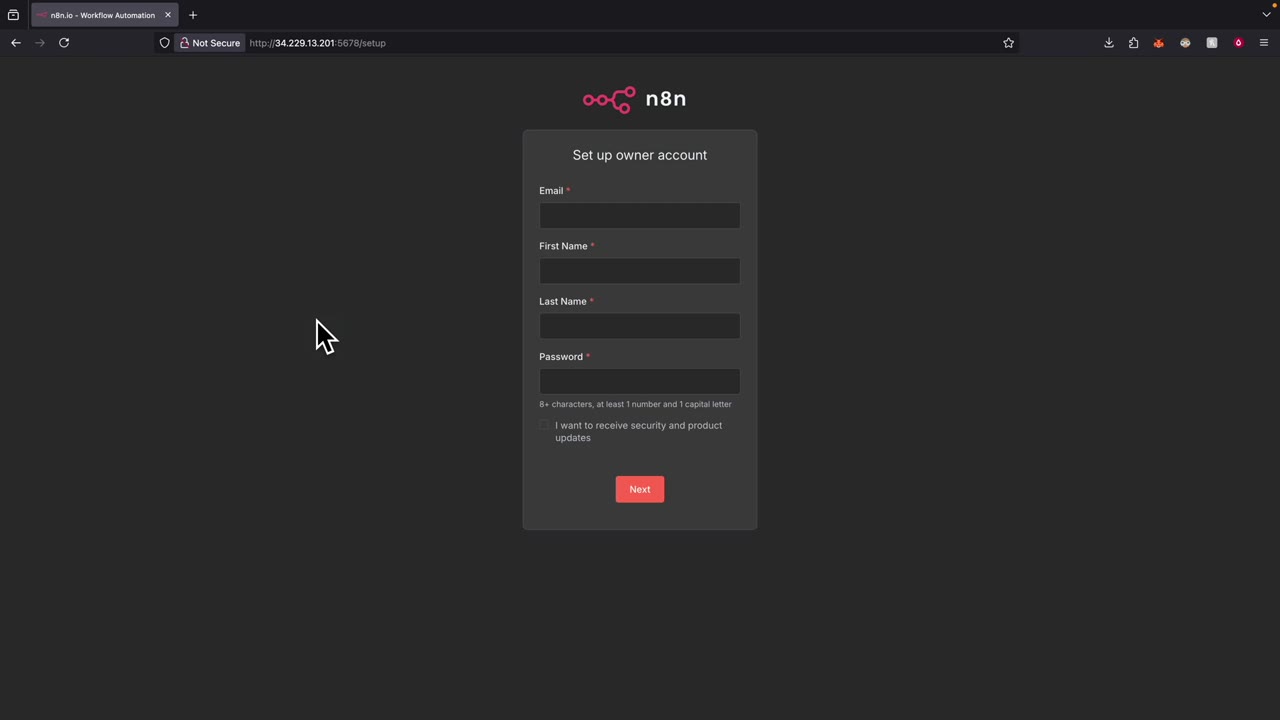
Create the owner account, then continue into the n8n dashboard. From there, choose Create Workflow or Start from scratch to begin building automations.
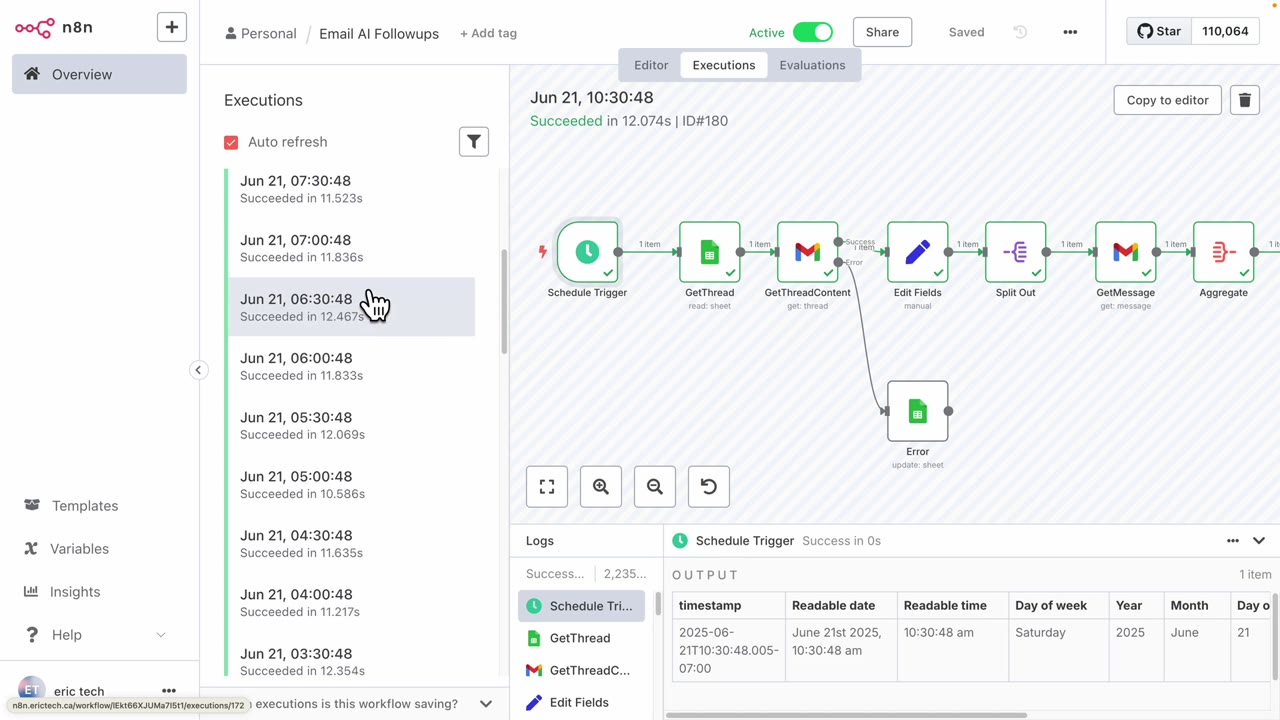
Step 9: Confirm the Workflow Runs Without Your Computer
The final proof is the Executions tab. The video shows scheduled workflow executions running every 30 minutes from the cloud-hosted n8n instance. That means the automation is running on EC2, not on the creator’s local computer.
Final Checklist
- AWS account created and EC2 opened.
- Ubuntu EC2 instance launched on a free-tier-eligible type.
- Key pair downloaded and stored safely.
- SSH connection created through Tabby or your terminal.
- Docker installed and started.
- n8n Docker volume created.
- n8n container running on port 5678.
- Security group allows inbound TCP traffic on port 5678.
- n8n owner account created in the browser.
- Executions confirm the workflow runs from the cloud server.
Cost Check
The article ends by checking AWS billing and showing EC2 cost at $0.00. You should do the same after setup. Open the AWS Billing dashboard, confirm that EC2 usage is covered by Free Tier, and keep watching it during the first few days.
That is the complete flow: AWS EC2 gives you the always-on server, Docker runs n8n, and the EC2 security group exposes the web interface so you can build and monitor workflows from any browser.

Olaitan Oladipo holds a BSc in Sociology from Olabisi Onabanjo University. He is a self-taught automation builder who has spent years inside n8n doing the work that most tutorials skip: debugging OAuth errors at 2am, migrating client automations from Make.com mid-project, fighting reverse proxy misconfigurations on AWS EC2, and figuring out through trial and error what actually holds up in production versus what only looks clean in a demo.
He is not a developer by training and not a SaaS founder. He is the person in the Discord server who actually answers the question instead of linking to the docs.
His writing on n8n Automation Tutorial covers self-hosting, AI agent workflows, tool comparisons, and the security vulnerabilities the automation industry would rather not discuss. He has built AI-assisted invoice approval flows using OpenAI function calling, connected Claude via HTTP Request nodes, and holds considered opinions about Zapier, Make.com, LangChain, and CrewAI that their marketing teams would not appreciate.
He writes for people who are technical enough to follow a tutorial but experienced enough to want the honest version.