Self-hosting n8n on a Hostinger VPS is one of the quickest ways to move from a beginner-friendly cloud workflow builder into a server you control. Hostinger’s n8n application template removes much of the early Docker setup work, while still giving you a VPS where you can manage updates, domains, backups, and performance.
If your self-hosted workflows later use AI Agent community tools, read the previous guide on configuring N8N_COMMUNITY_PACKAGES_ALLOW_TOOL_USAGE in n8n. This Hostinger guide covers the server setup path before you start tuning advanced node behavior.
What You Need Before Starting
- A Hostinger account with access to VPS hosting.
- A domain name if you want a professional HTTPS URL for n8n.
- A strong password manager for the VPS root password and n8n owner account.
- A basic backup plan before running business-critical workflows.
Step 1: Choose a VPS Plan
Start by choosing a VPS plan that matches your expected workload. n8n can run on a small server for learning and light automations, but heavier workflows, AI usage, browser automation, or frequent executions need more RAM and CPU.
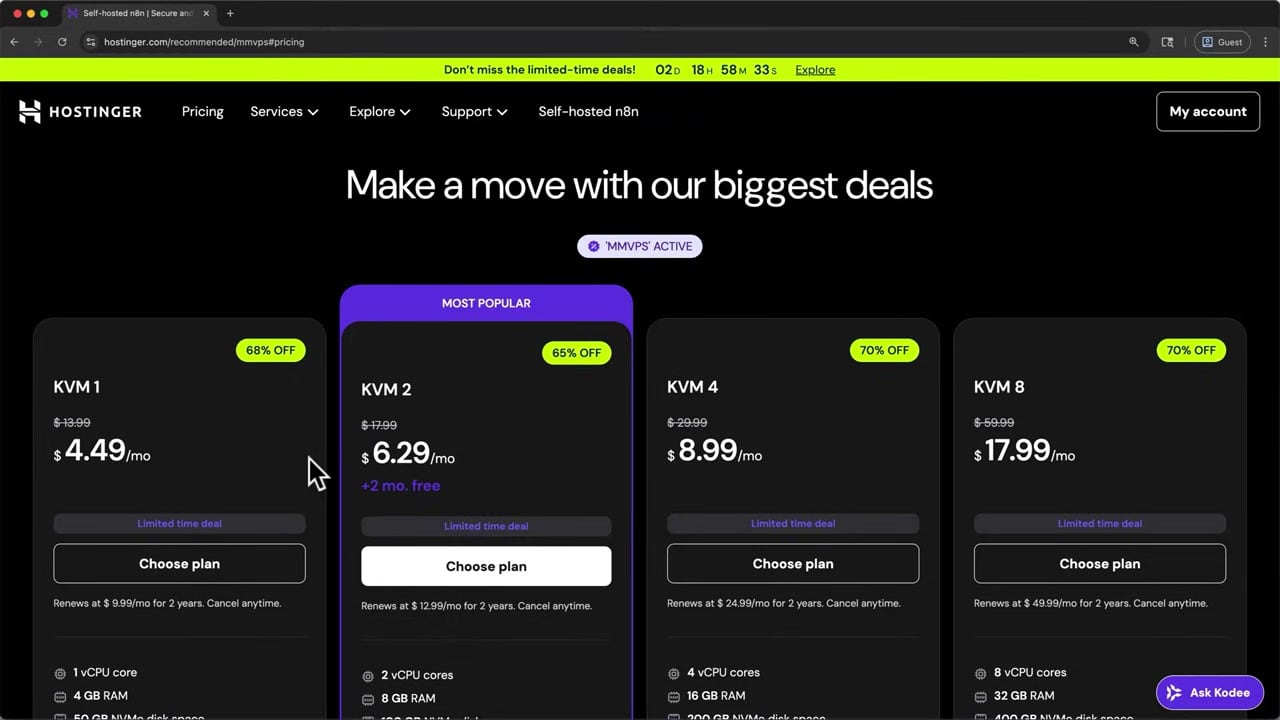
For a beginner setup, choose a plan that is affordable but not starved for memory. If your workflows start timing out or queueing heavily, you can upgrade later.
Step 2: Select the n8n Application Template
During VPS setup, Hostinger lets you choose an operating system or application template. Search for or select the n8n template. This template usually installs n8n inside Docker, which is the recommended self-hosted pattern for most production-style deployments.
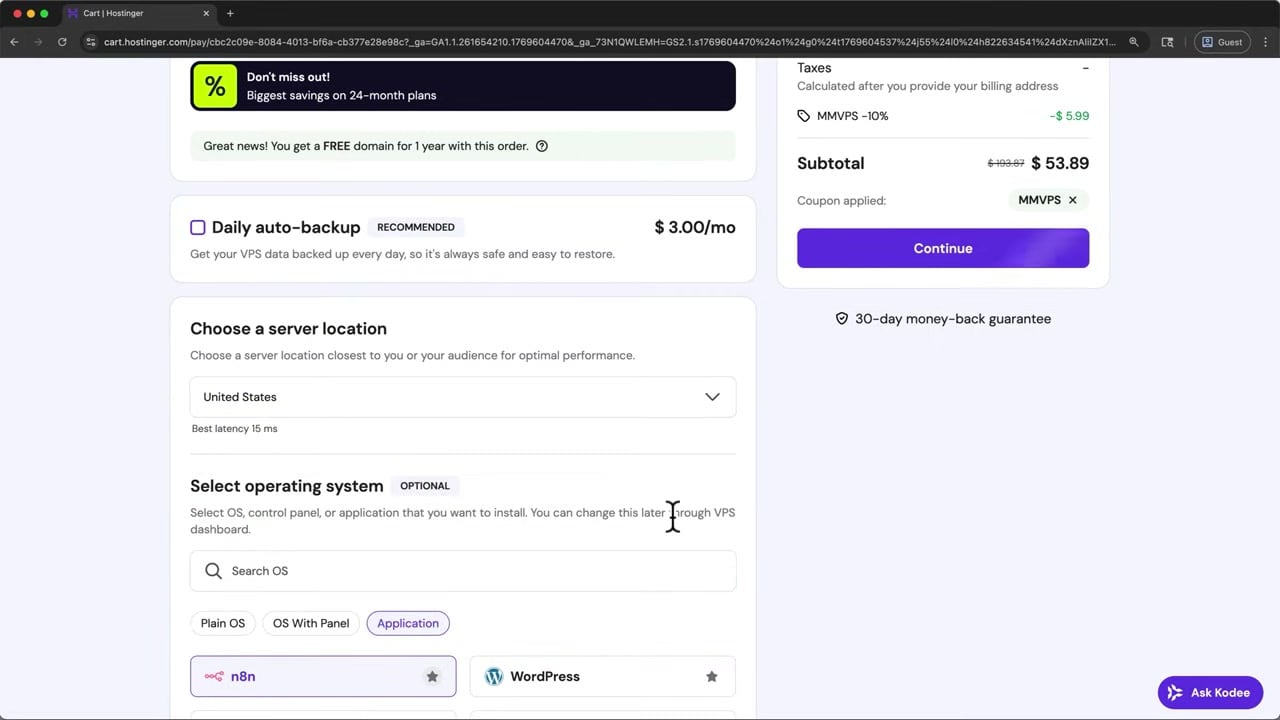
The benefit of this template is speed: you avoid manually writing the first Docker Compose file and can reach the n8n owner setup screen much faster.
Step 3: Create a Strong Root Password
Hostinger will ask for a VPS root password. Treat this like the key to the server. Use a long, unique password and save it somewhere safe.
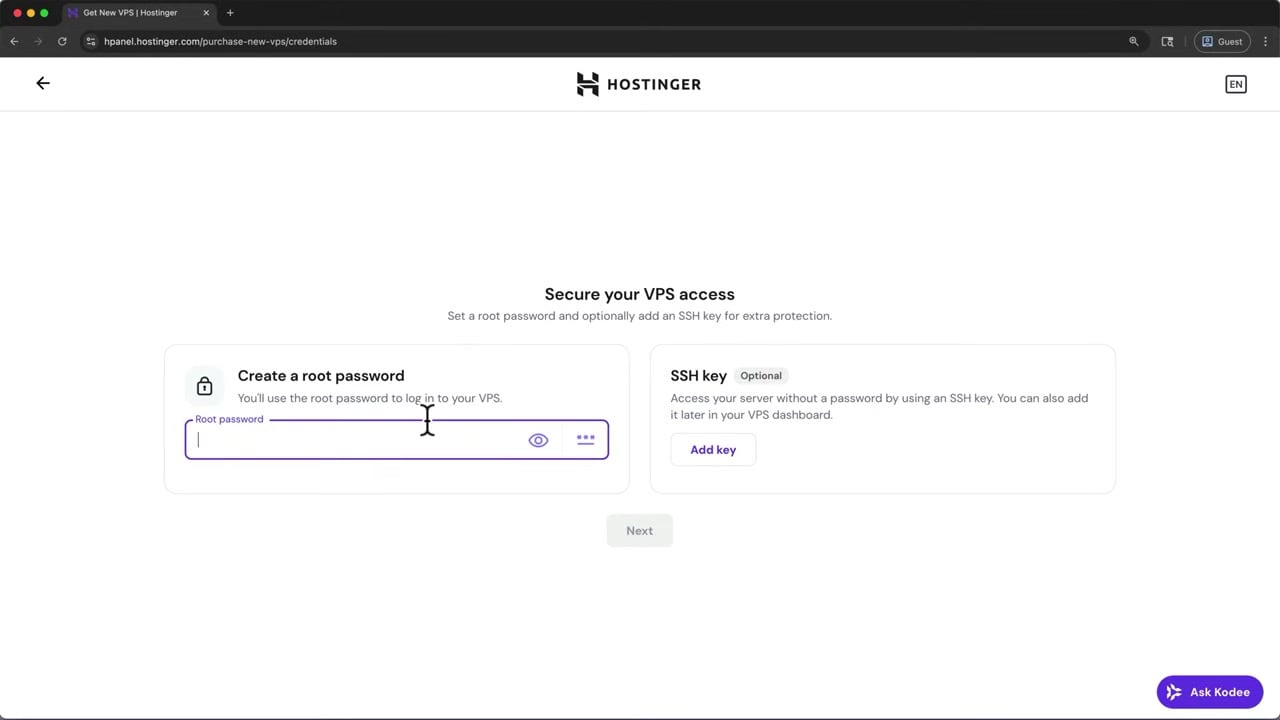
If Hostinger offers SSH key login, that is usually more secure than password-only access. Even if you start with a root password, plan to use SSH keys and restrict access as your setup becomes more serious.
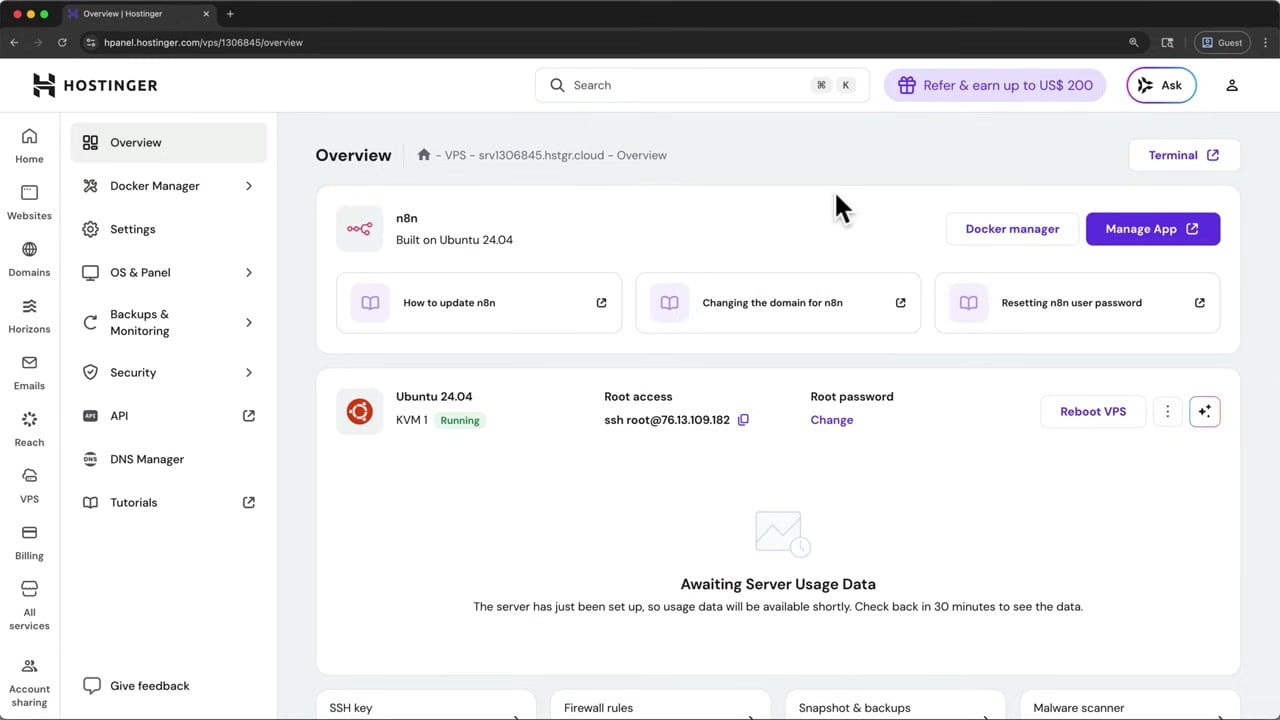
Step 4: Wait for the VPS to Provision
After choosing the template and creating credentials, Hostinger provisions the VPS and installs the n8n application. This can take a few minutes. Once ready, open the VPS dashboard and look for the n8n application management option.
Step 5: Open n8n From Manage App
Use the Manage App option to open n8n. This should take you to the first-time n8n setup page where you create the owner account.
If the page does not load immediately, wait a little longer and refresh. Also confirm the VPS firewall or Hostinger panel is not blocking the exposed application port.
Step 6: Create the n8n Owner Account
The first person to open a fresh n8n instance creates the owner account. Use a real email address, a strong password, and accurate profile details. This account controls the instance, credentials, workflows, and user access.
After the owner account is created, n8n may offer a free community license key. This is optional, but it unlocks useful self-hosted features such as workflow history and other community edition capabilities.
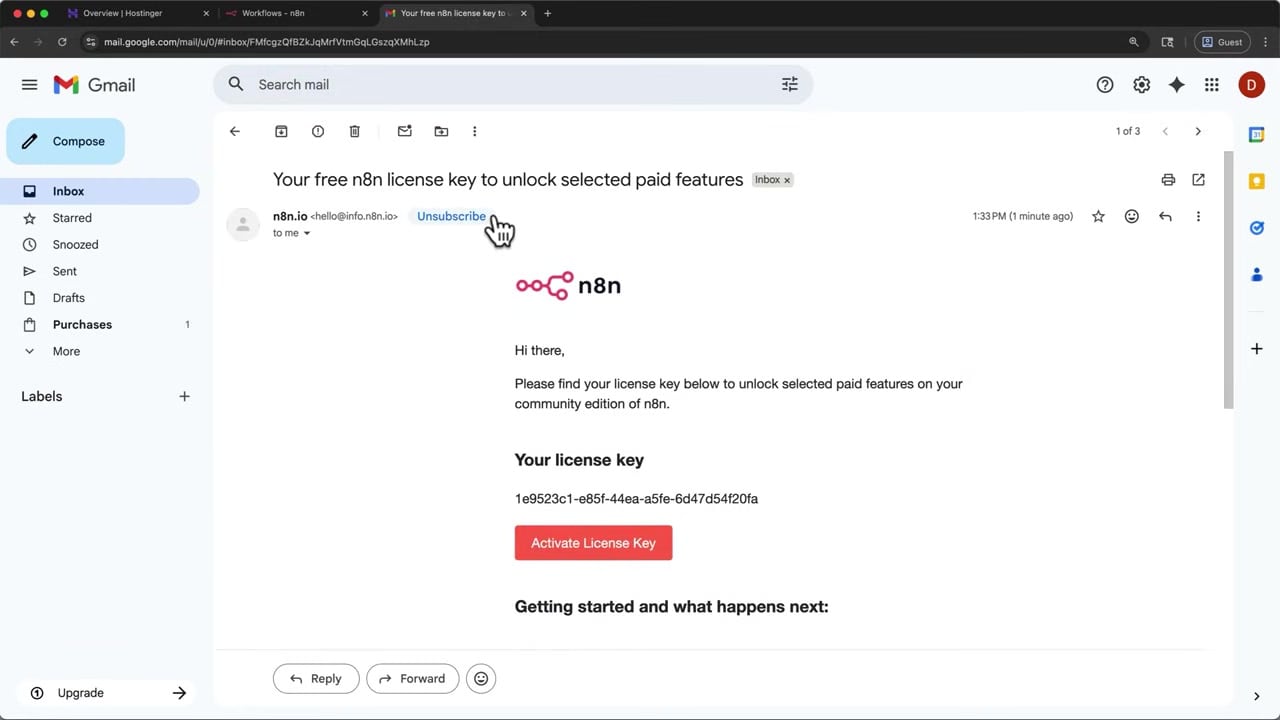
Step 7: Activate the Free Community License Key
Request the free license key from inside n8n, open the email sent by n8n, copy the key, and paste it into the license screen. If you do not see the email, check spam or promotions folders.
This license is not the same as a paid n8n Cloud subscription. You are still self-hosting; the license simply unlocks free community features for your instance.
Step 8: Verify the Hostinger Account Email
If Hostinger asks you to verify your email address, complete that step early. A verified hosting account reduces the chance of dashboard restrictions, support issues, or delayed server management actions.
Step 9: Update n8n When Hostinger Shows an Update
Hostinger’s Docker Manager can show when the n8n image has a newer version available. Before updating, make sure you understand where your n8n data is stored and that you have a backup.
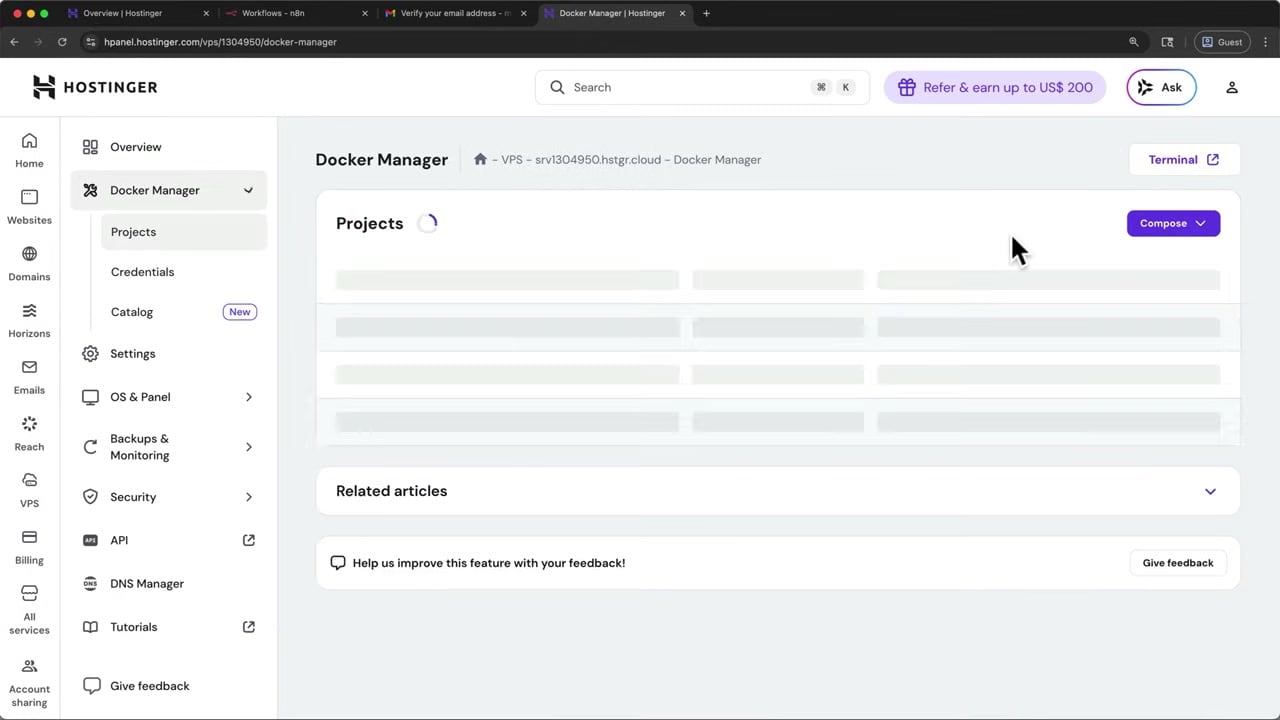
For a simple template install, the dashboard update flow may be enough. For more advanced production use, learn the underlying Docker commands too, because they make troubleshooting much easier.
docker compose pull
docker compose down
docker compose up -d
docker compose logs -f n8n
Production Checklist After Installation
- Connect a real domain instead of relying on a raw IP address.
- Use HTTPS so cookies, credentials, and webhook traffic are protected.
- Set a fixed
WEBHOOK_URLso production webhooks generate the correct public URL. - Back up the n8n database and the
.n8ndata folder before updates. - Keep the n8n image updated, but read release notes before major upgrades.
- Do not expose unnecessary ports to the public internet.
When Hostinger VPS Makes Sense
Hostinger VPS is a good fit when you want a practical self-hosted n8n environment without manually building everything from scratch. It is especially useful for learning, small business automations, and early production workflows. For very high-volume automation, you may eventually move to a custom Docker Compose or Kubernetes setup with queue mode, workers, managed databases, and dedicated monitoring.
References
Official references used for accuracy: n8n Docker installation documentation, n8n Docker Compose setup documentation, and n8n license key documentation.

Olaitan Oladipo holds a BSc in Sociology from Olabisi Onabanjo University. He is a self-taught automation builder who has spent years inside n8n doing the work that most tutorials skip: debugging OAuth errors at 2am, migrating client automations from Make.com mid-project, fighting reverse proxy misconfigurations on AWS EC2, and figuring out through trial and error what actually holds up in production versus what only looks clean in a demo.
He is not a developer by training and not a SaaS founder. He is the person in the Discord server who actually answers the question instead of linking to the docs.
His writing on n8n Automation Tutorial covers self-hosting, AI agent workflows, tool comparisons, and the security vulnerabilities the automation industry would rather not discuss. He has built AI-assisted invoice approval flows using OpenAI function calling, connected Claude via HTTP Request nodes, and holds considered opinions about Zapier, Make.com, LangChain, and CrewAI that their marketing teams would not appreciate.
He writes for people who are technical enough to follow a tutorial but experienced enough to want the honest version.