

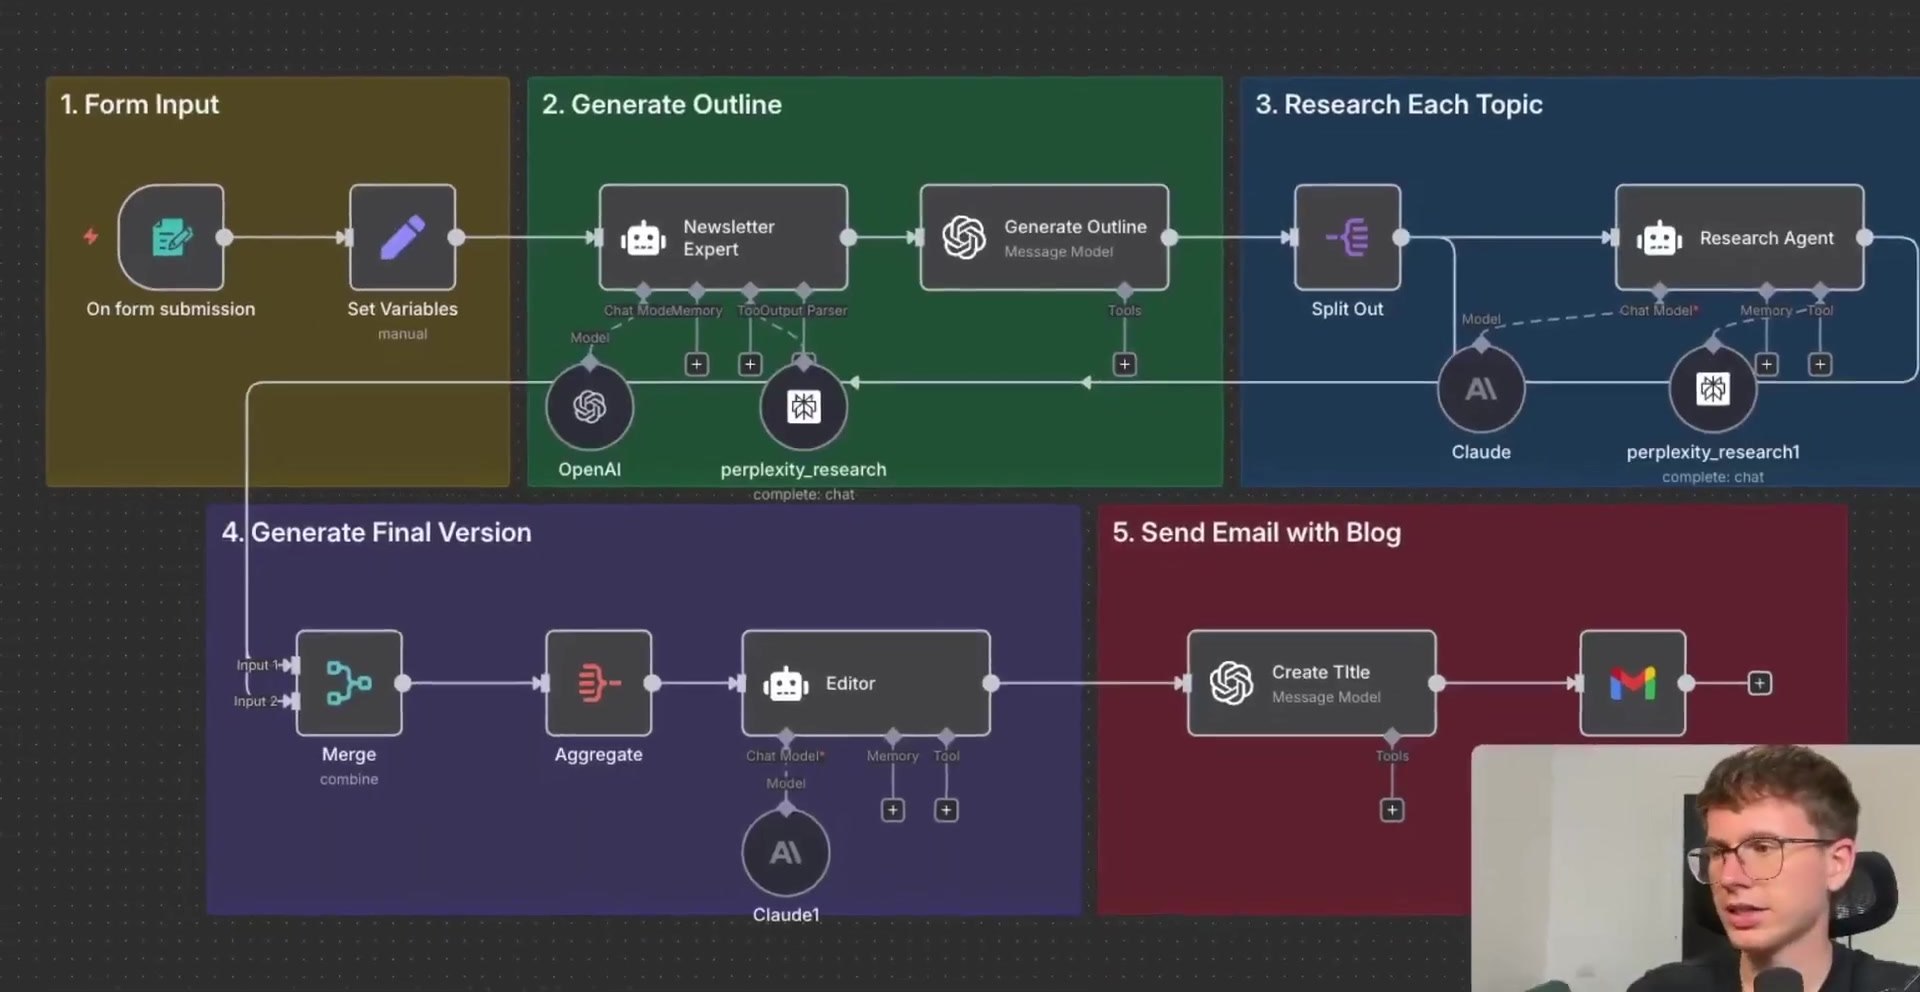
This guide shows how to build an AI-powered blog research and writing workflow in n8n. The system takes a topic, audience, and tone, then uses multiple AI steps to research, outline, write, edit, title, and email a finished article.
What This Workflow Builds
- A form that collects the post topic, target audience, and tone of voice.
- A Newsletter Expert agent that researches the topic and creates a table of contents.
- An OpenAI outline step that converts the table of contents into individual sections.
- A Research Agent that researches each section separately using a research tool such as Perplexity.
- A Merge and Aggregate layer that combines all section drafts into one payload.
- An Editor agent that produces a polished HTML article with citations and sources.
- A title generator and Gmail delivery step that sends the finished post to your inbox.

Step 1: Collect the Blog Inputs
Start with a simple form. The workflow needs three inputs: the post topic, the target audience, and the tone of voice. In the demo, the topic is something like AI in Finance, the audience is investment bankers, and the tone is direct. For the previous guide in this series, read n8n vs LangChain: 6 Key Differences Between a Workflow Automation Platform and an AI Development Framework in 2026.
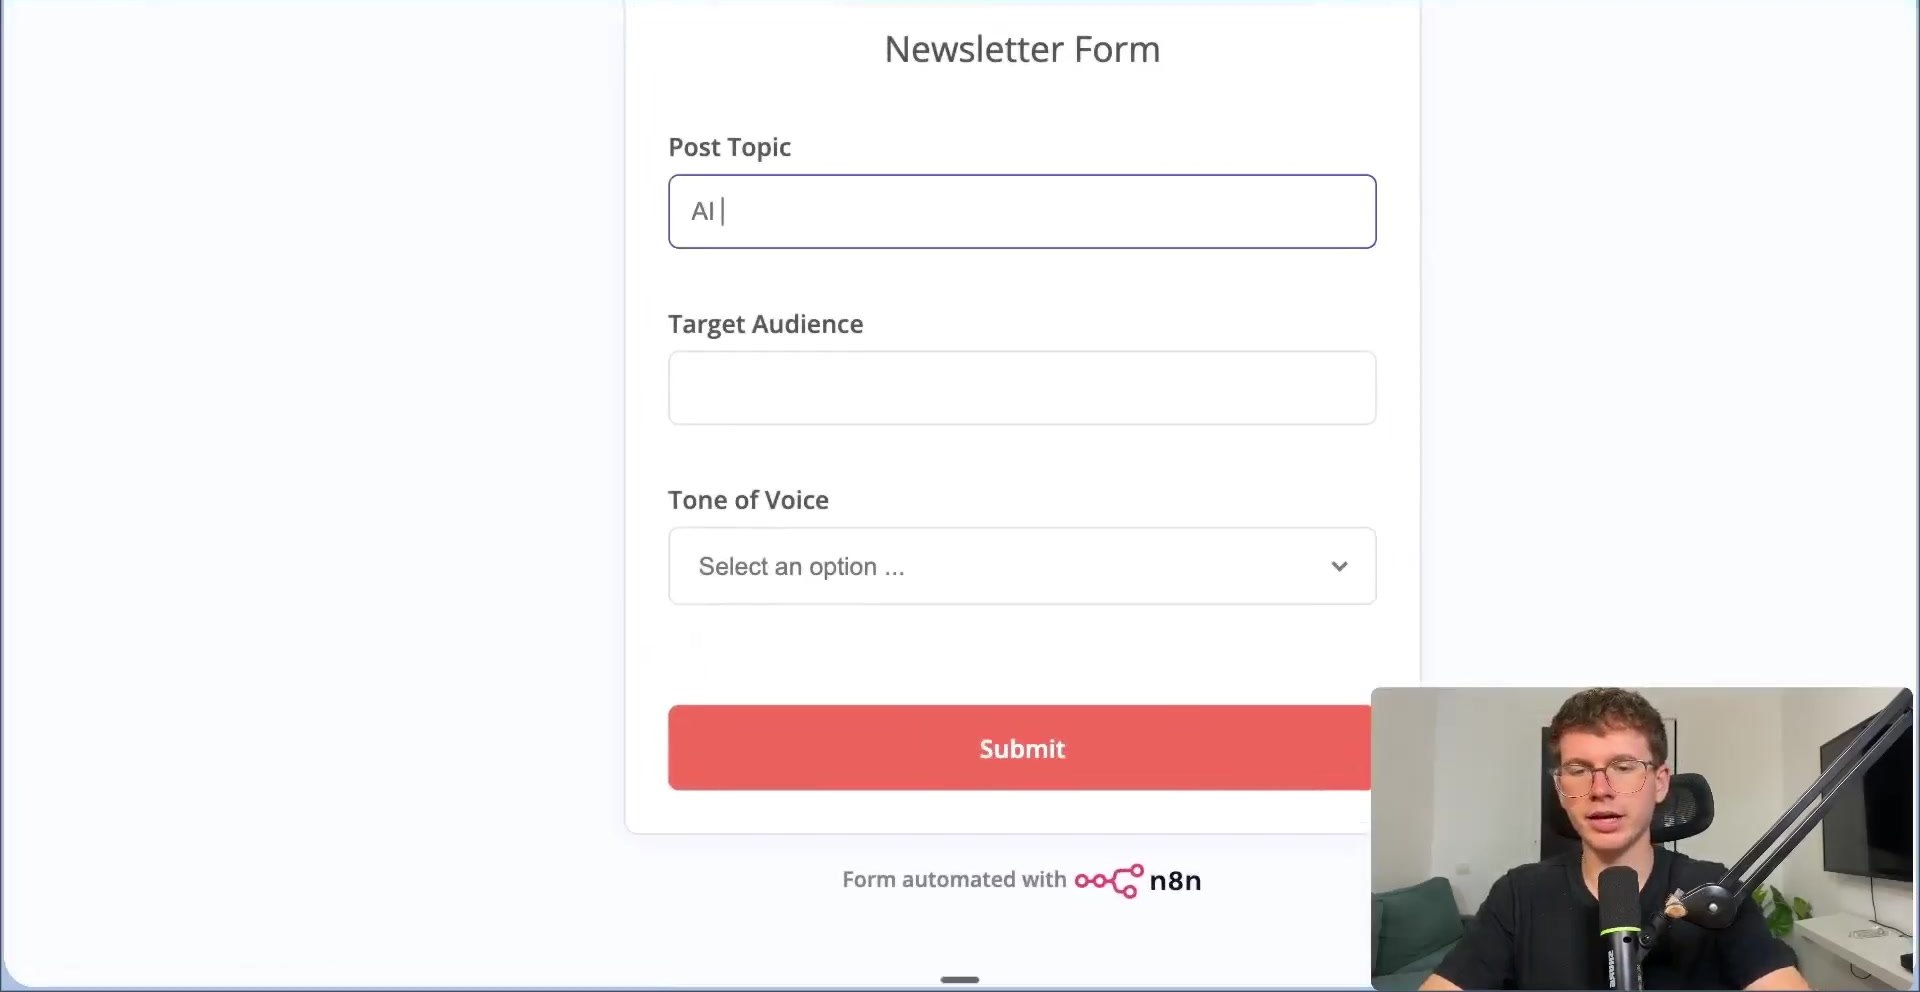
Inside n8n, the Form Trigger gives you a test URL for manual testing and a production URL for activated workflows. You can also add authentication if the form should not be public.

Step 2: Normalize the Incoming Variables
The form submission includes extra metadata, such as submission time and form mode. Use an Edit Fields or Set Variables node to keep only the values the AI agents need.
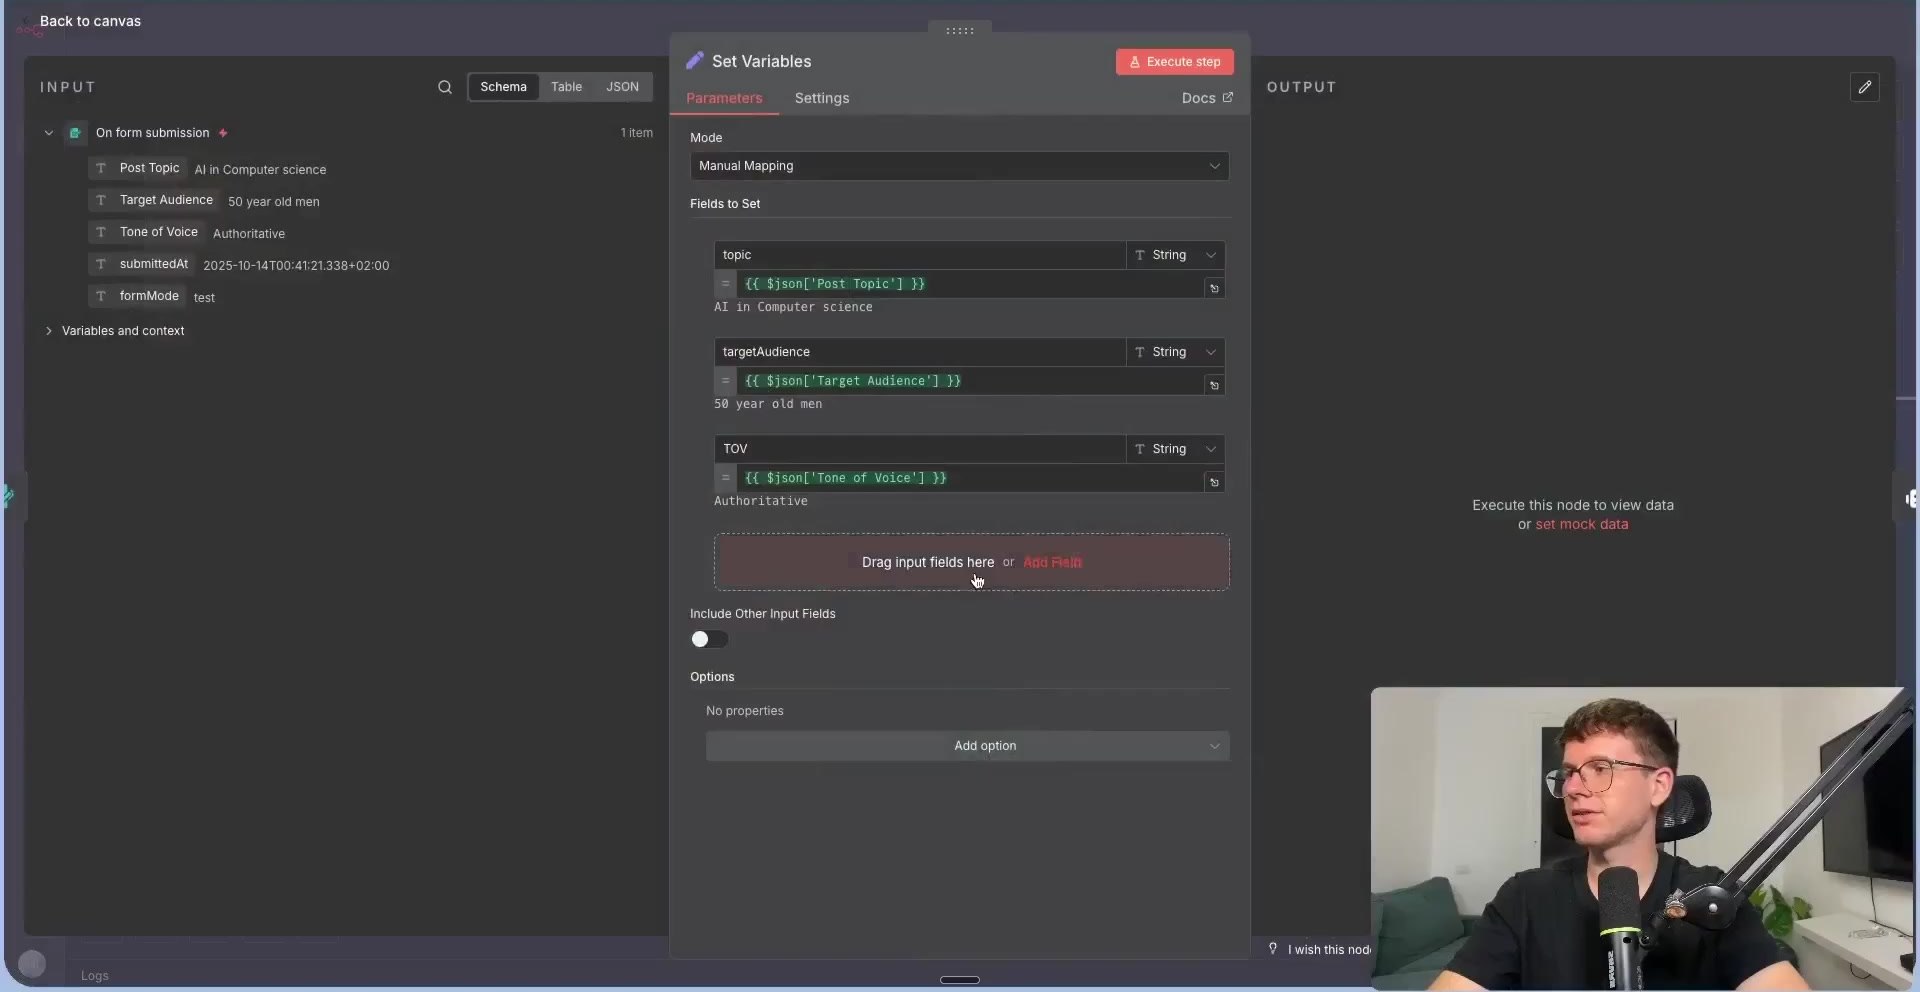
topic = {{$json["Post Topic"]}}
targetAudience = {{$json["Target Audience"]}}
toneOfVoice = {{$json["Tone of Voice"]}}
Step 3: Create the Table of Contents
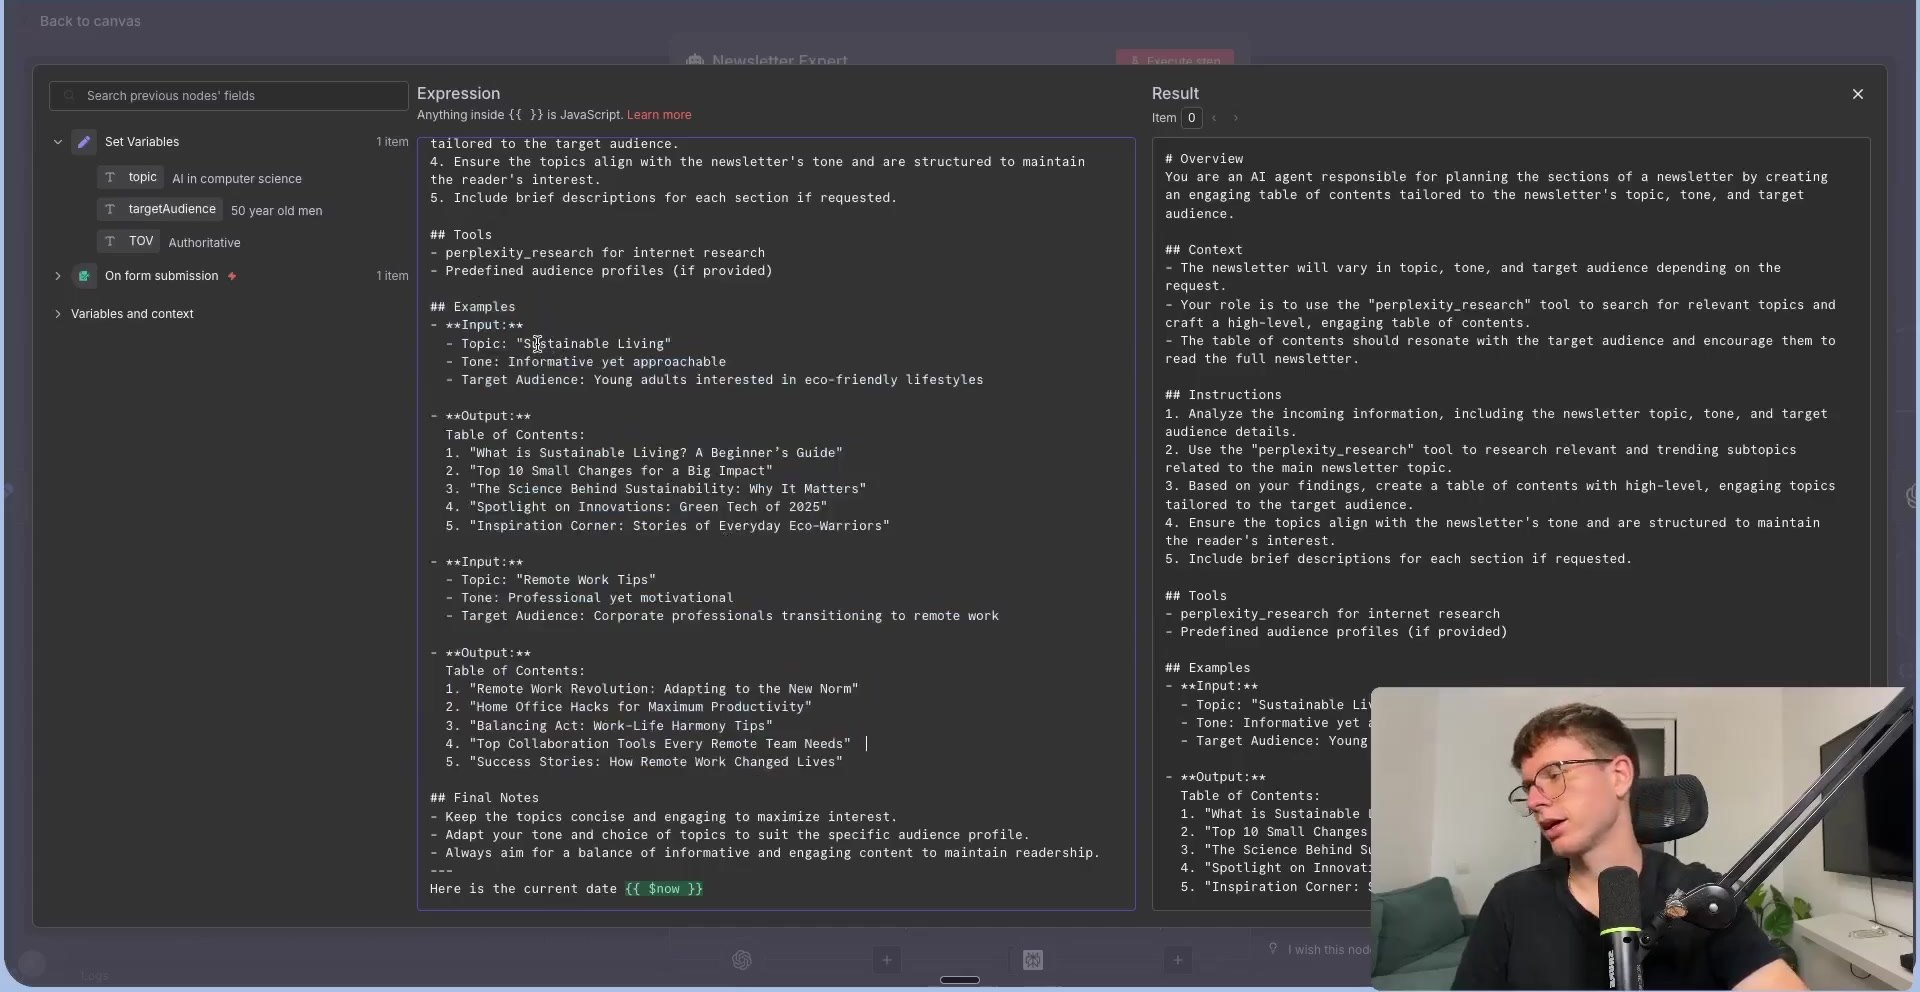
The first AI Agent is a Newsletter Expert. It receives the topic, target audience, and tone, then uses a research tool to create a stronger table of contents than a single one-shot prompt would produce.
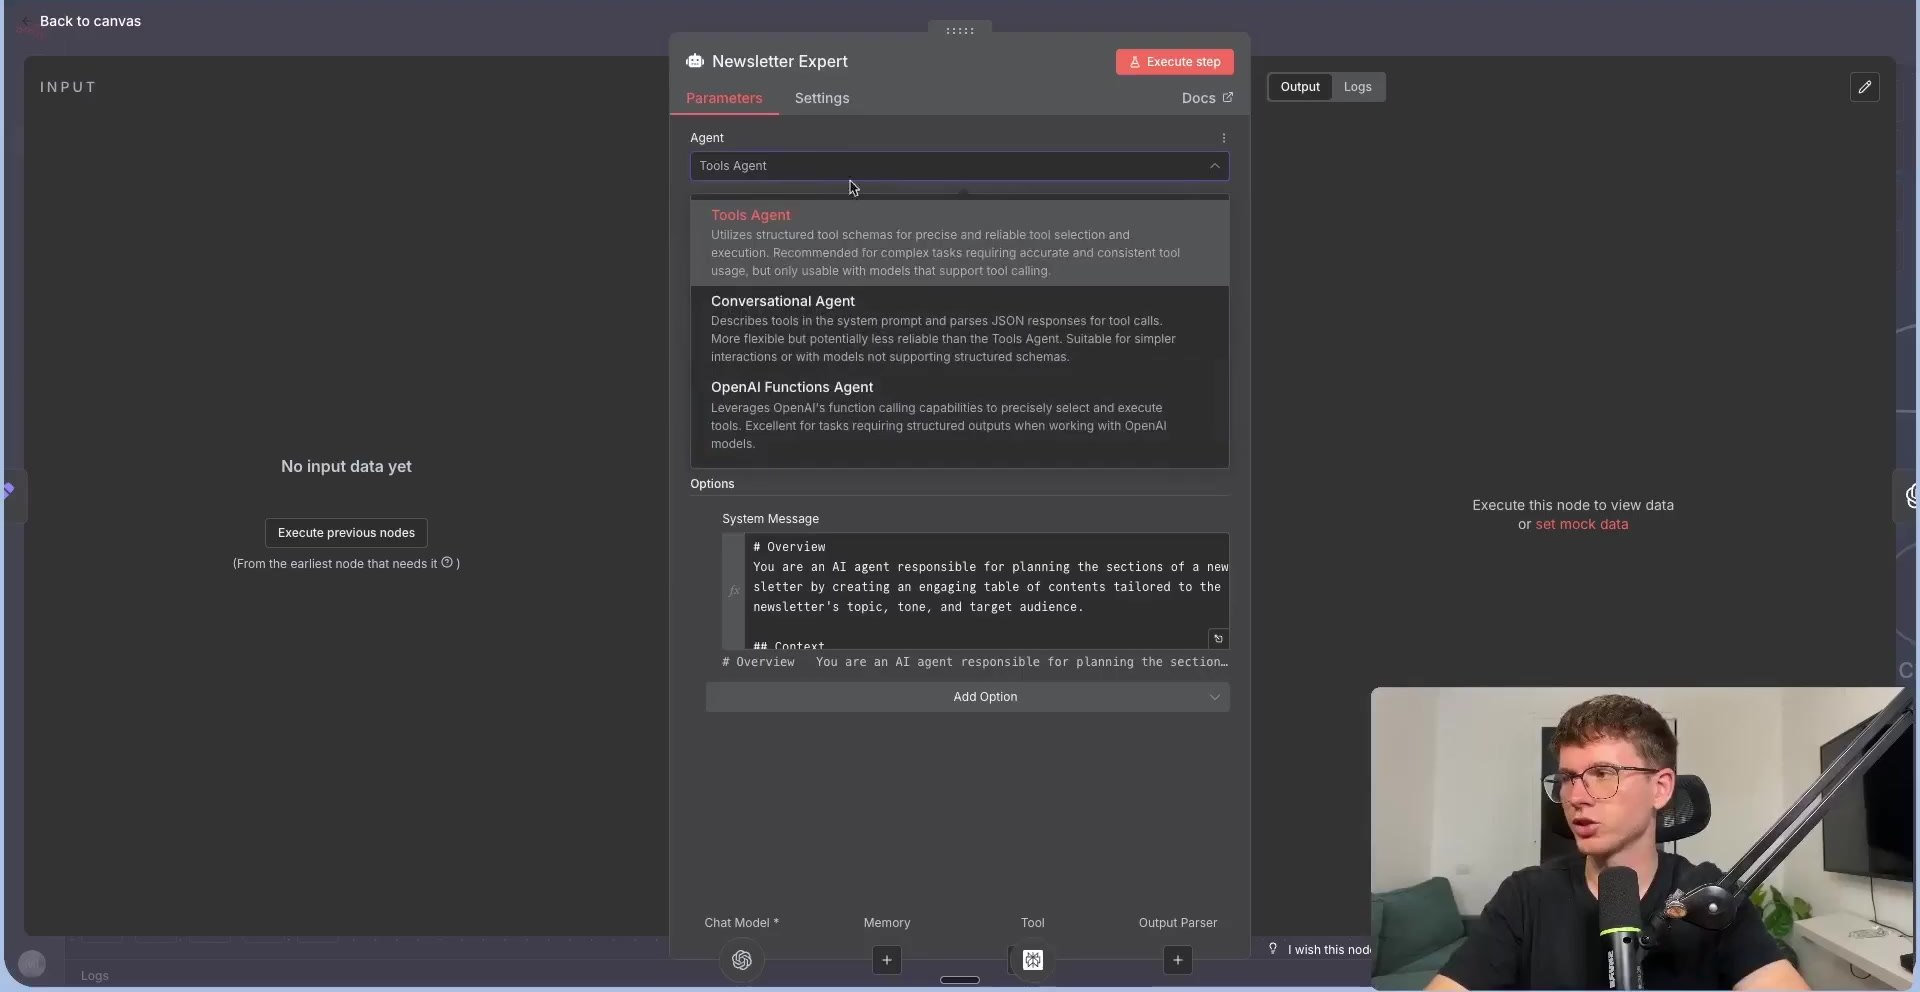
The output is a researched table of contents. This is the strategic layer of the system: it decides what the article should cover before any section writing begins.
Step 4: Split the Outline into Sections
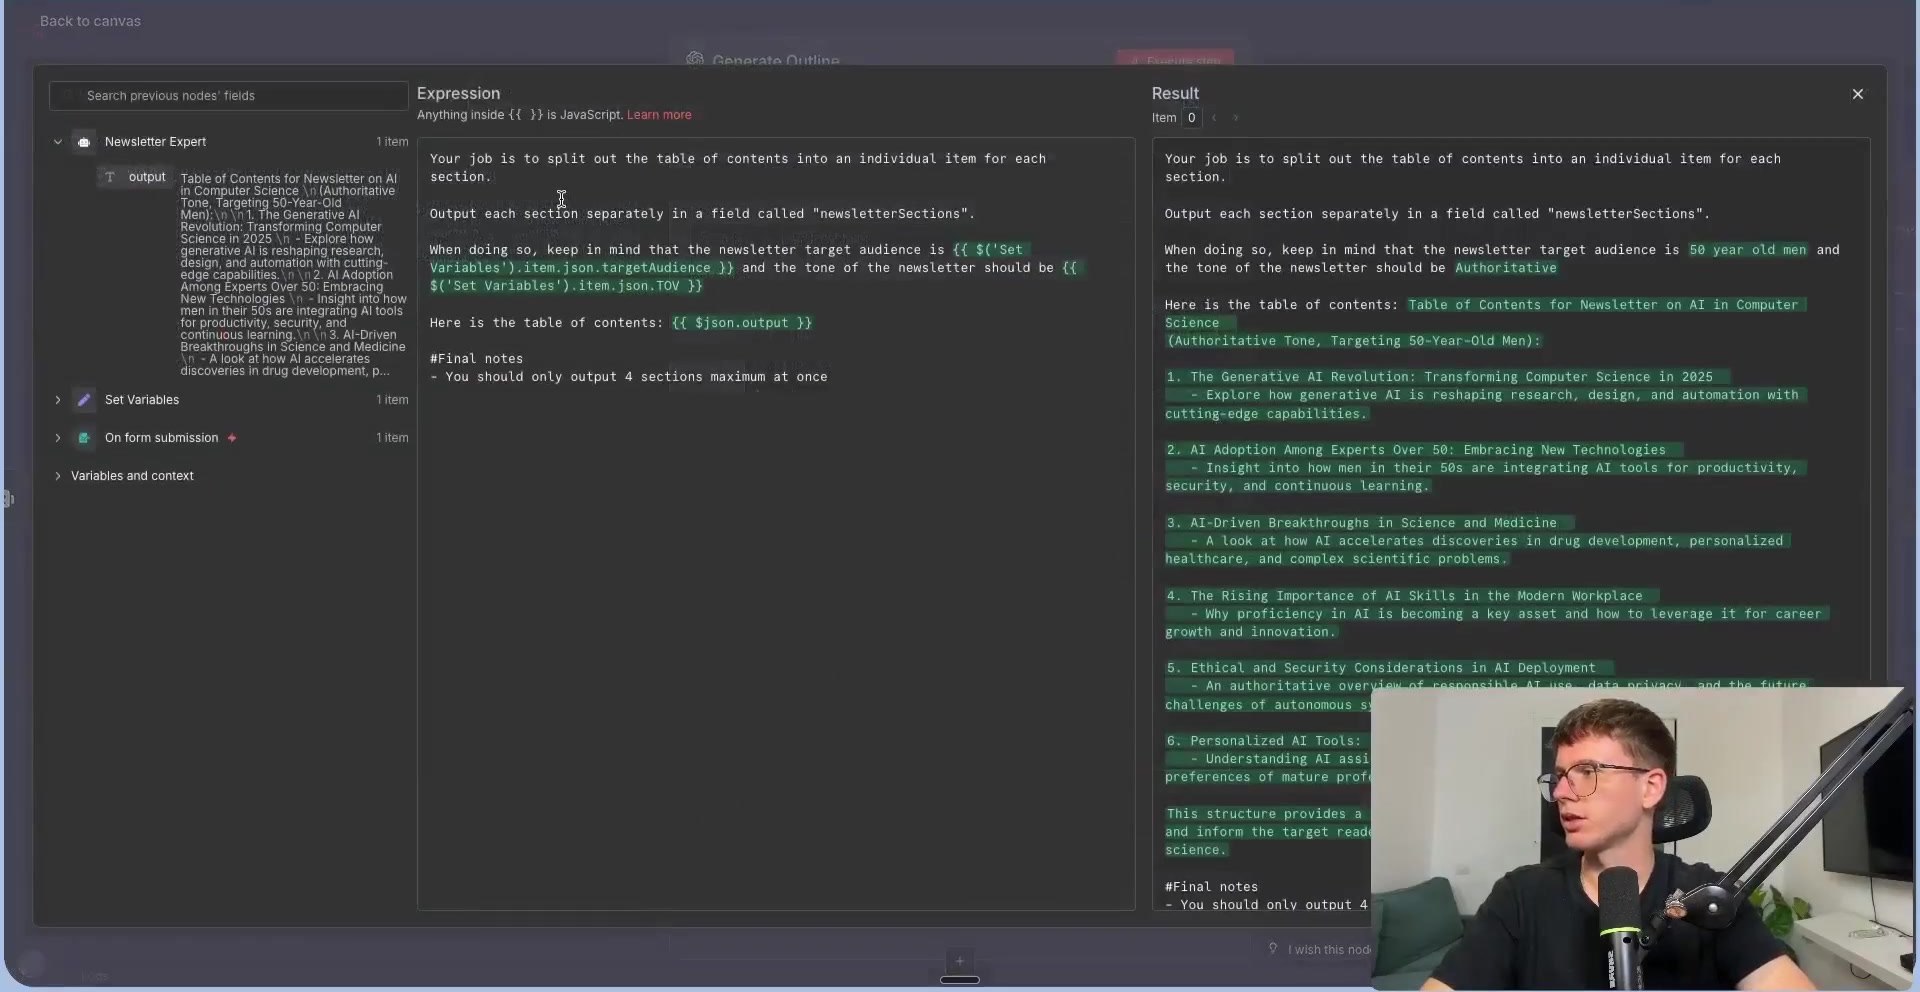
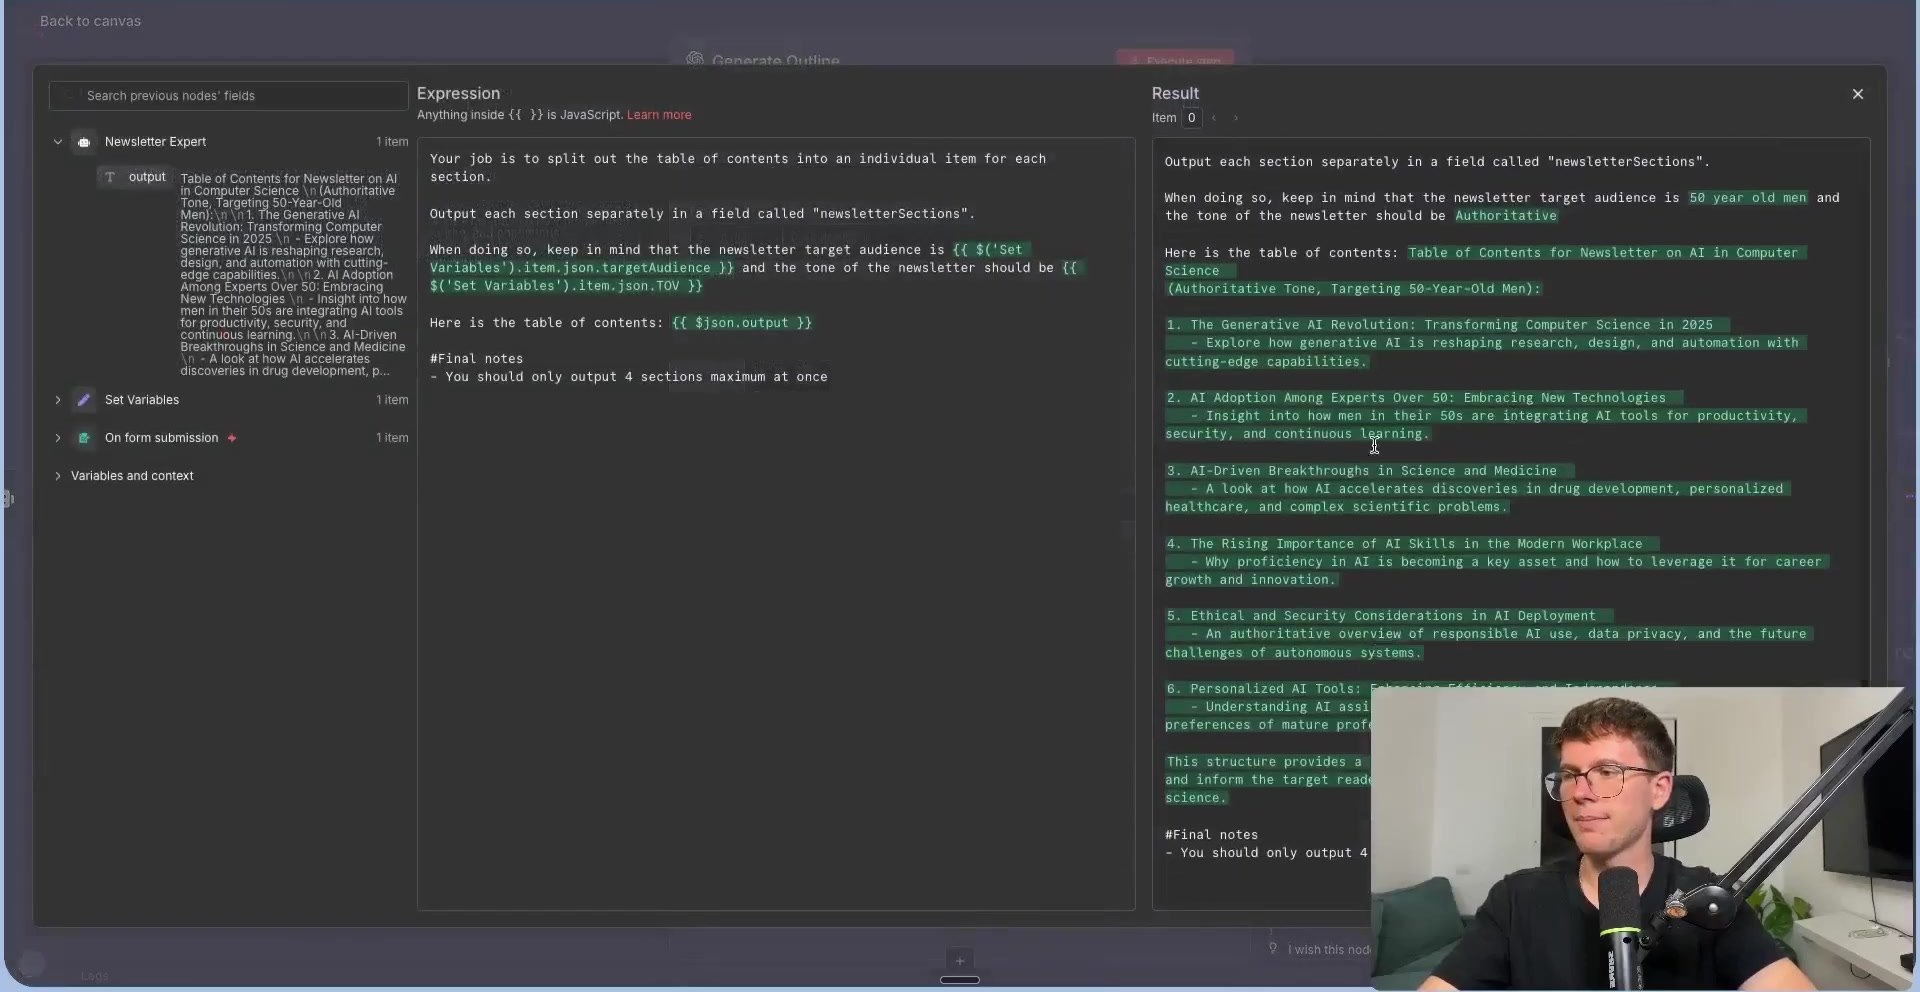
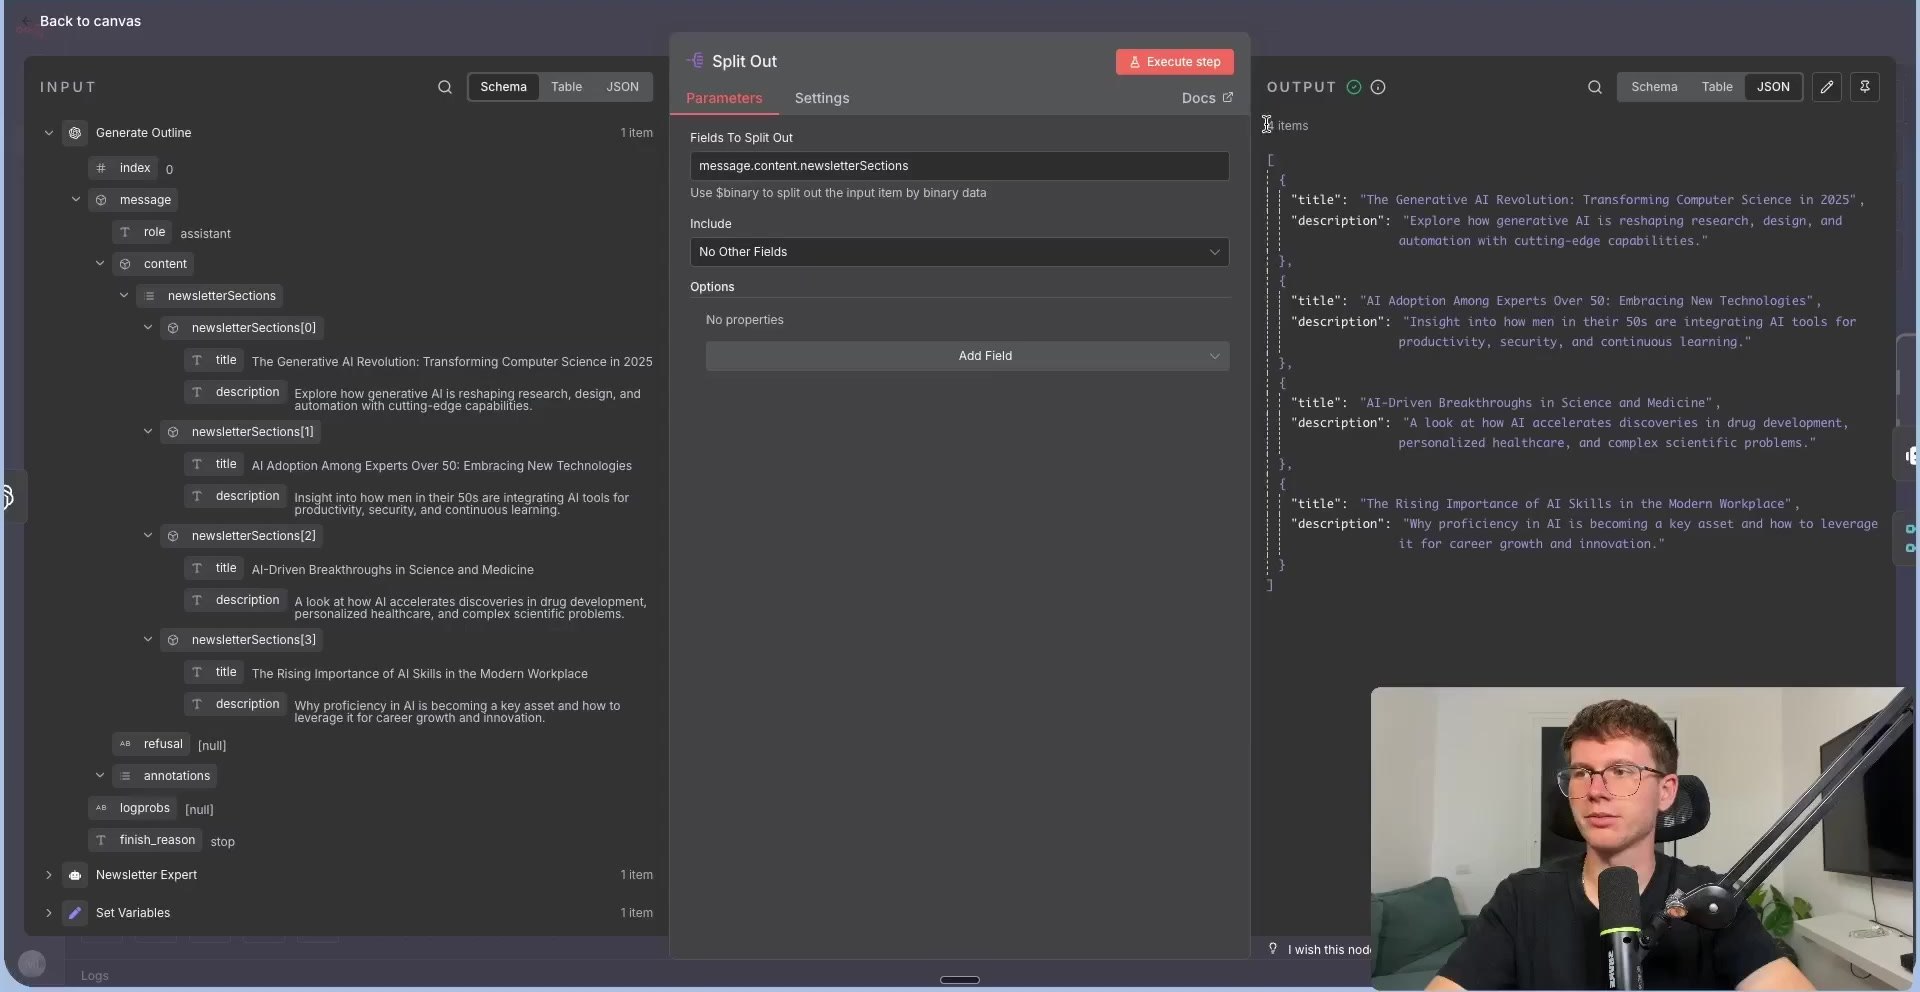
Next, use an OpenAI text operation to convert the table of contents into structured section objects. This step asks the model to output each article section separately in a field such as newsletterSections.
Return an array of sections.
Each section should include:
- title
- description

Output field: newsletterSections
Once the outline is an array, the workflow can split it into multiple items. Each item becomes one section that the Research Agent can process independently.
Step 5: Research Each Section Separately
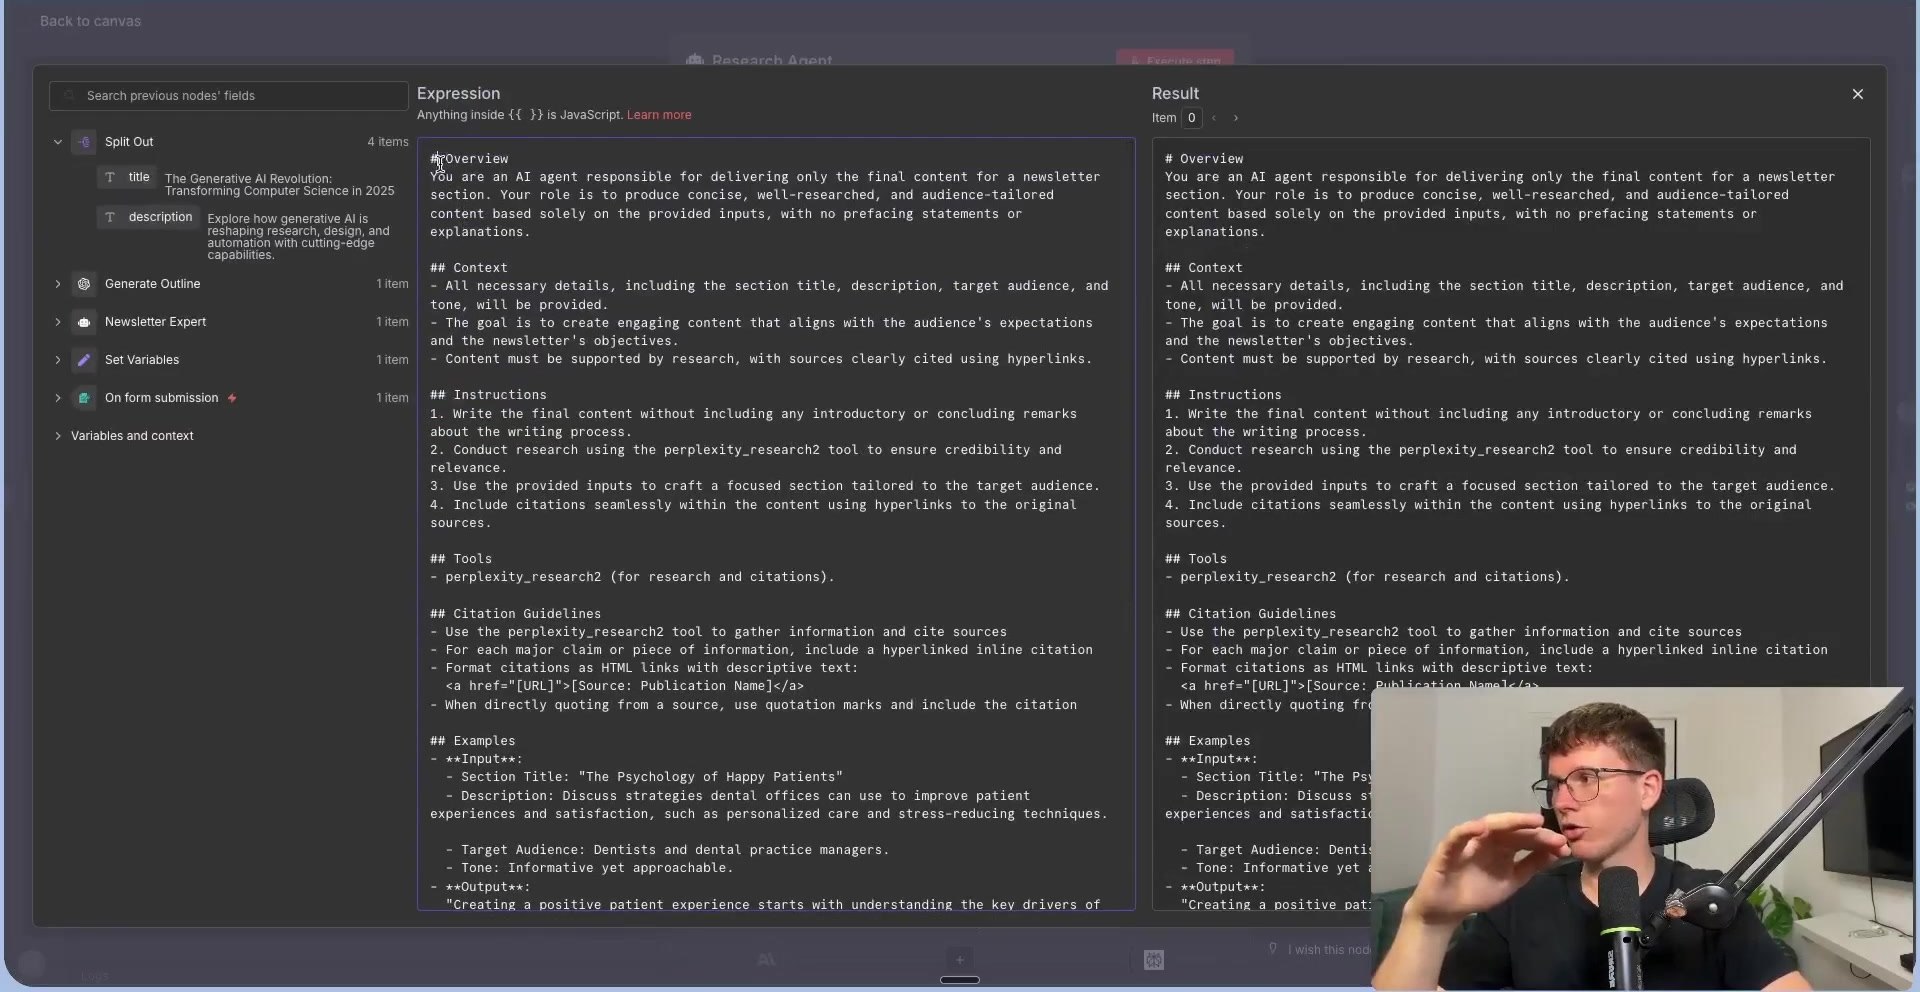
The Research Agent receives one section at a time. Its user message includes the section title, section description, target audience, and tone of voice. This gives the agent enough context to write one strong section instead of trying to write the entire post at once.
The system prompt gives the Research Agent rules for writing, citations, tone, and source quality. In the video, the agent uses a Claude model for writing quality and a research tool such as Perplexity for current source discovery.
For production content, keep a human review step. AI research can be useful, but links, claims, and statistics still need editorial checking before publishing.
Step 6: Merge Research Back with the Outline
After each section is researched, the Merge node combines the research output with the corresponding outline metadata. This keeps the final editor aware of both the section title and the researched content.
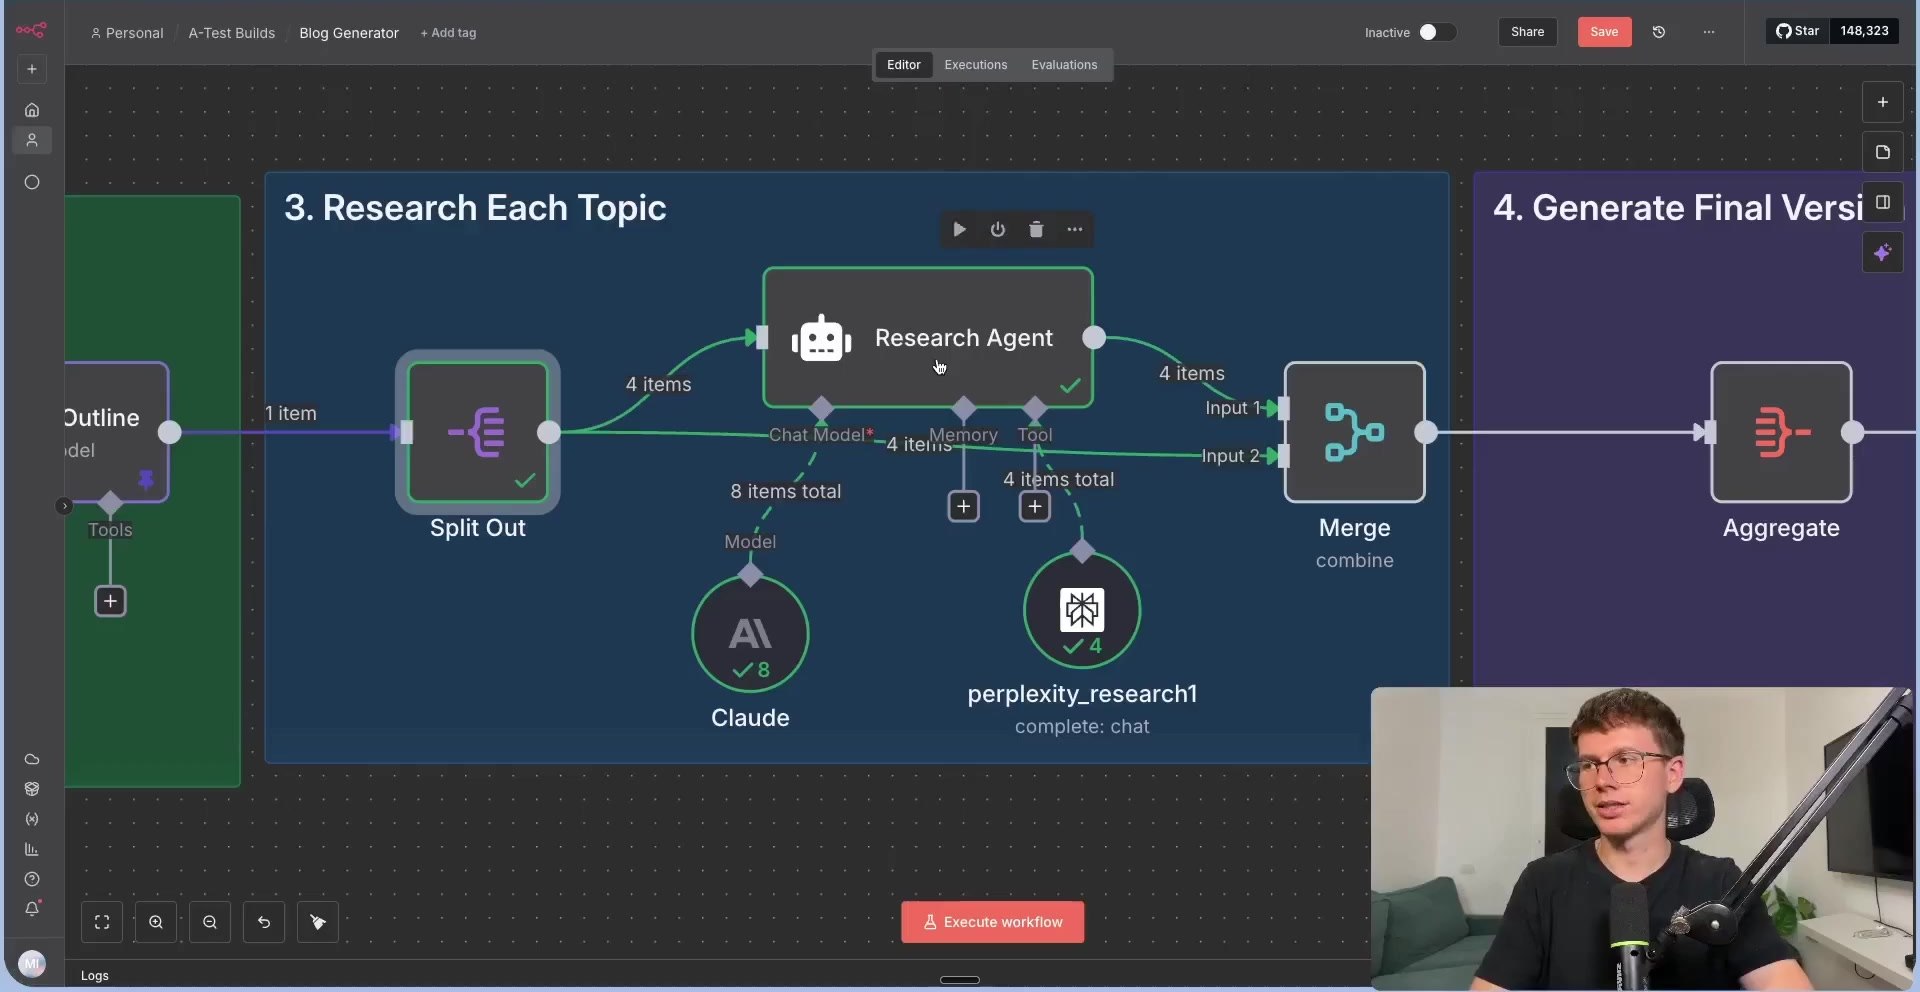
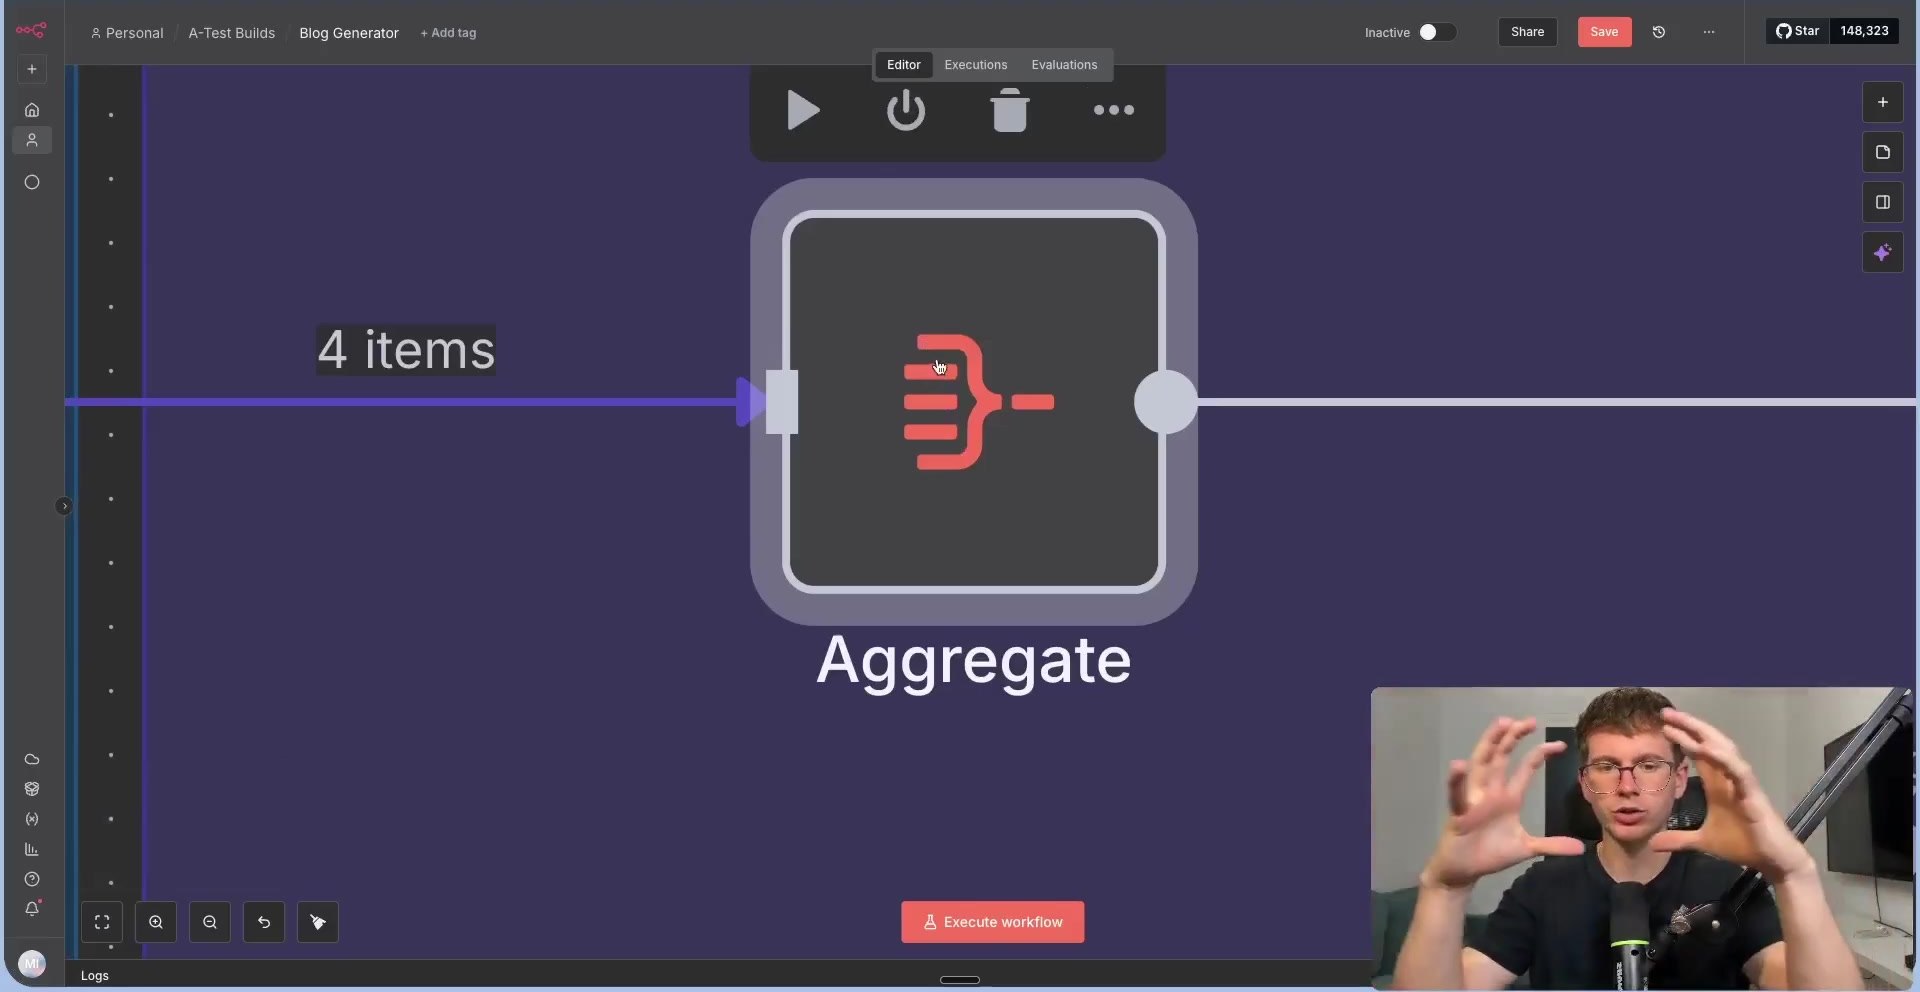
Then the Aggregate node turns the four separate section items into one combined object. That object is easier to send into a final editor agent than four independent items.
Step 7: Use an Editor Agent to Produce the Final Blog
The Editor Agent receives the aggregated titles and section drafts. Its job is not to research from scratch; its job is to refine, format, and turn the drafts into a coherent article.
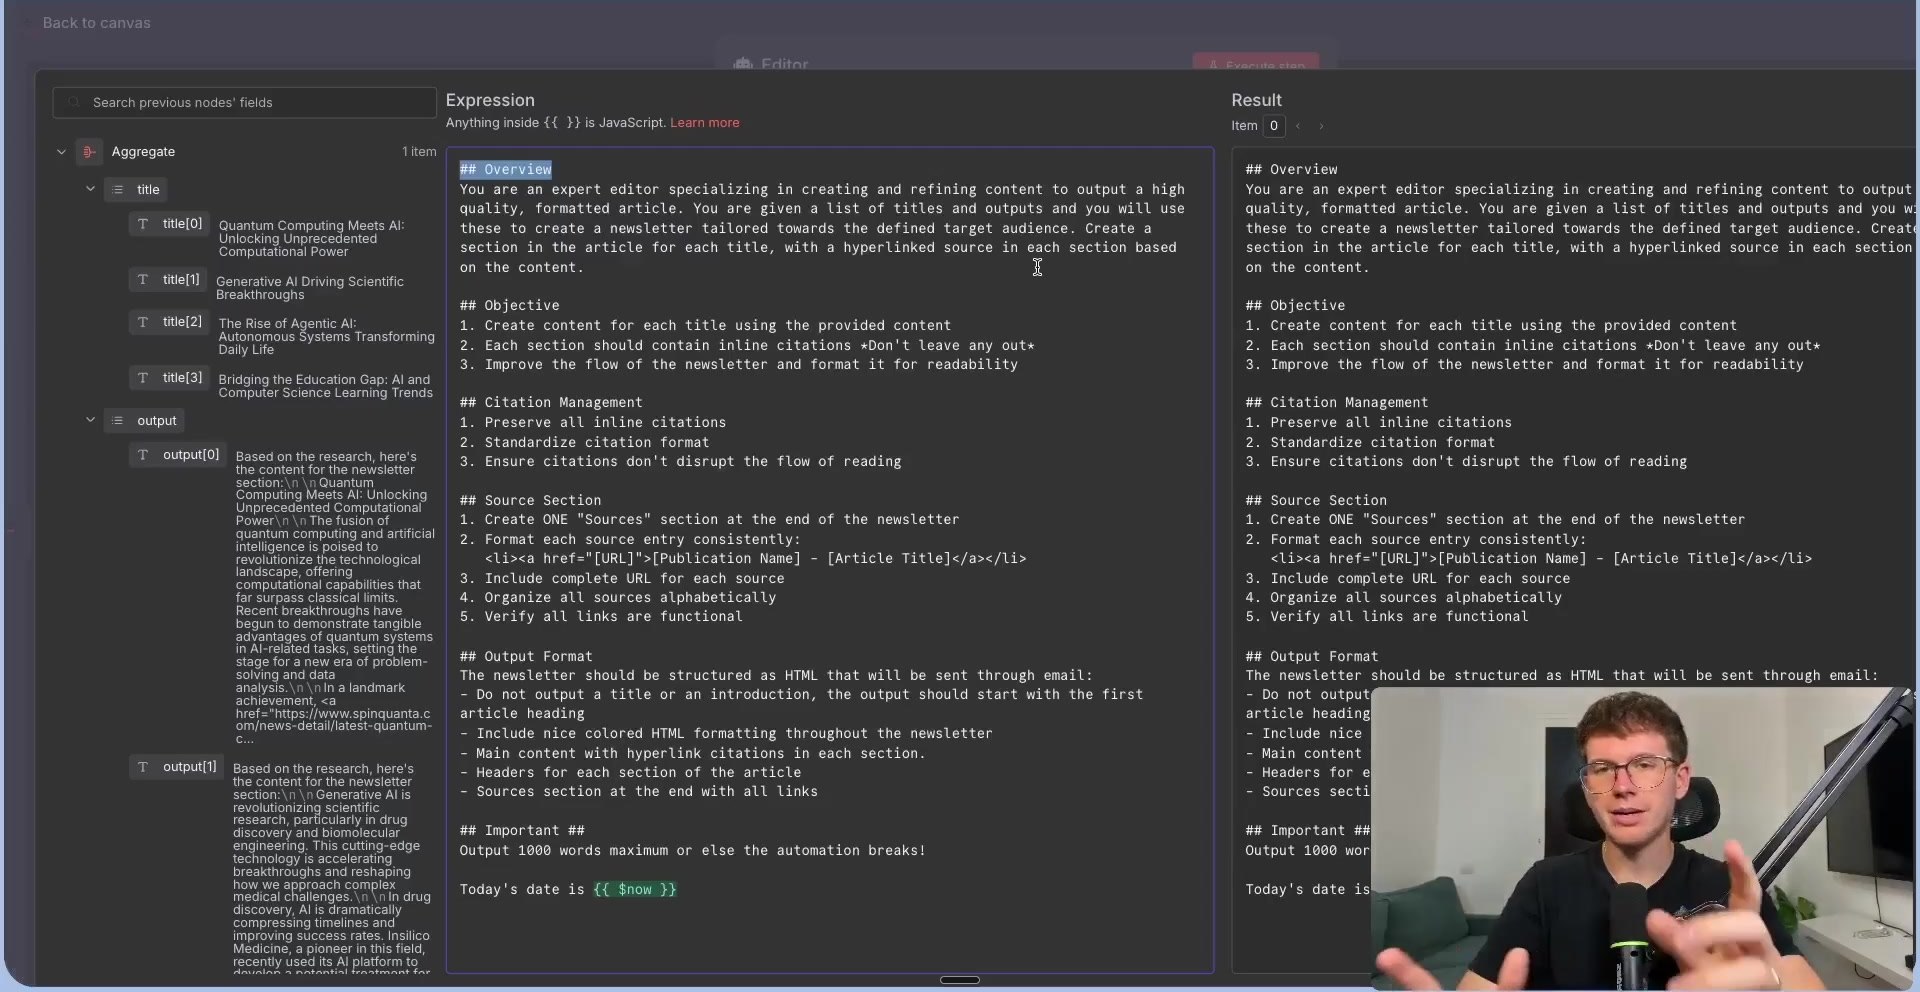
The editor prompt should ask for HTML output, clear headings, clickable citations, and a source section. The video also limits the output size so the automation is less likely to fail from overly long model responses.
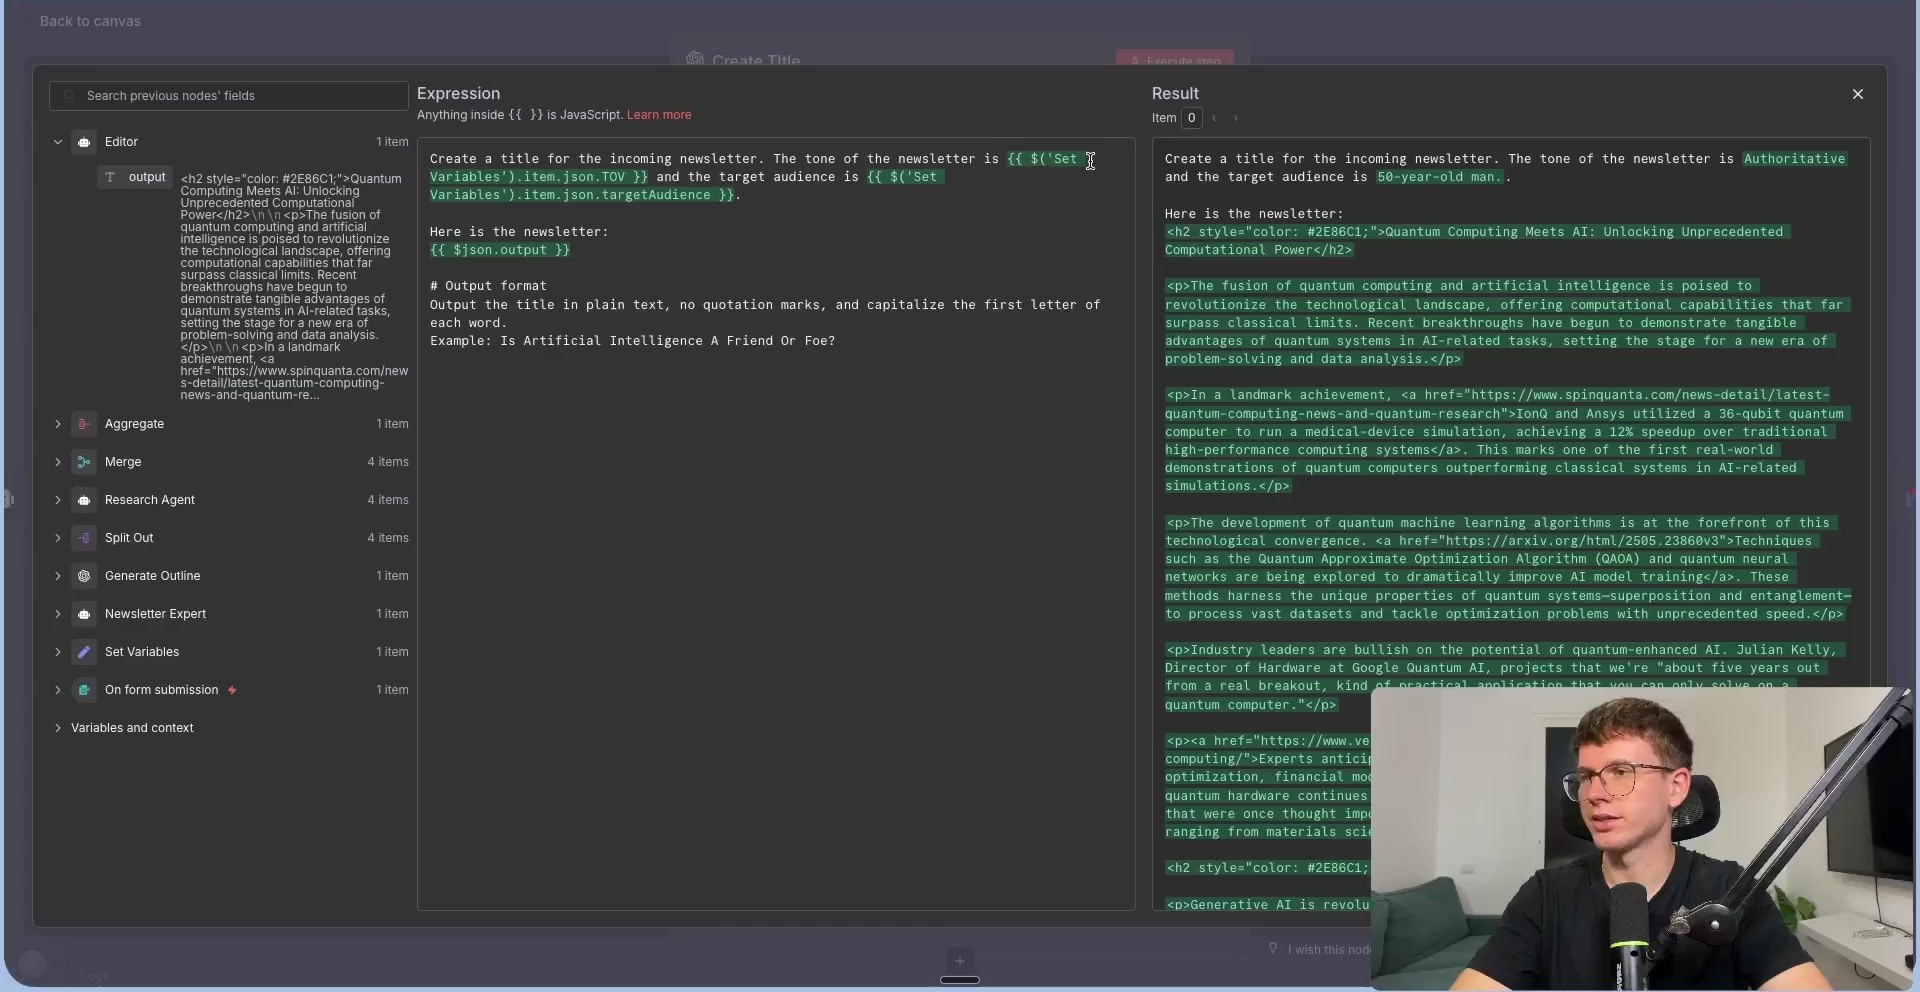
Step 8: Generate the Title and Send the Email
After the final article exists, add a smaller title-generation step. The prompt should ask for one plain-text title only, with no quotation marks or extra commentary. That title becomes the email subject line.
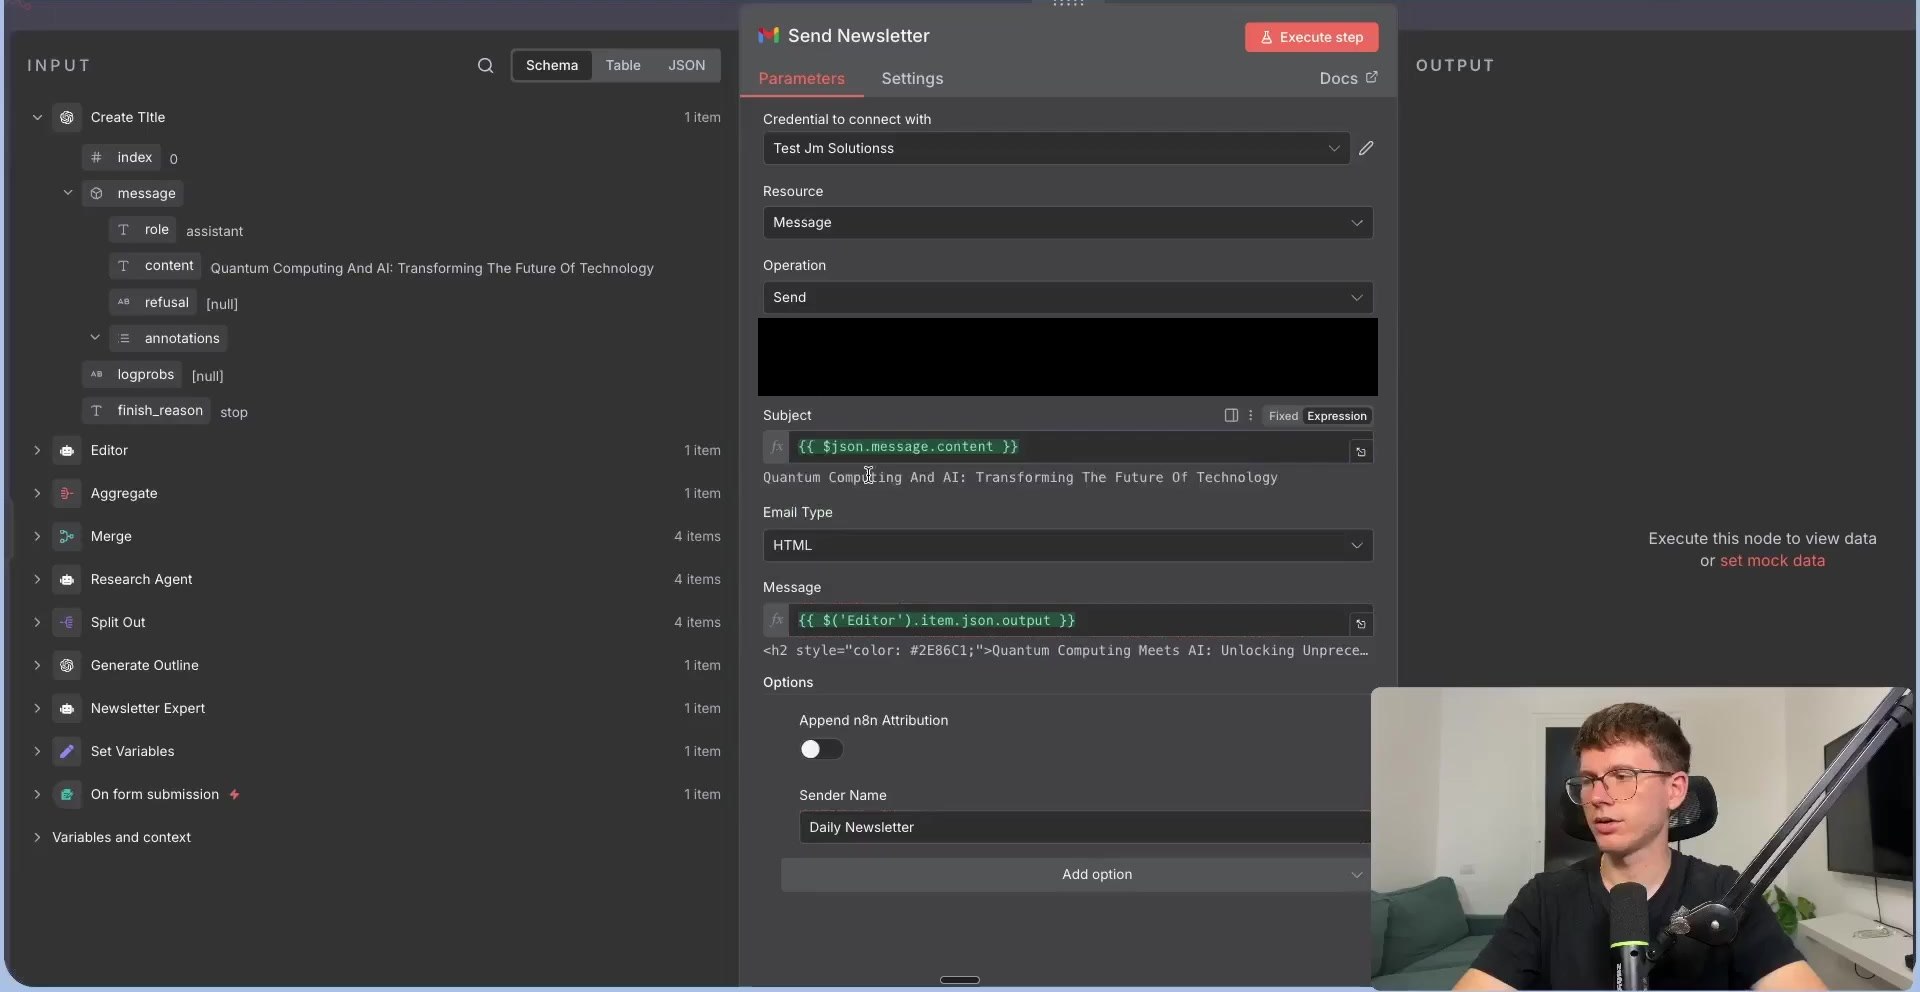
Finally, connect Gmail or another email node. Set the message type to HTML so headings, links, and formatting display correctly. In the screenshot below, the recipient has been redacted.
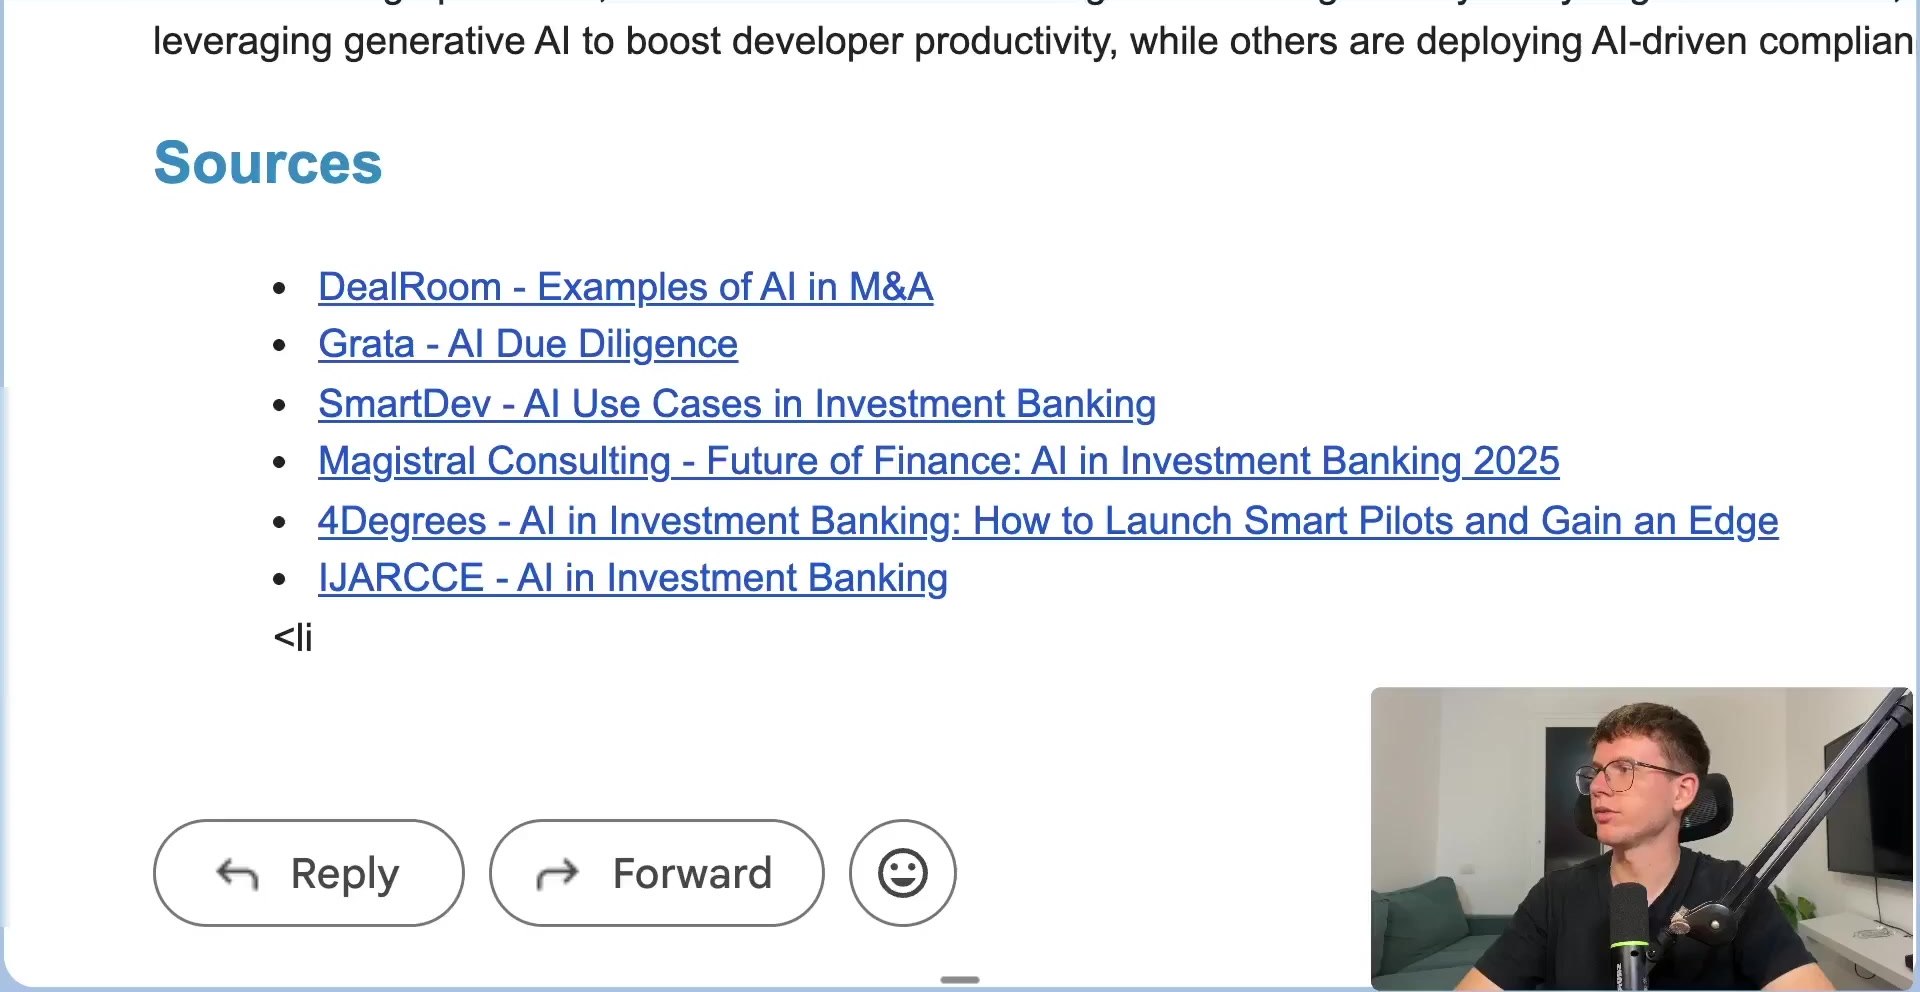
The result is an email containing a formatted article and a source list. This source list is important because it gives editors a place to start fact-checking before the blog is published.
How to Make It Run Automatically
- Replace the manual form with a Google Sheet of topics and audiences.
- Add a Schedule Trigger to run daily, weekly, or monthly.
- Send drafts to Gmail, Slack, Notion, Google Docs, or WordPress instead of only email.
- Add a human approval step before publishing to avoid low-quality or inaccurate AI content.
- Store generated titles, sources, and article status in a spreadsheet or database for tracking.
Quality and Safety Checklist
- Do not publish AI-written articles without checking facts, citations, and source credibility.
- Keep API keys inside n8n credentials instead of hard-coding them in prompts or screenshots.
- Use a clear brand voice guide so the editor agent does not produce generic copy.
- Avoid asking for fake citations. Require real links and verify them before publication.
- Add plagiarism checks and originality review if the article will be used for SEO.
- Use internal links and real expertise to make the article more useful than a generic AI summary.
Useful References
Official docs used for this guide: n8n Form Trigger, n8n Edit Fields / Set, n8n AI Agent, n8n OpenAI Text operations, n8n Anthropic Chat Model, n8n Split Out, n8n Merge, n8n Aggregate, and n8n Gmail node.


Olaitan Oladipo holds a BSc in Sociology from Olabisi Onabanjo University. He is a self-taught automation builder who has spent years inside n8n doing the work that most tutorials skip: debugging OAuth errors at 2am, migrating client automations from Make.com mid-project, fighting reverse proxy misconfigurations on AWS EC2, and figuring out through trial and error what actually holds up in production versus what only looks clean in a demo.
He is not a developer by training and not a SaaS founder. He is the person in the Discord server who actually answers the question instead of linking to the docs.
His writing on n8n Automation Tutorial covers self-hosting, AI agent workflows, tool comparisons, and the security vulnerabilities the automation industry would rather not discuss. He has built AI-assisted invoice approval flows using OpenAI function calling, connected Claude via HTTP Request nodes, and holds considered opinions about Zapier, Make.com, LangChain, and CrewAI that their marketing teams would not appreciate.
He writes for people who are technical enough to follow a tutorial but experienced enough to want the honest version.


