This guide shows how a Make.com scenario can be turned into an n8n template by exporting the Make blueprint JSON, translating it into n8n’s workflow JSON structure, validating it, and then importing the result into n8n. The method is not magic, and it is not perfect, but it can give you a very strong migration head start.
The big idea is simple: visual automation builders are powered by structured data. Make displays modules as bubbles. n8n displays nodes on a canvas. Underneath both tools, a workflow is described by JSON-like configuration data. For the previous guide in this series, read How to Add an OpenAI API Key to an n8n Node.
Important: This is a migration accelerator, not a guaranteed one-click replacement for every automation. Always review imported workflows, reconnect credentials, and test each branch before using the converted workflow in production.
What You Will Build
- A Make scenario that watches a Google Drive folder for Make blueprint JSON files.
- A conversion chain that researches n8n equivalents for each Make module.
- A validation chain that checks JSON syntax and n8n import compatibility.
- A final Google Drive output step that writes an edited n8n-ready JSON file.
- A repeatable process for importing the edited JSON into n8n.
Step 1: Export the Make Automation Blueprint
Start with a Make scenario you want to migrate. In the example, the Make scenario has a Google Sheets input, a ChatGPT completion, and a Google Sheets output.
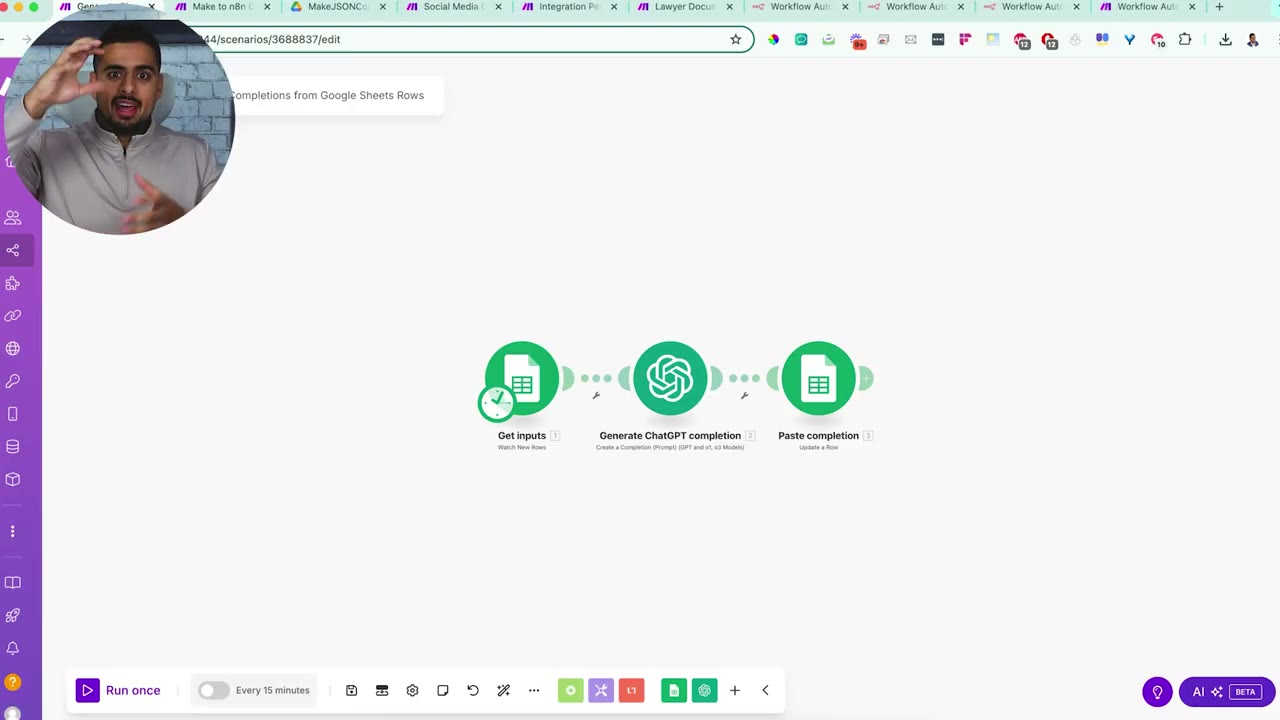
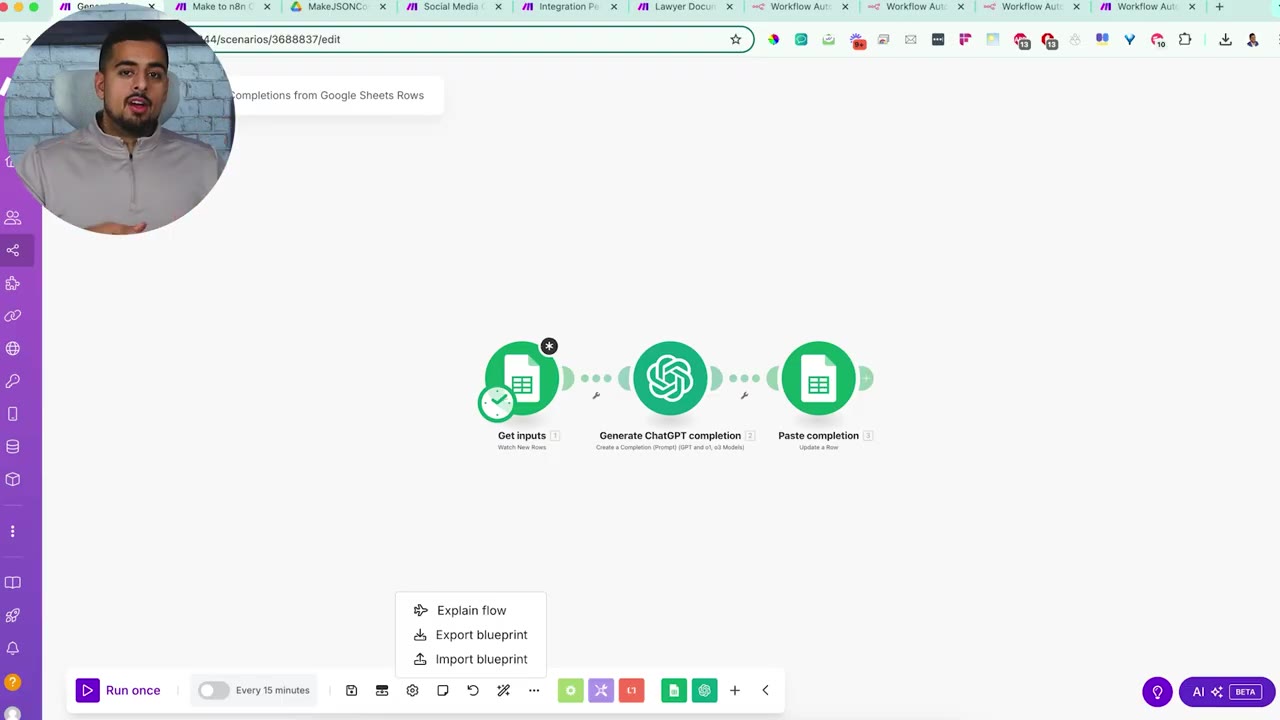
From the Make scenario menu, choose Export Blueprint. This downloads a JSON file that represents the visual Make scenario.
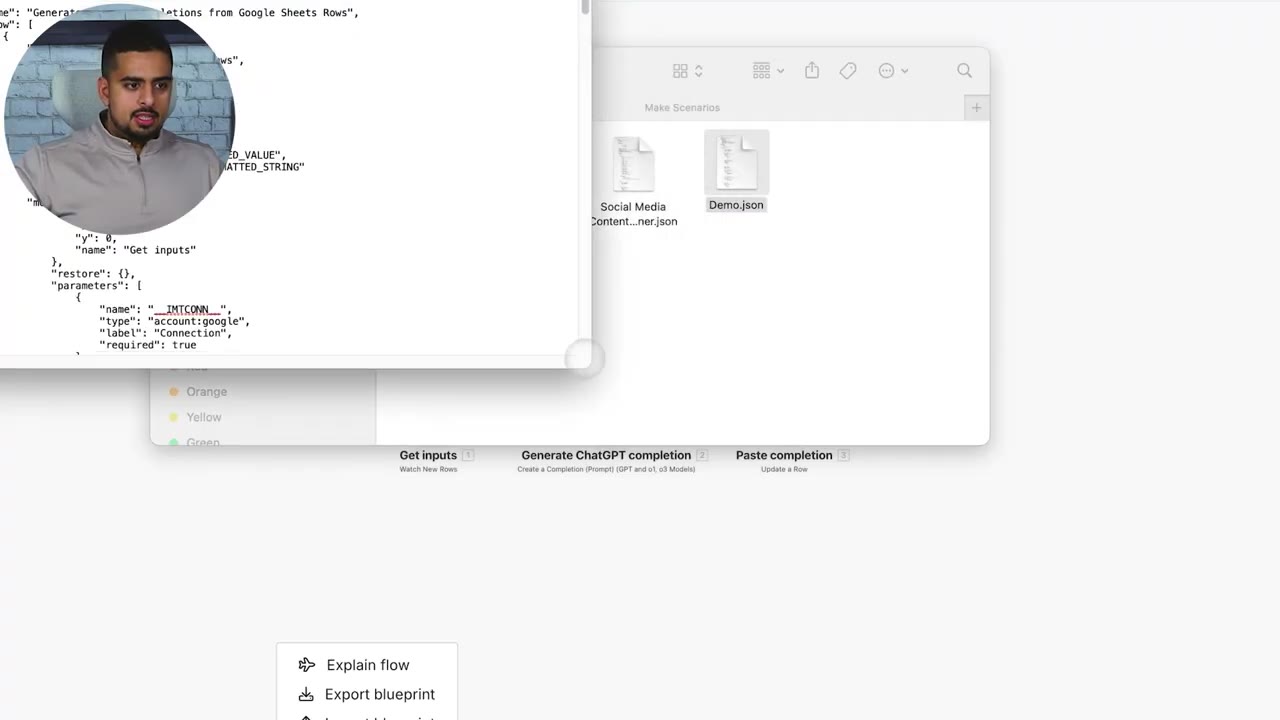
Opening the exported file shows the automation as structured JSON. That is why conversion is possible: the workflow can be translated from one schema into another.
Why You Cannot Import Make JSON Directly into n8n
Make and n8n do not use the same internal node names, parameters, connection format, or integration library. A Make Google Sheets module is not automatically the same thing as an n8n Google Sheets node. Unsupported Make modules may need substitutes such as HTTP Request, Code, Set, Merge, or manual placeholders.
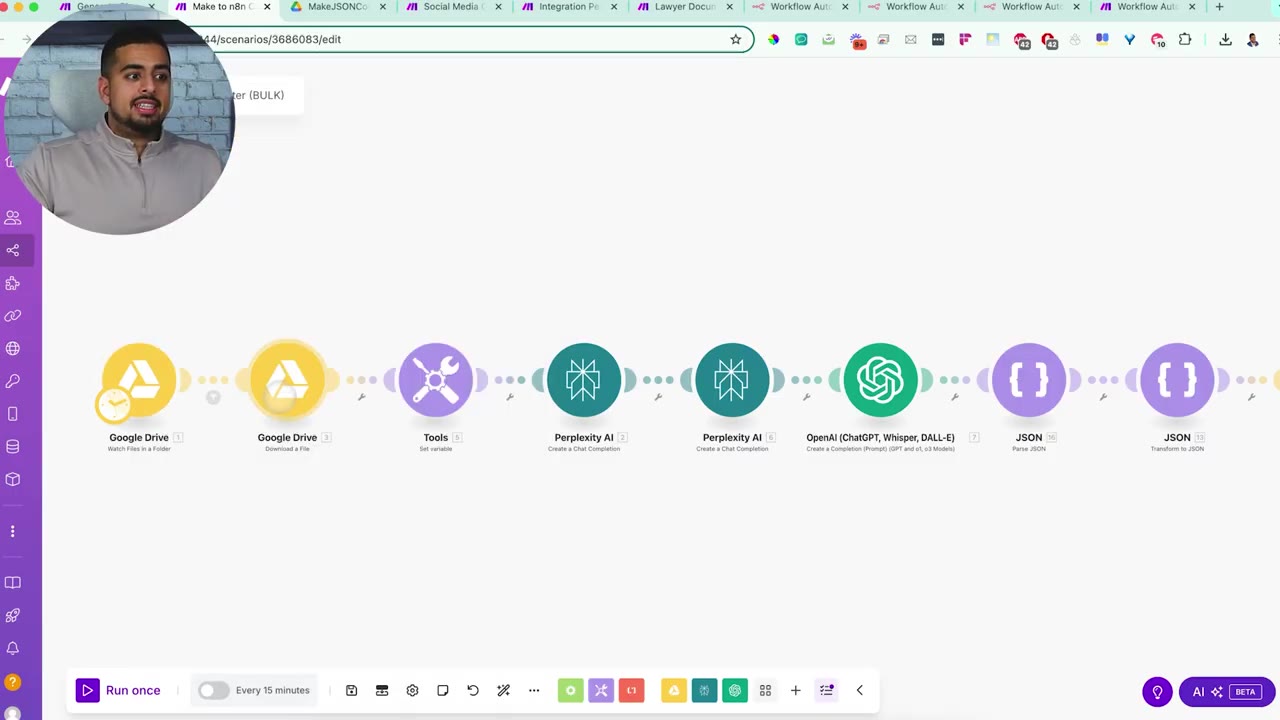
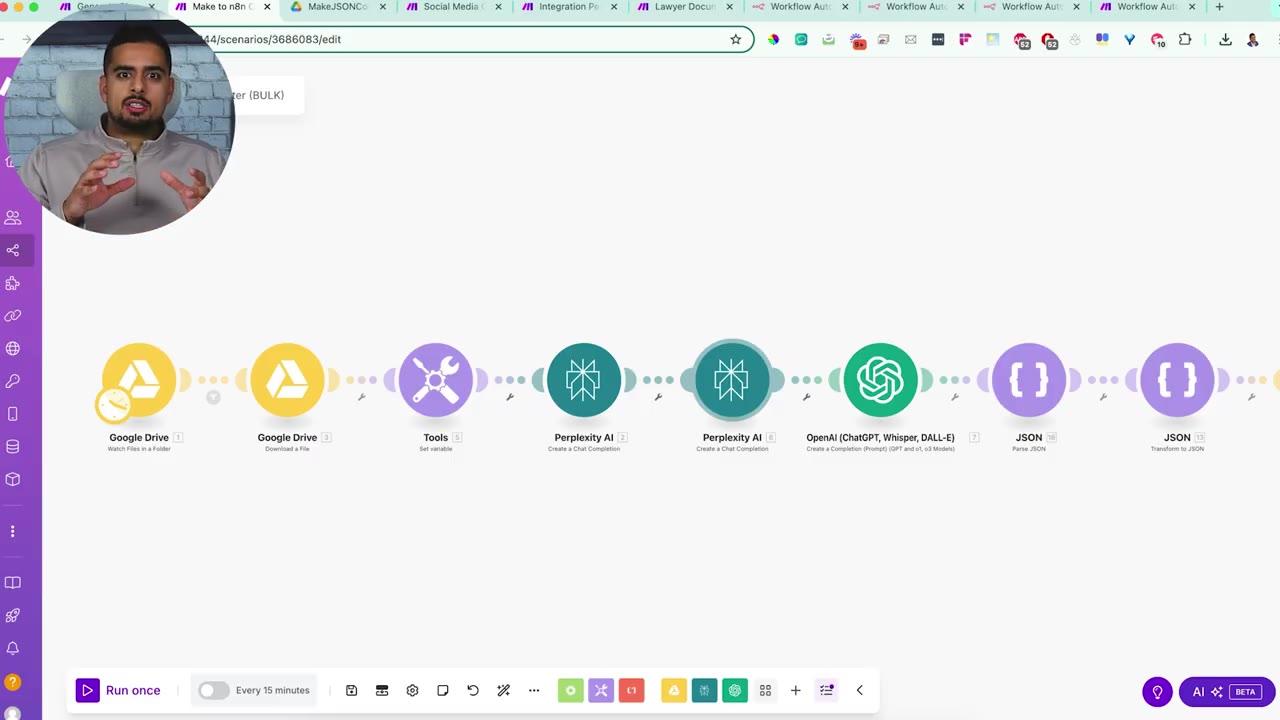
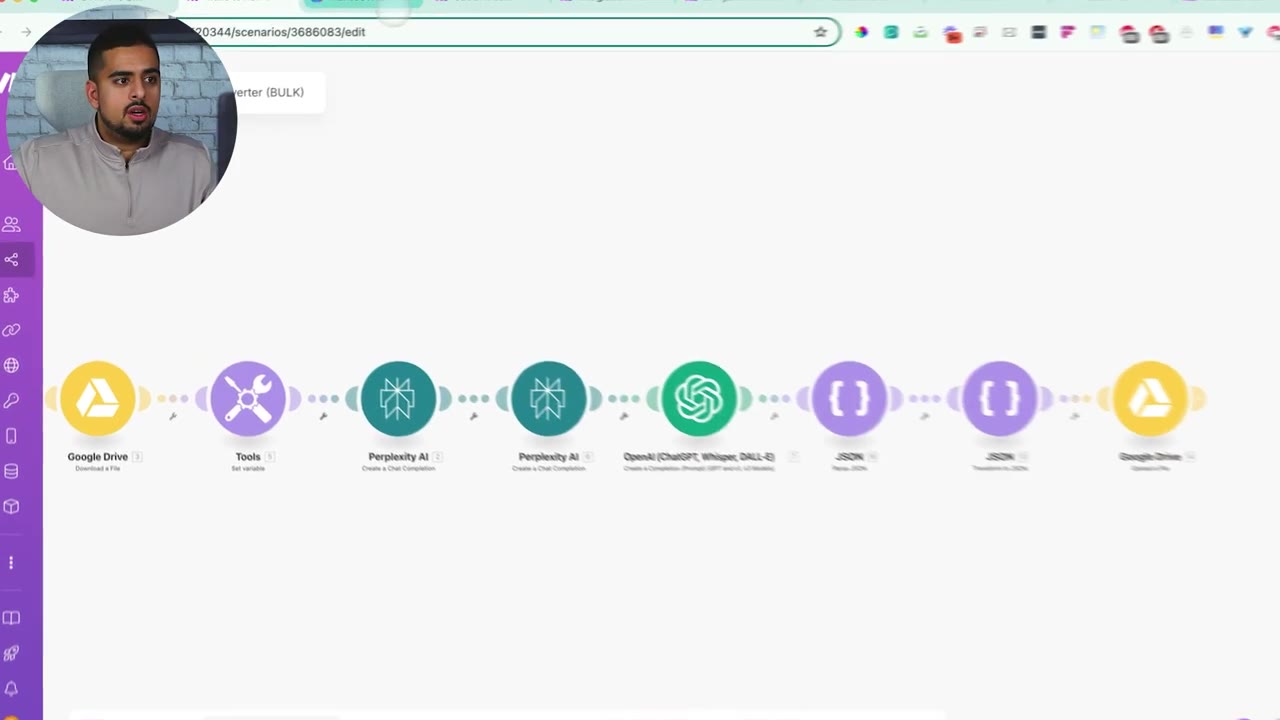
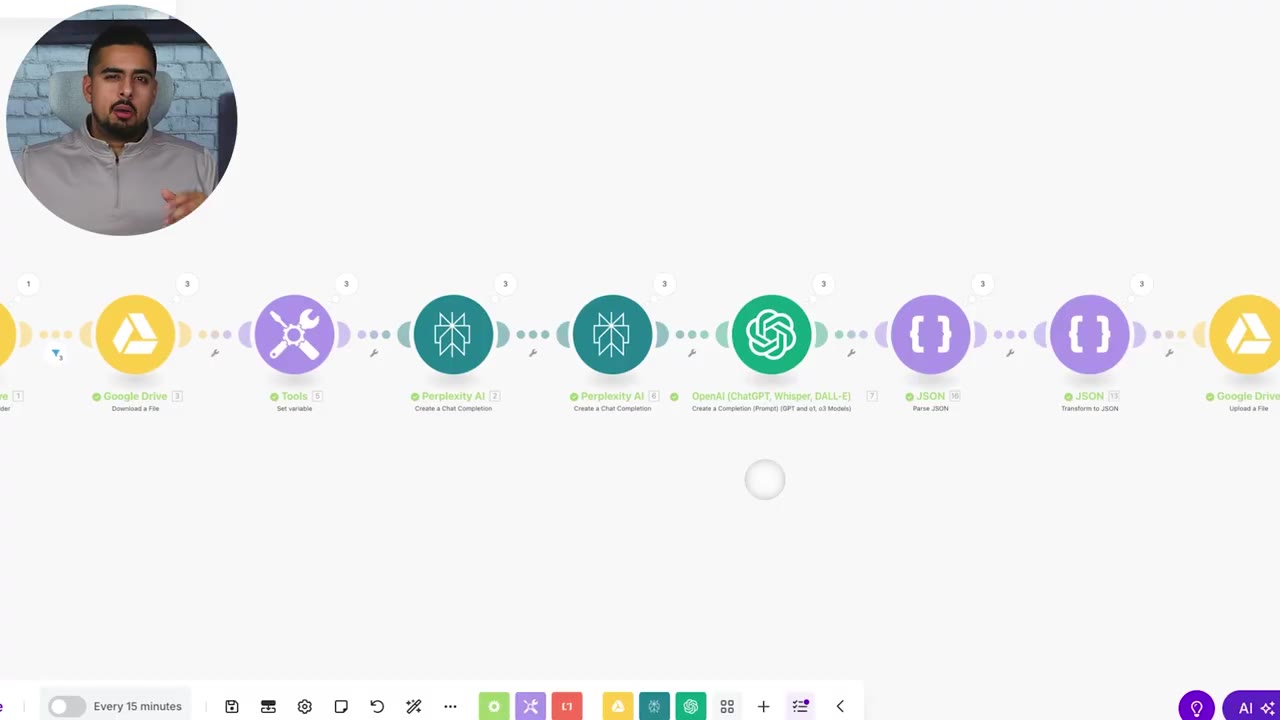
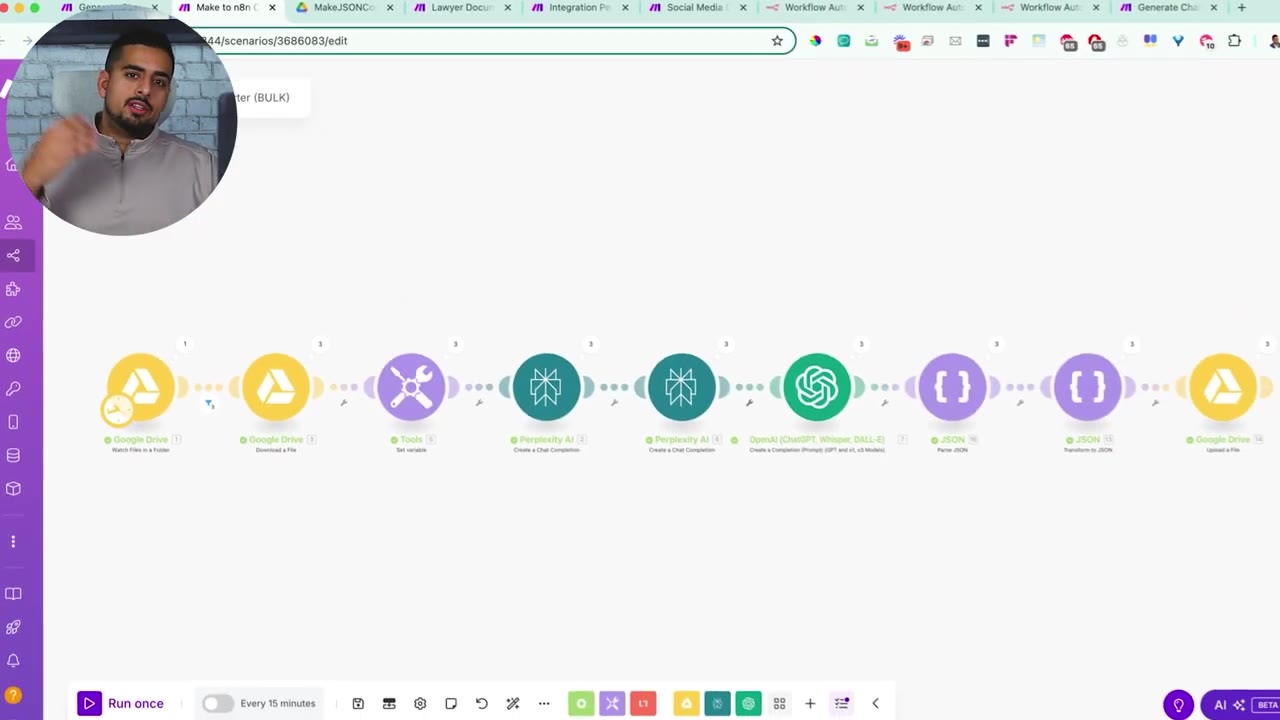
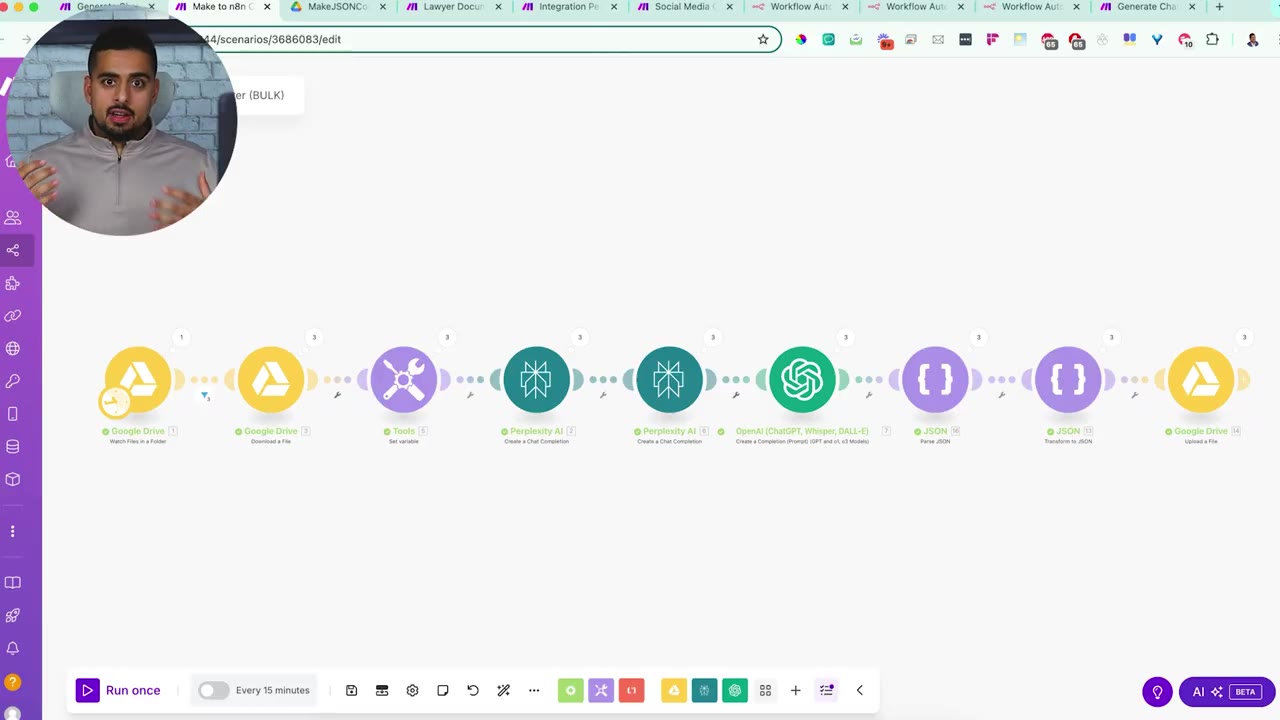
Step 2: Create a Bulk Converter Scenario in Make
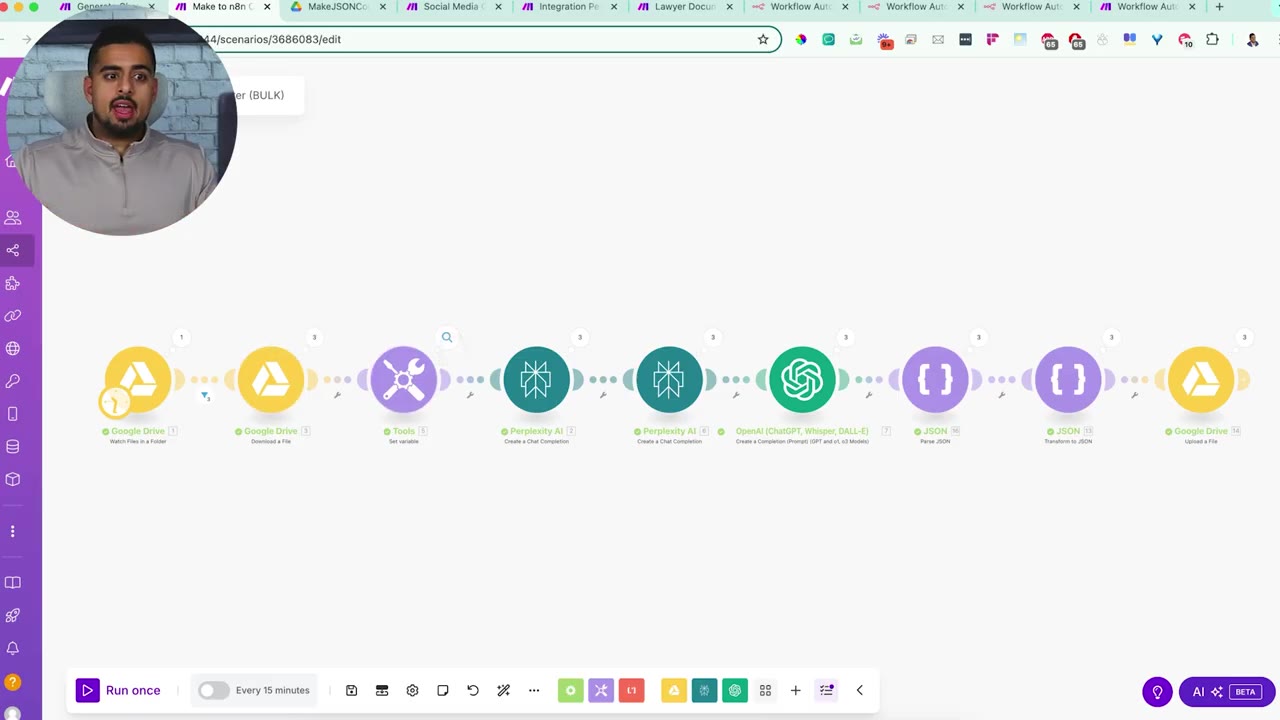
The converter scenario shown in the video is built inside Make. It watches a folder, downloads each JSON file, sends the content through research and reasoning models, validates the output, then writes a new edited JSON file back to Drive.
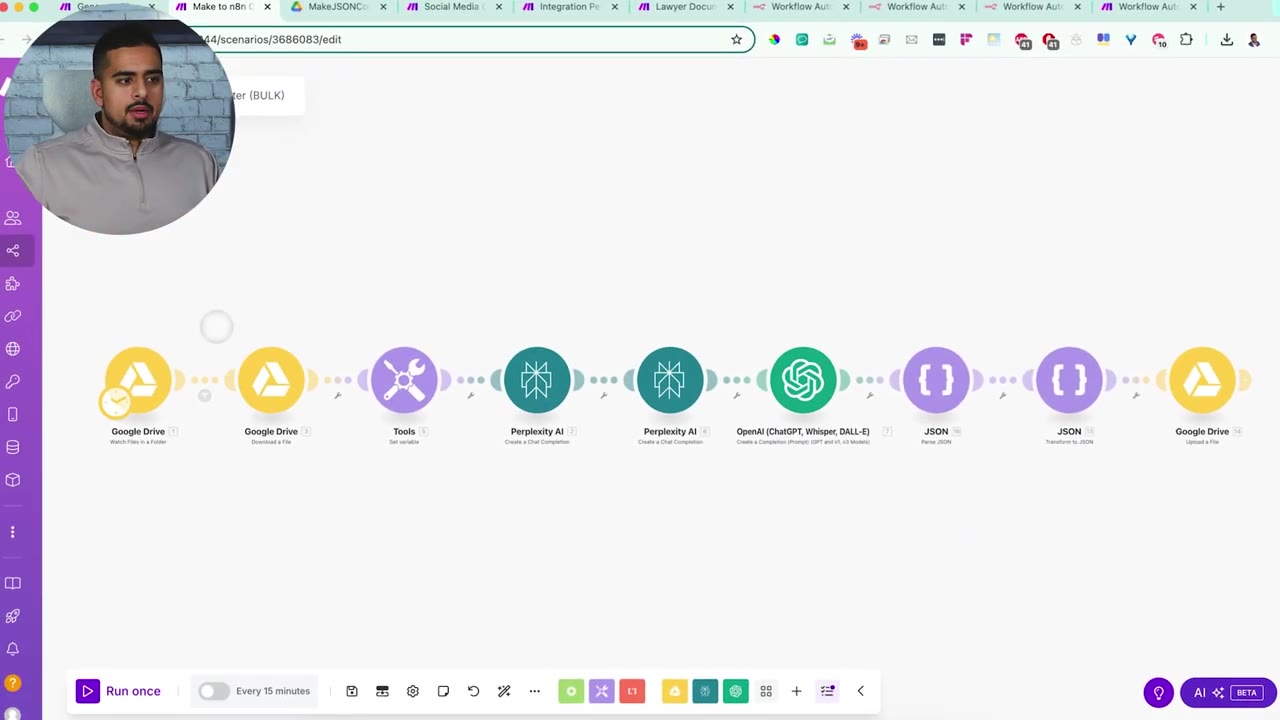
The first module watches a folder named something like Make JSON Converter. You can use Google Drive, OneDrive, Dropbox, or another file source as long as the automation can detect new JSON files.
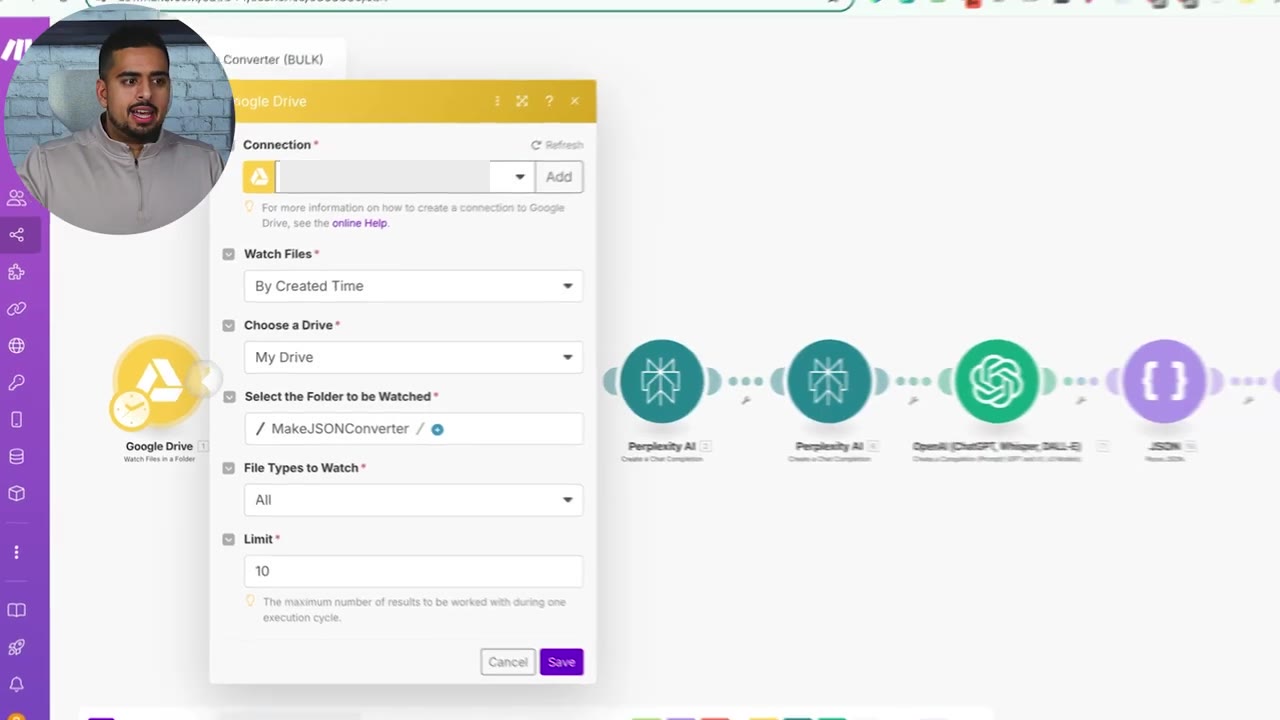
The limit controls how many files can be processed in a run. In the video, the limit is set to 10, but you can adjust it based on your Make operations allowance and the complexity of each automation.
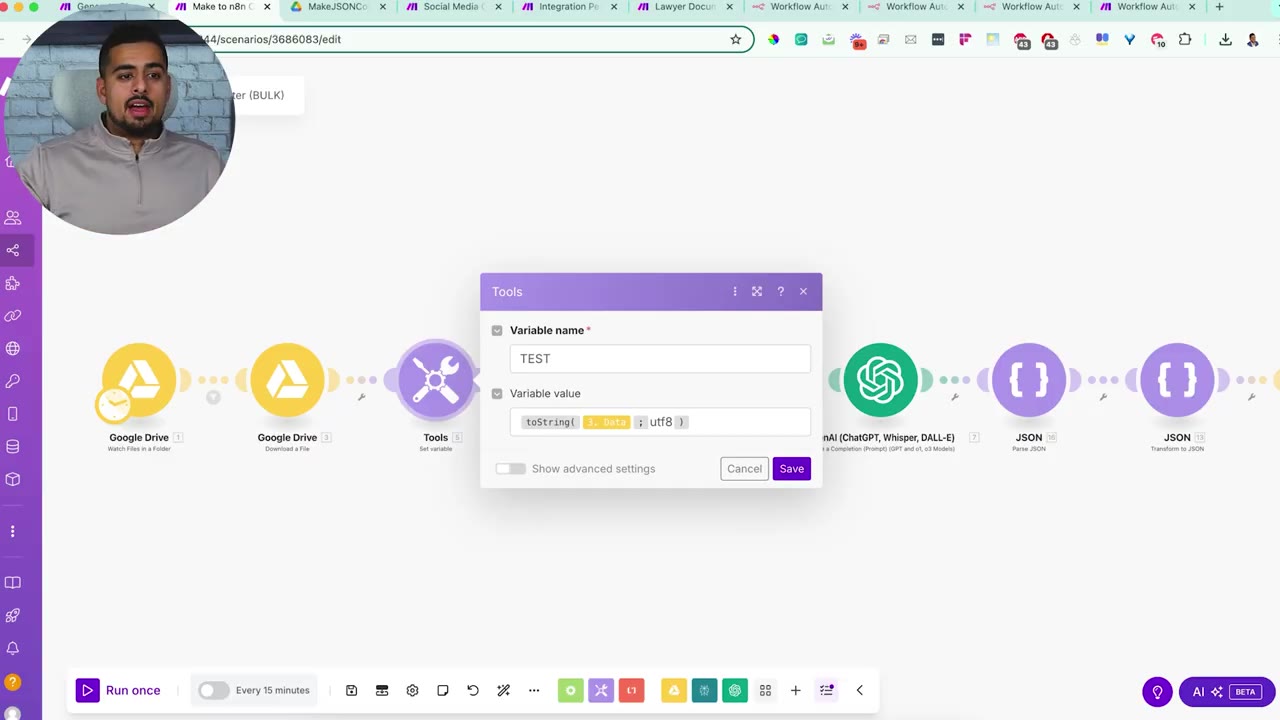
Step 3: Download and Prepare the Blueprint File
After the watch module sees a JSON file, the next module downloads it. Make often handles downloaded files as binary data, so the workflow must convert or encode that data back into usable JSON text before sending it to the AI conversion steps.
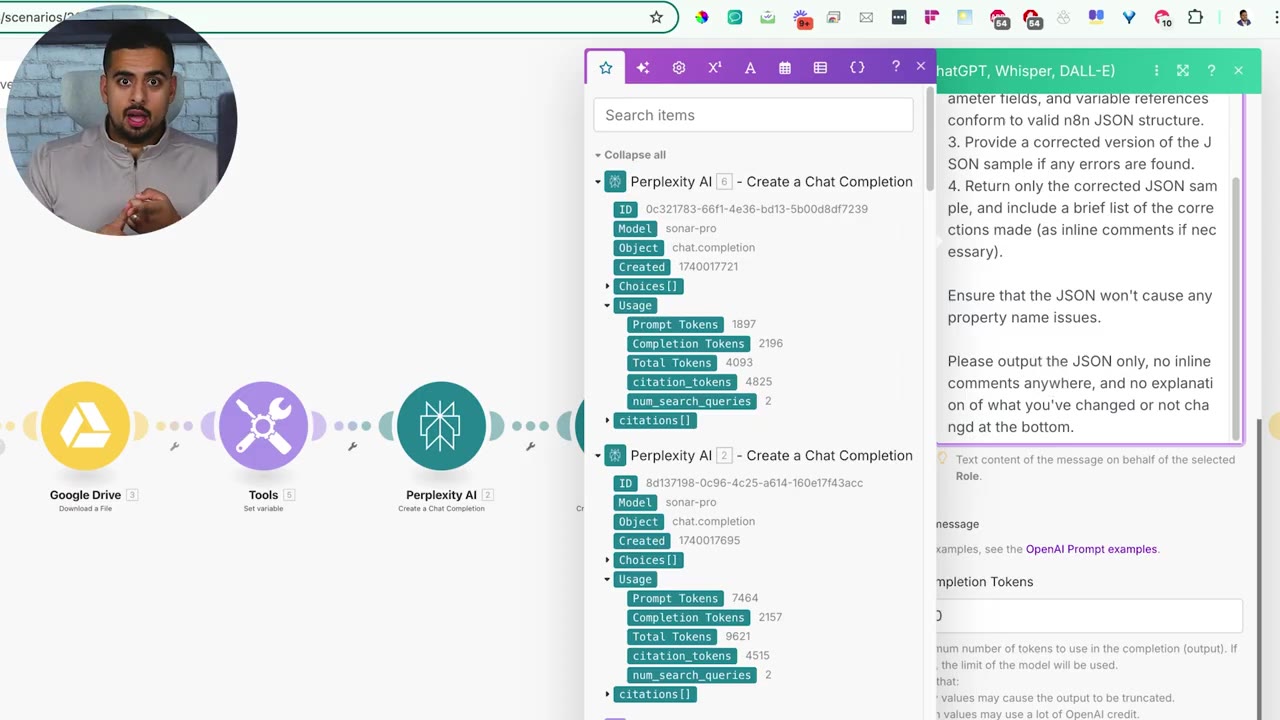
Step 4: Use Perplexity to Research the Conversion
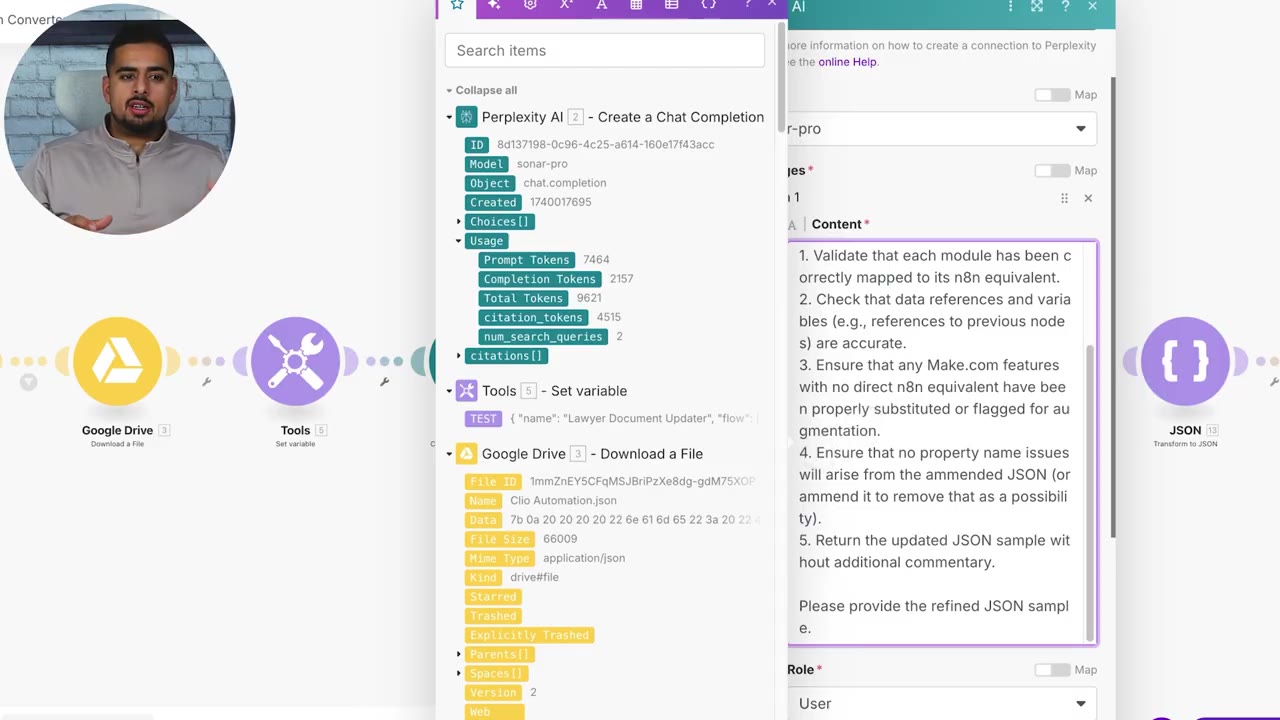
The first research step uses Perplexity with a stronger research model. The goal is to look up Make and n8n documentation or examples so the conversion is not based only on guessing node names.
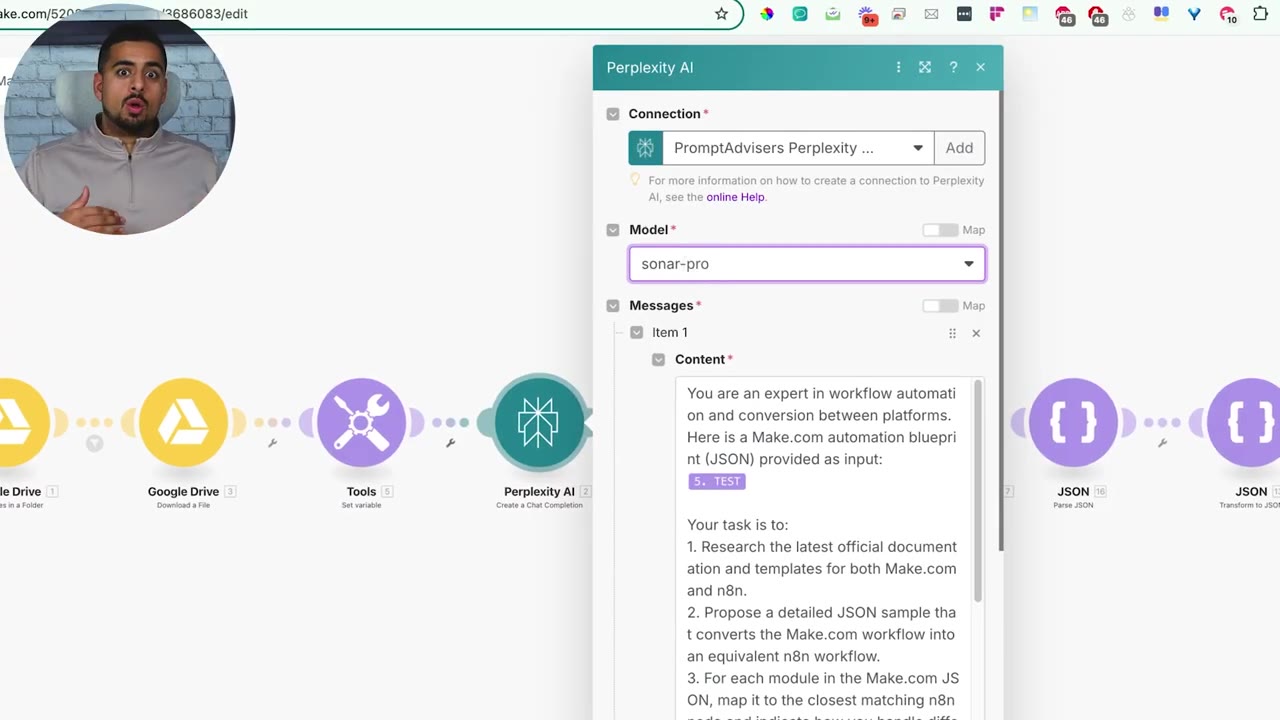
The prompt asks the model to act as a workflow automation conversion expert. It passes the Make blueprint JSON as input and asks for an equivalent n8n JSON sample.
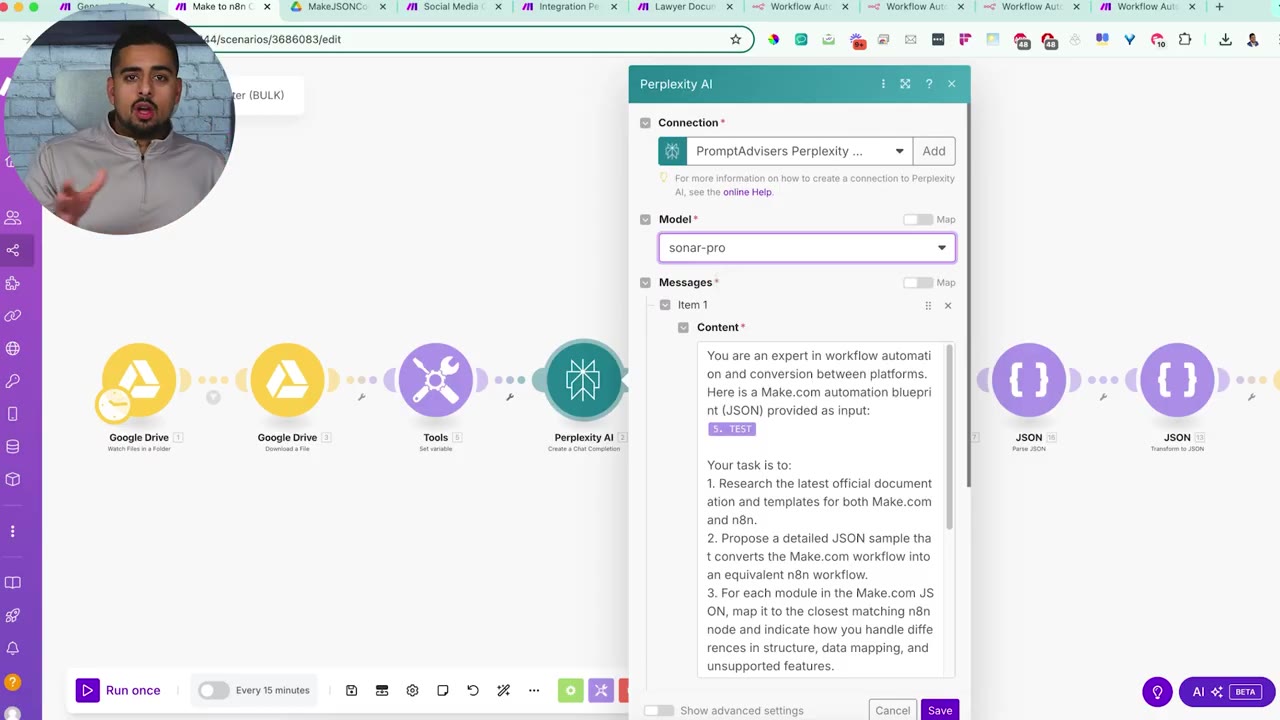
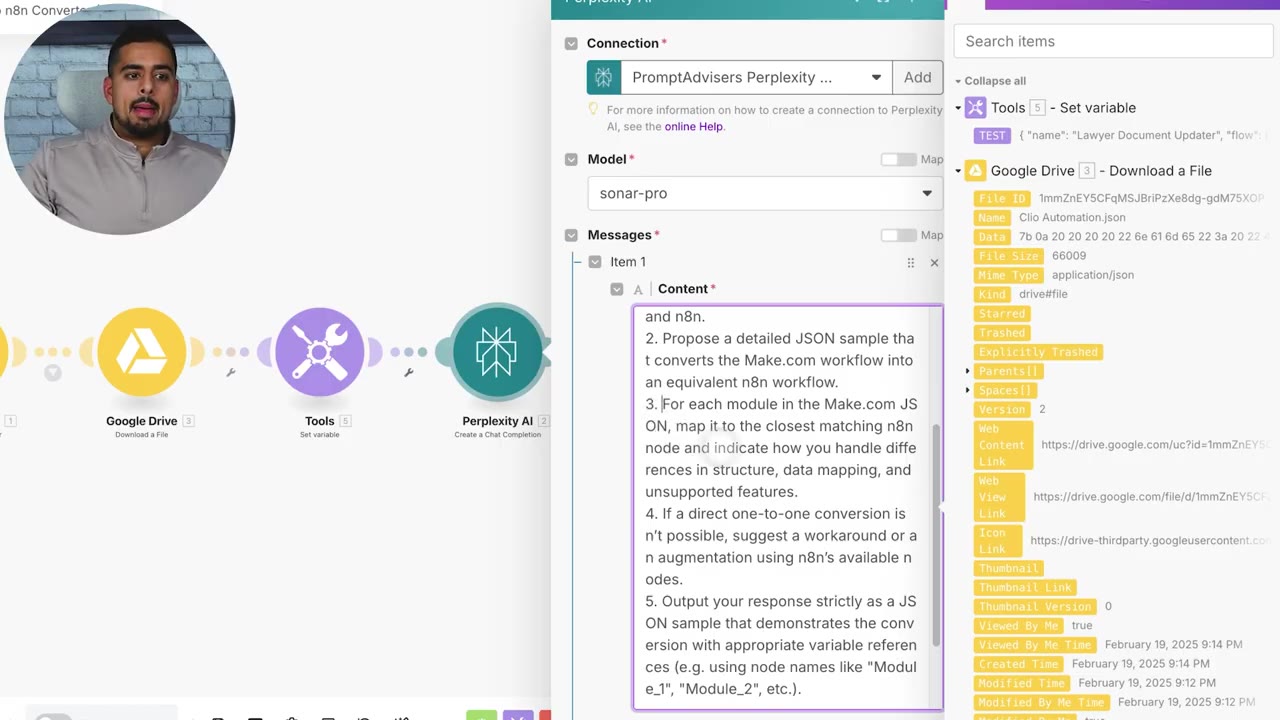
The critical instruction is to map each Make module to the closest matching n8n node and describe how unsupported features should be handled. That prevents the converter from pretending every Make module has a native n8n match.
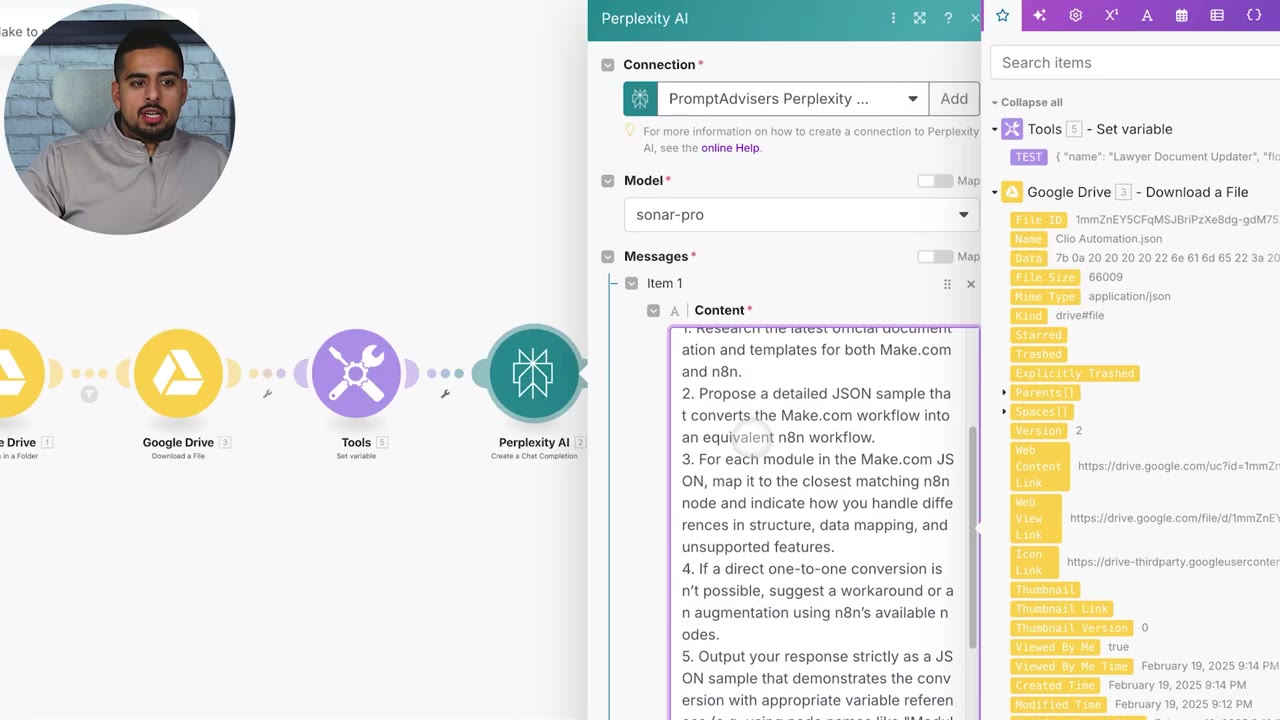
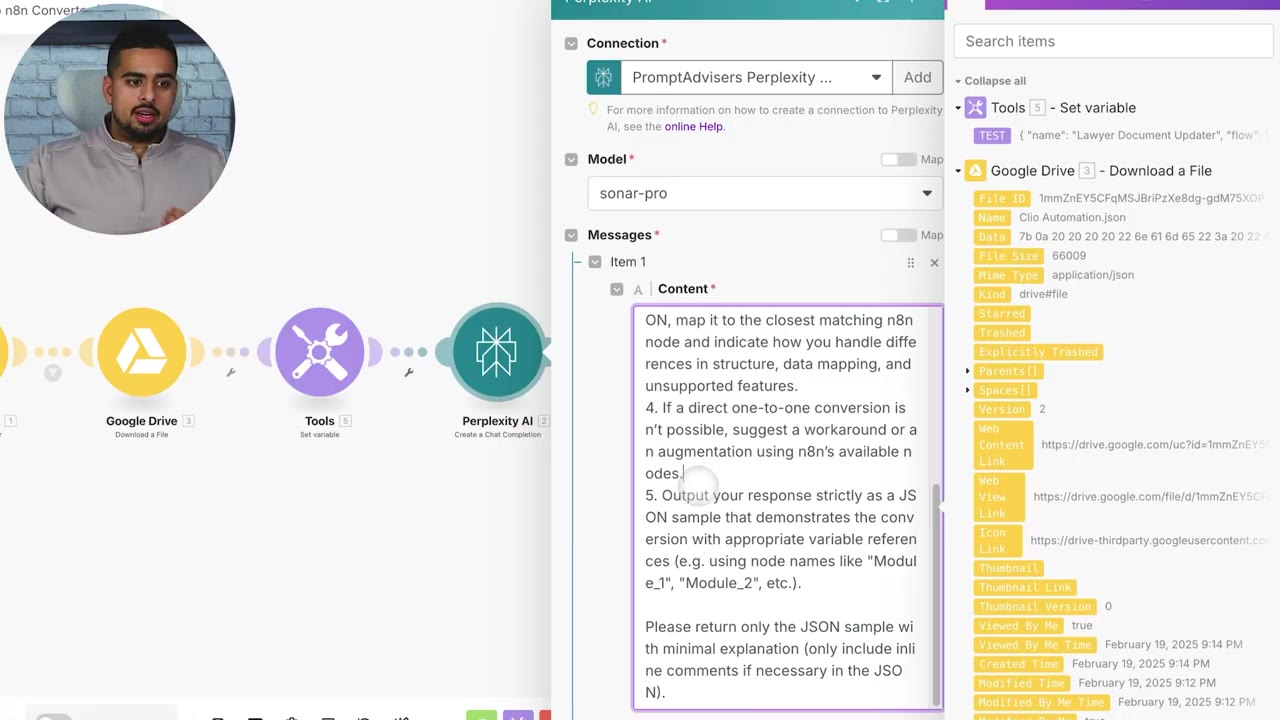
The prompt also asks for workarounds when a one-to-one conversion is not possible. For example, an unsupported app module might become an HTTP Request node that calls the app’s API.
Step 5: Add a Second Validation Pass
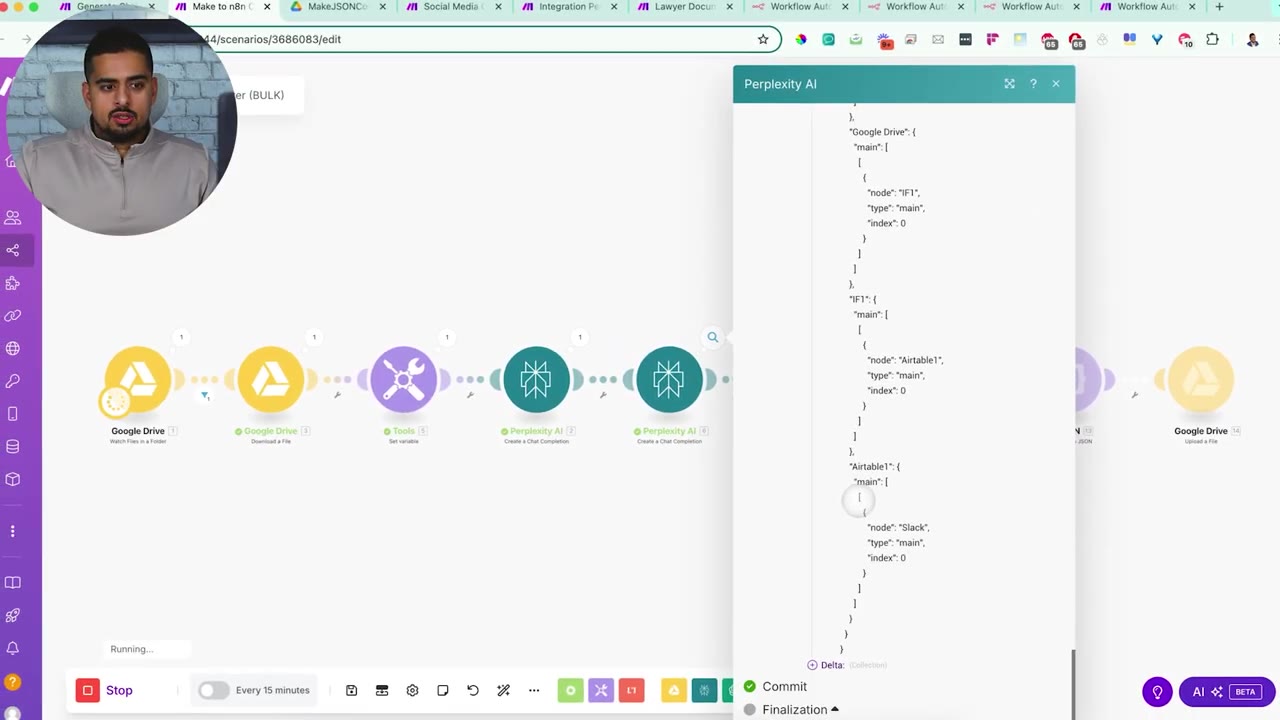
The second Perplexity step validates the first output. This is useful because AI-generated JSON can contain stale syntax, wrong node names, missing labels, or extra metadata that breaks the import.
The validation prompt asks the model to check n8n JSON syntax, node connections, parameter fields, and variable references.
The prompt also calls out a common n8n import issue: property-name problems. If a node is missing a required name or label, n8n may not know how to represent it on the canvas.
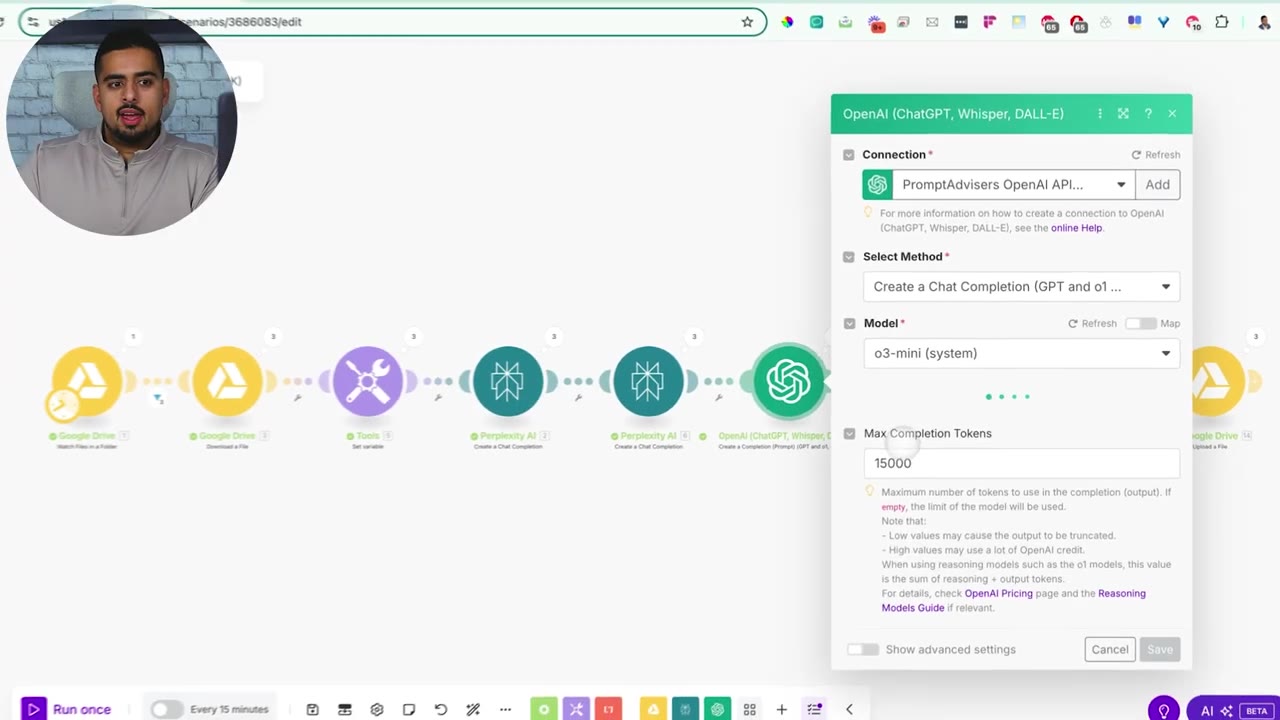
Step 6: Use an OpenAI Reasoning Model to Correct the JSON
After the research passes, the workflow sends the JSON through an OpenAI reasoning step. The video uses an o3-family reasoning model because complex workflows can produce very long JSON outputs that need more context and output capacity.
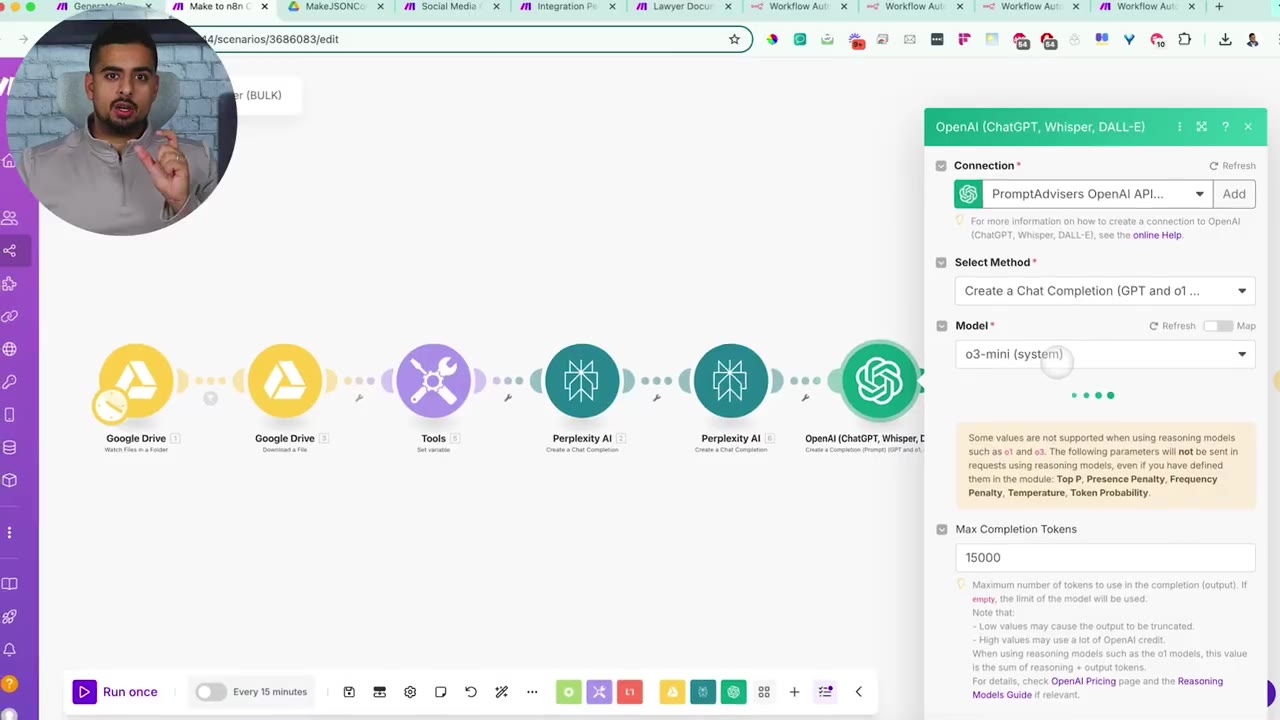
If the Make automation has many modules, increase the max completion tokens. If the output is cut off, the final JSON will be incomplete and n8n will not import it correctly.
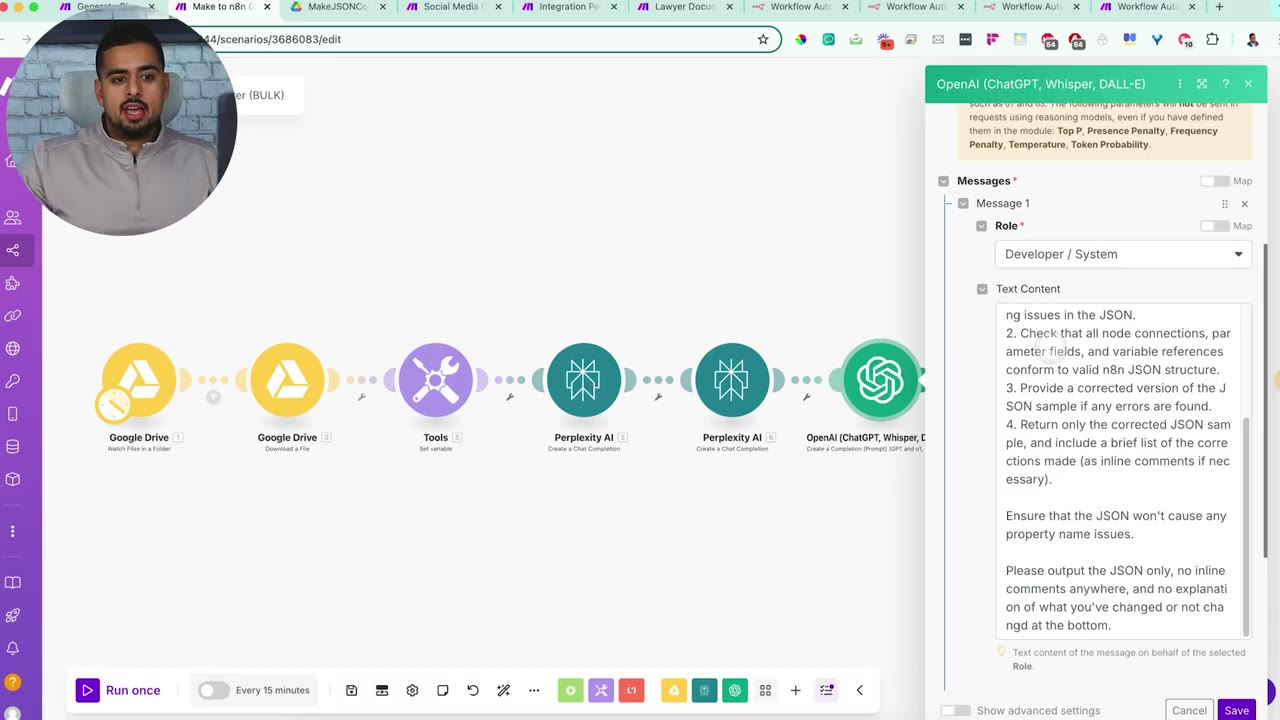
The reasoning prompt asks the model to identify syntax errors, check node connections and parameters, and return only the corrected JSON.
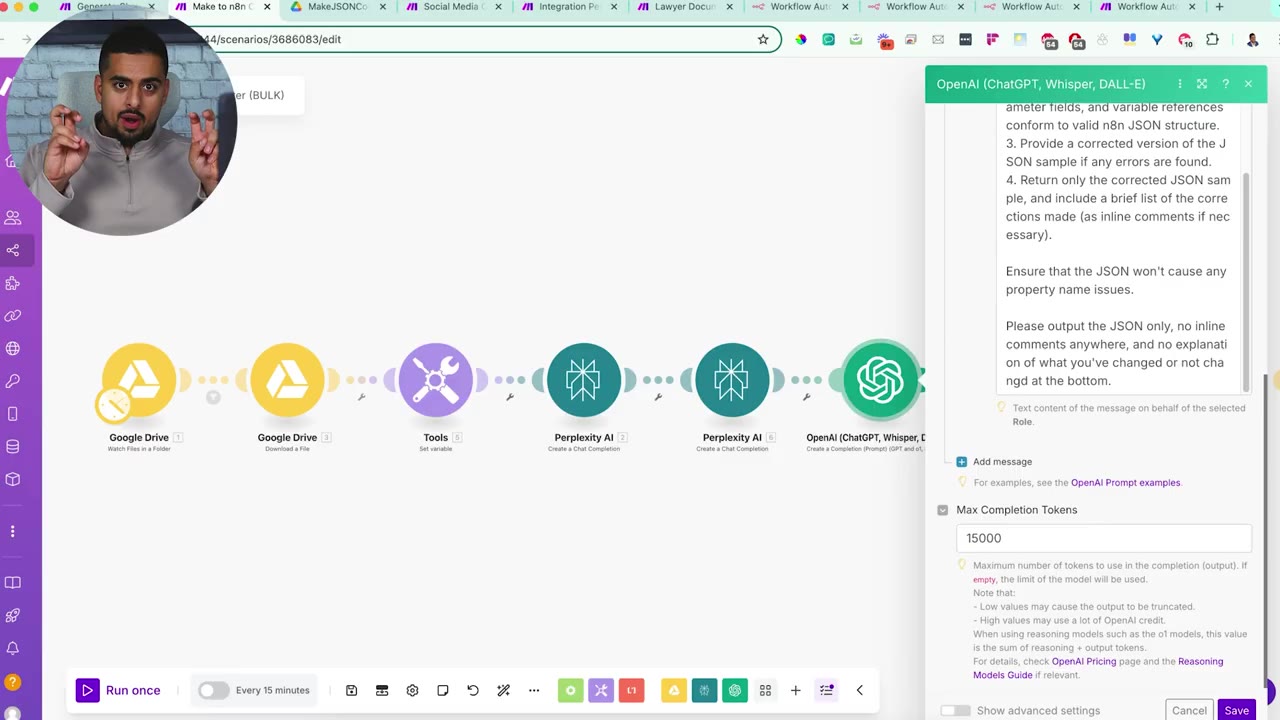
The prompt explicitly says not to add inline comments. JSON with comments is not valid JSON, and extra explanation from the model can break the import process.
Step 7: Parse the JSON as a Fail-Safe
The Parse JSON step is the safety gate. If the model response is not valid JSON, this module fails and stops the workflow before a broken file is created.
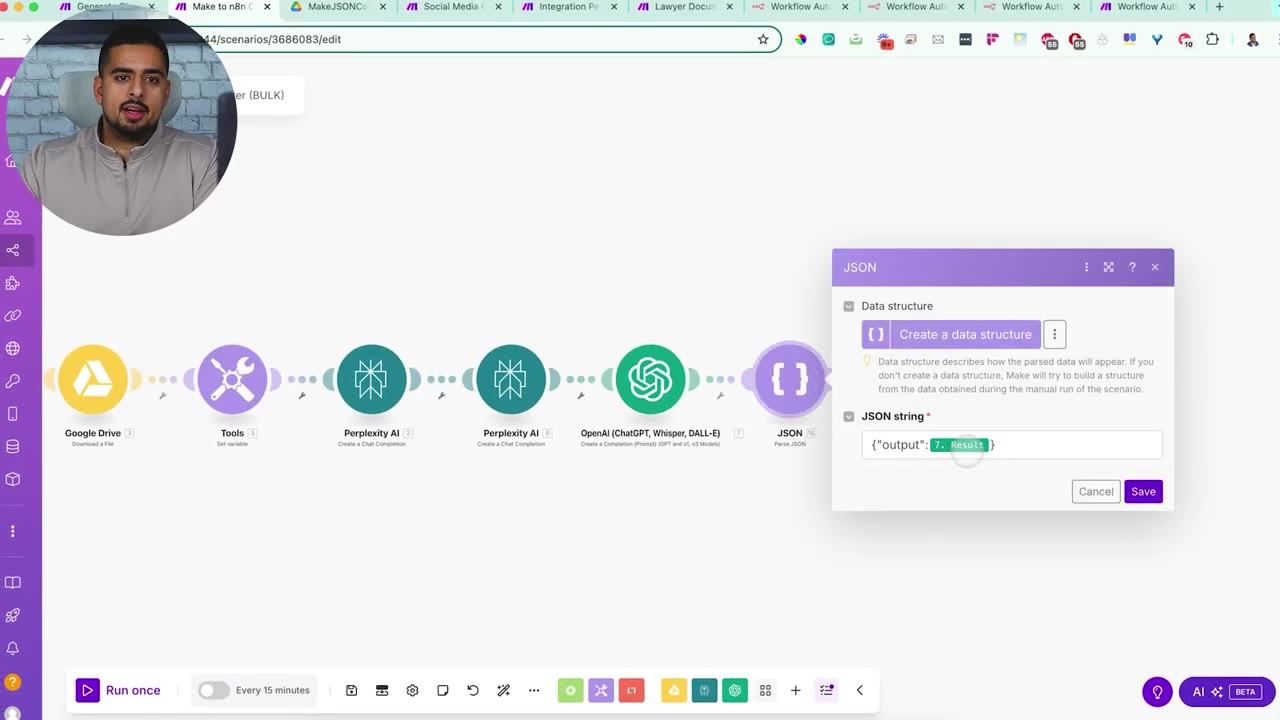
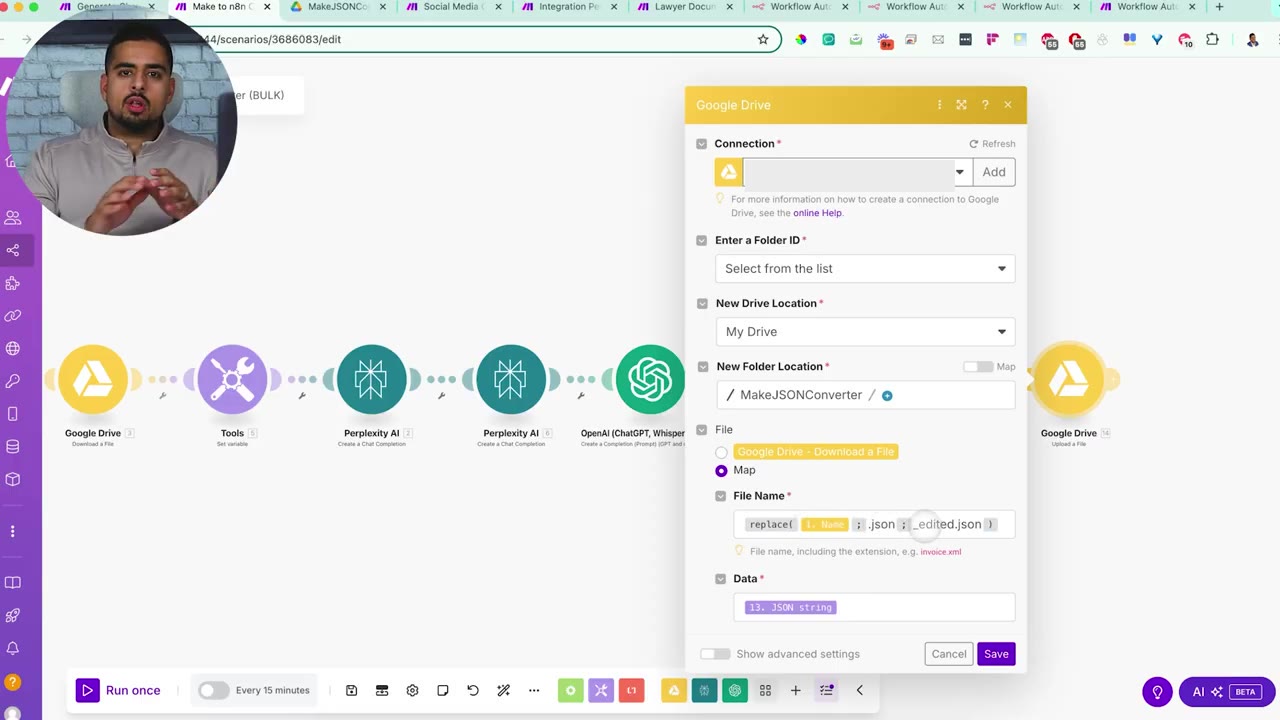
After parsing, transform the valid JSON into the file data that will be uploaded back into Google Drive.
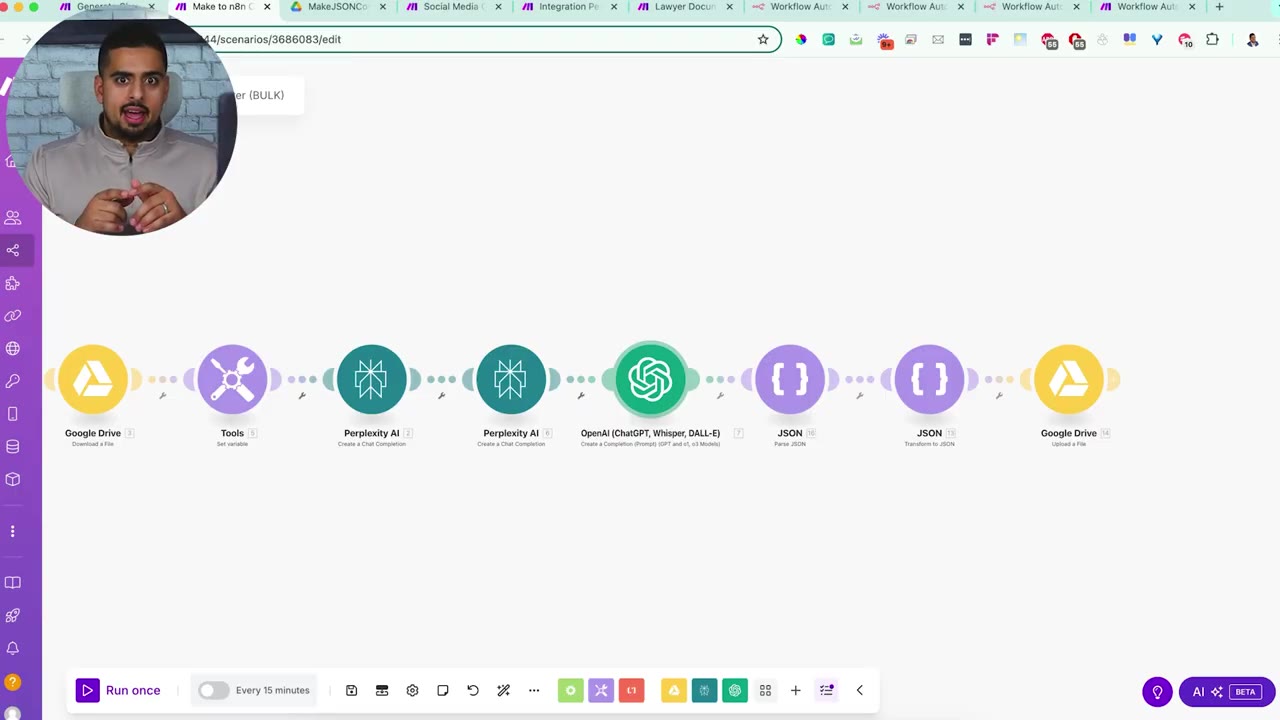
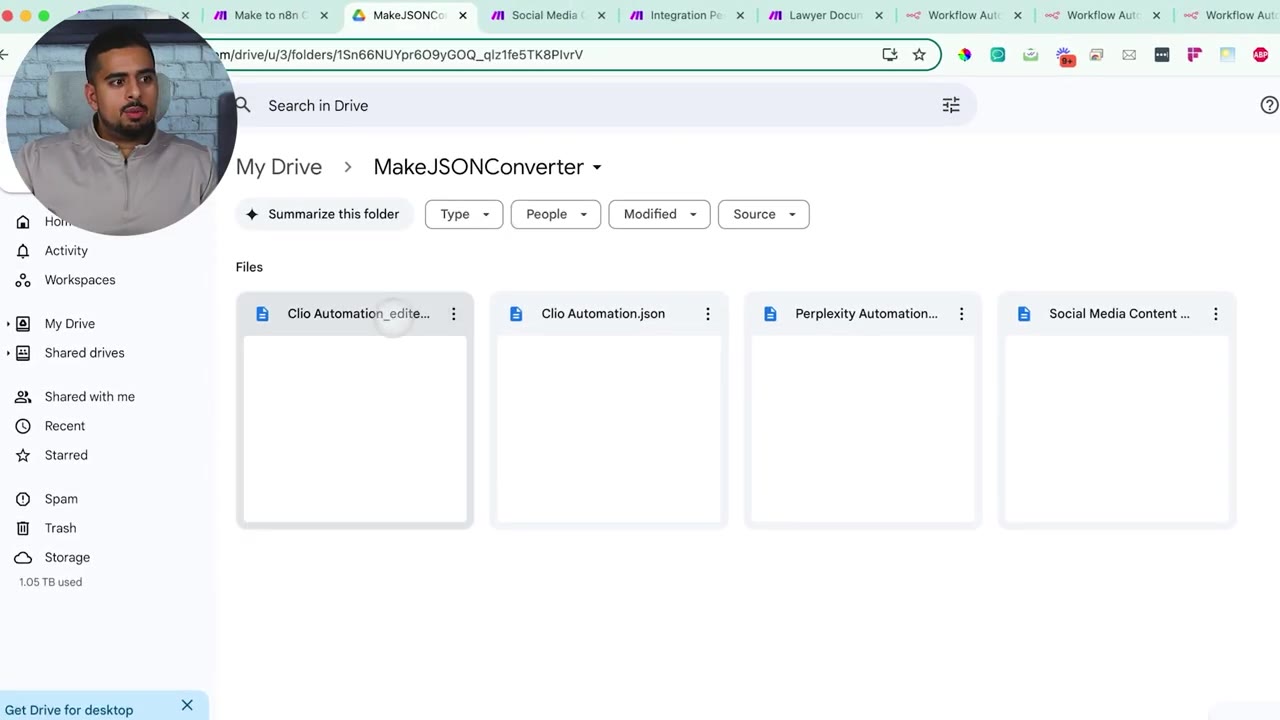
The final Google Drive module writes the edited output back into the folder. The video adds _edited to the filename so it is easy to tell the original Make blueprint from the n8n-ready output.
Step 8: Test the Converter with Multiple Files
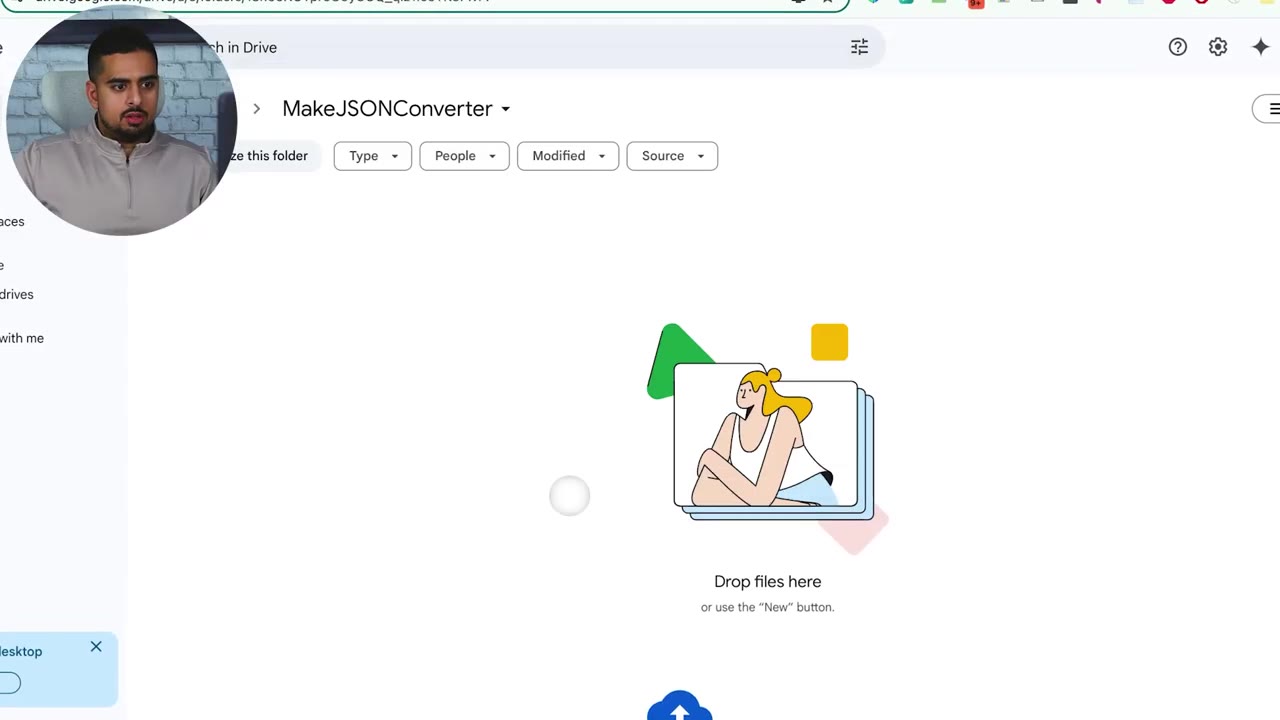
The demo starts with an empty Google Drive folder, then uploads three Make blueprint JSON files.
Run the Make converter once. The automation processes the files one at a time, which helps keep each conversion isolated and easier to troubleshoot.
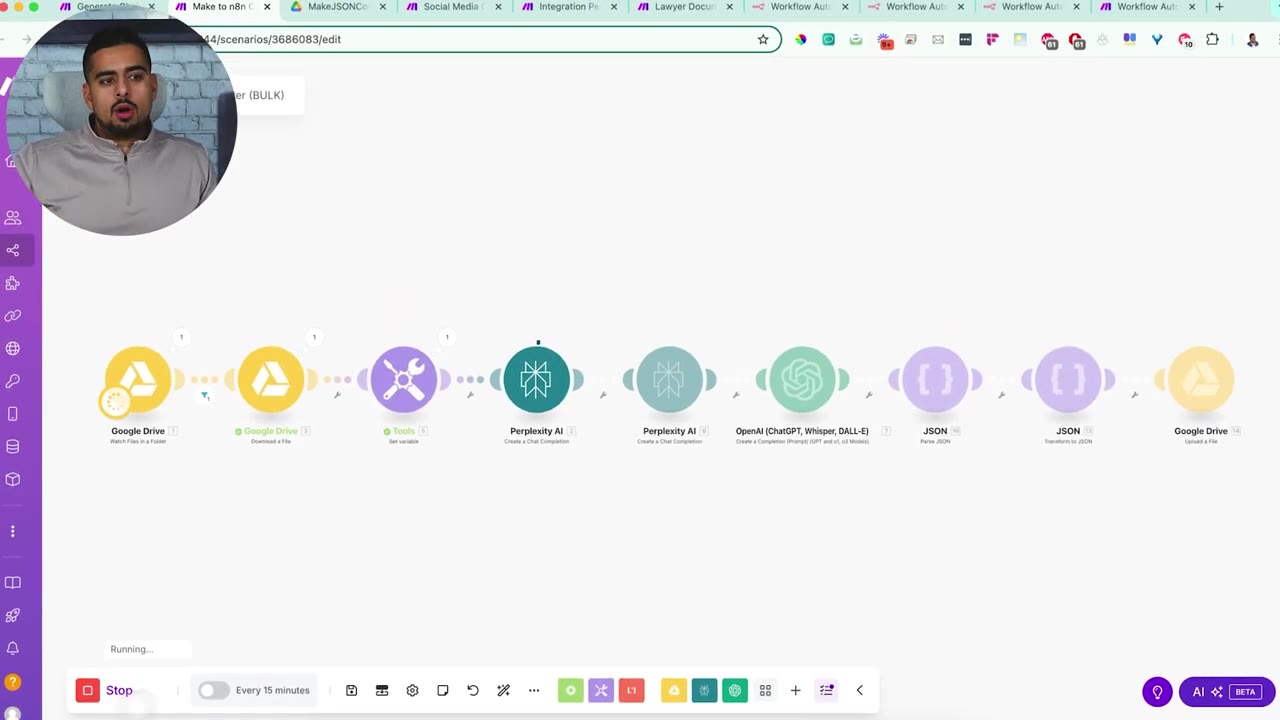
During the run, the Perplexity output shows JSON content without extra commentary. That is a good sign because the downstream Parse JSON module expects clean JSON.
After the first conversion succeeds, the edited JSON appears in the Drive folder. Once all three files finish, the folder contains three converted outputs.
Step 9: Import the Edited JSON into n8n
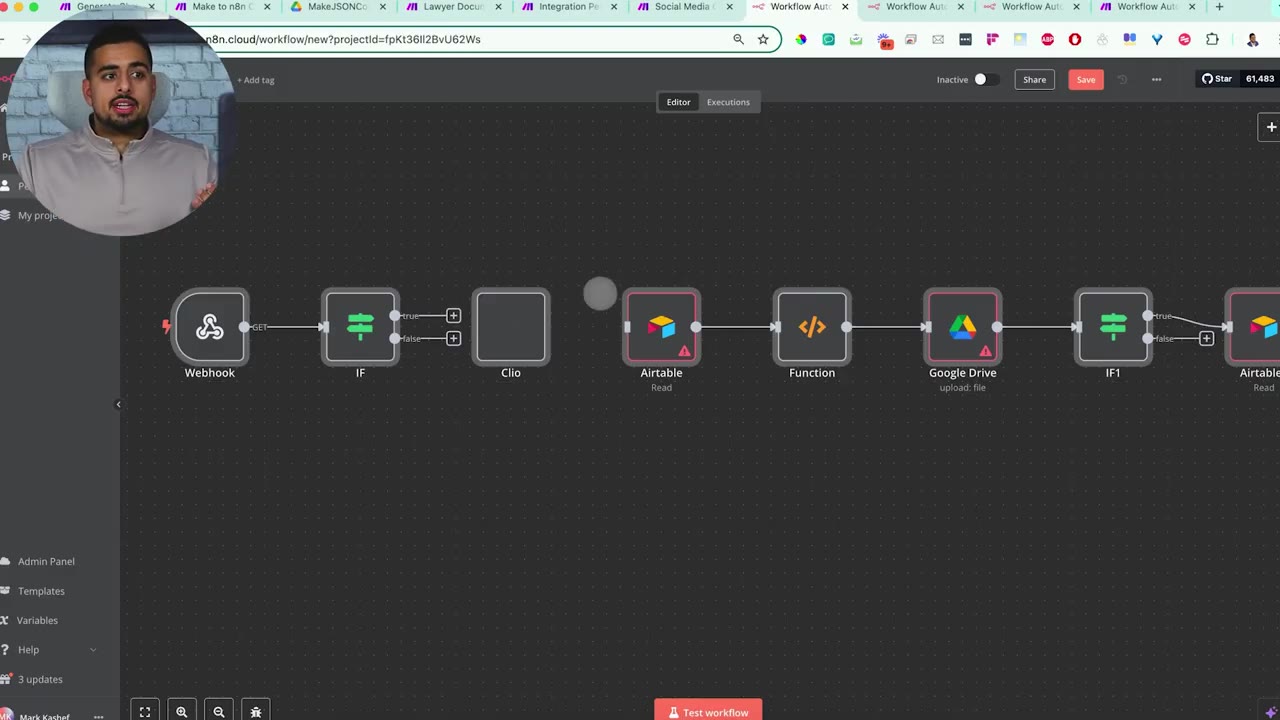
Open the edited JSON file, select all, copy it, then paste it into a blank n8n workflow canvas. n8n can create workflow nodes directly from copied workflow JSON when the structure is valid.
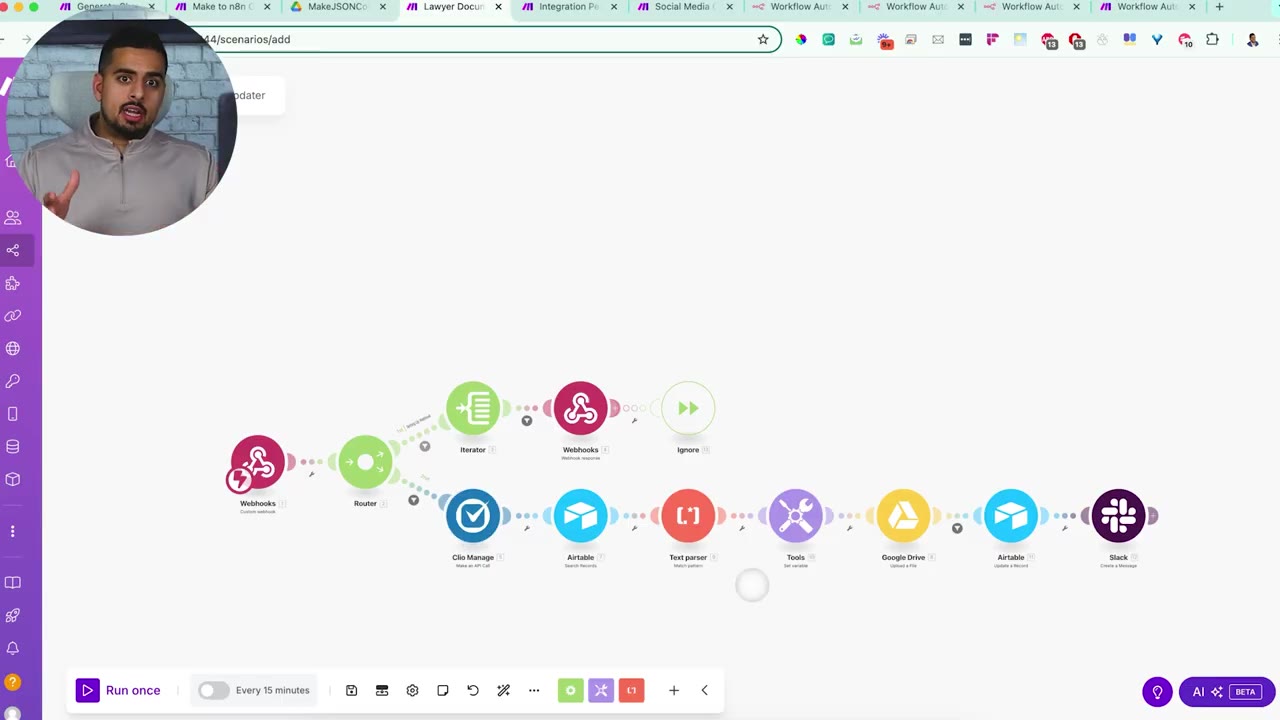
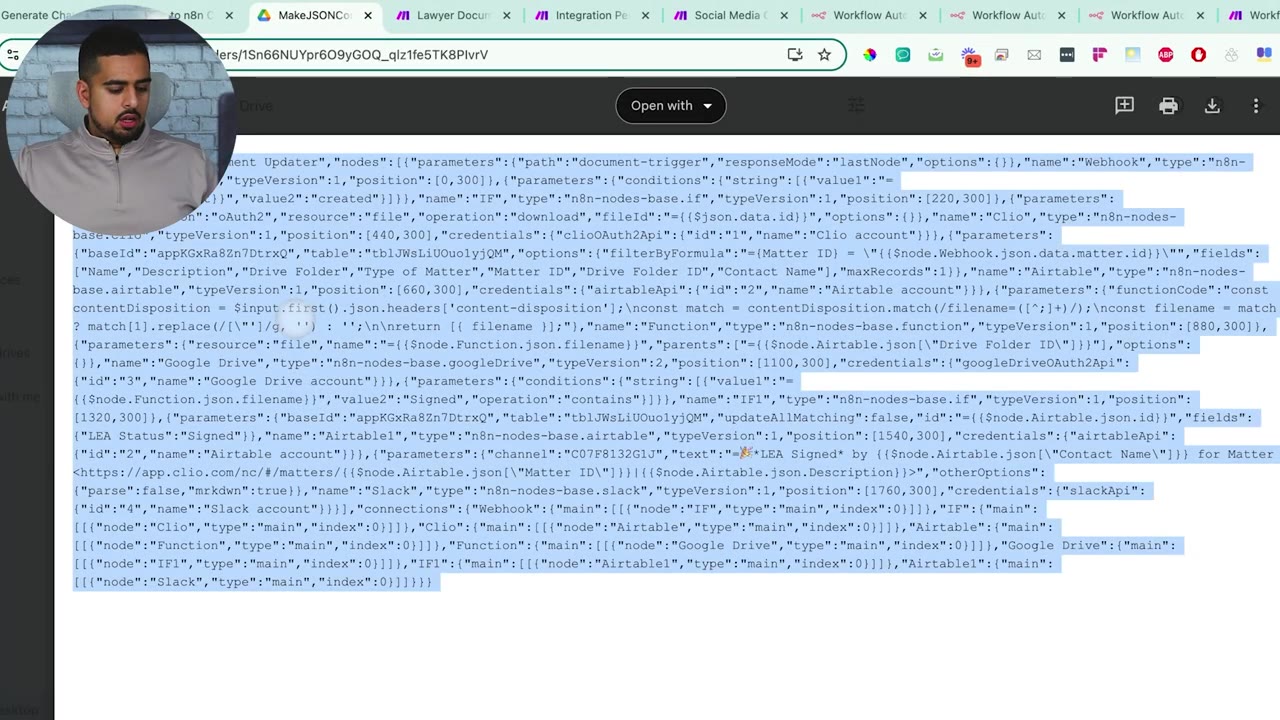
The Clio example is useful because Clio does not have a direct n8n integration in the video. The converter still produces a workable structure, but unsupported pieces need attention.
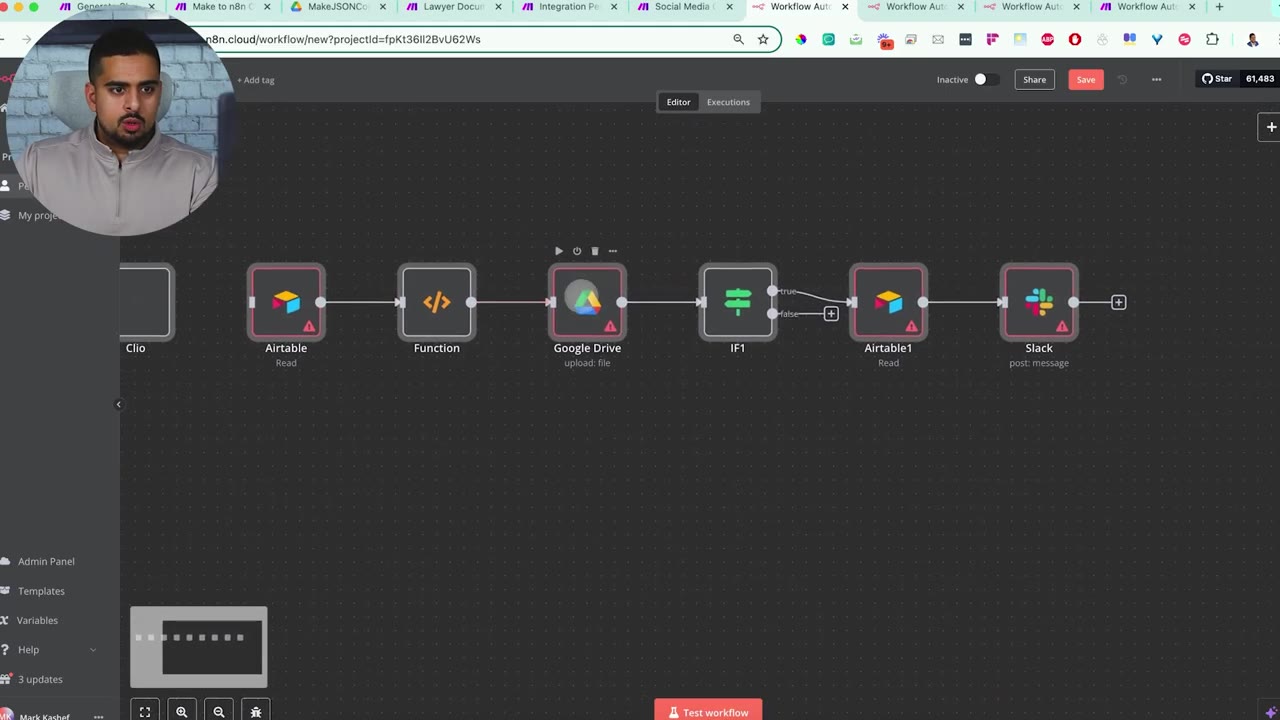
When a native n8n node does not exist, use an HTTP Request node or Code node as the substitute. This is where you connect directly to the app’s API and manually map the fields.
Step 10: Review Each Converted Workflow
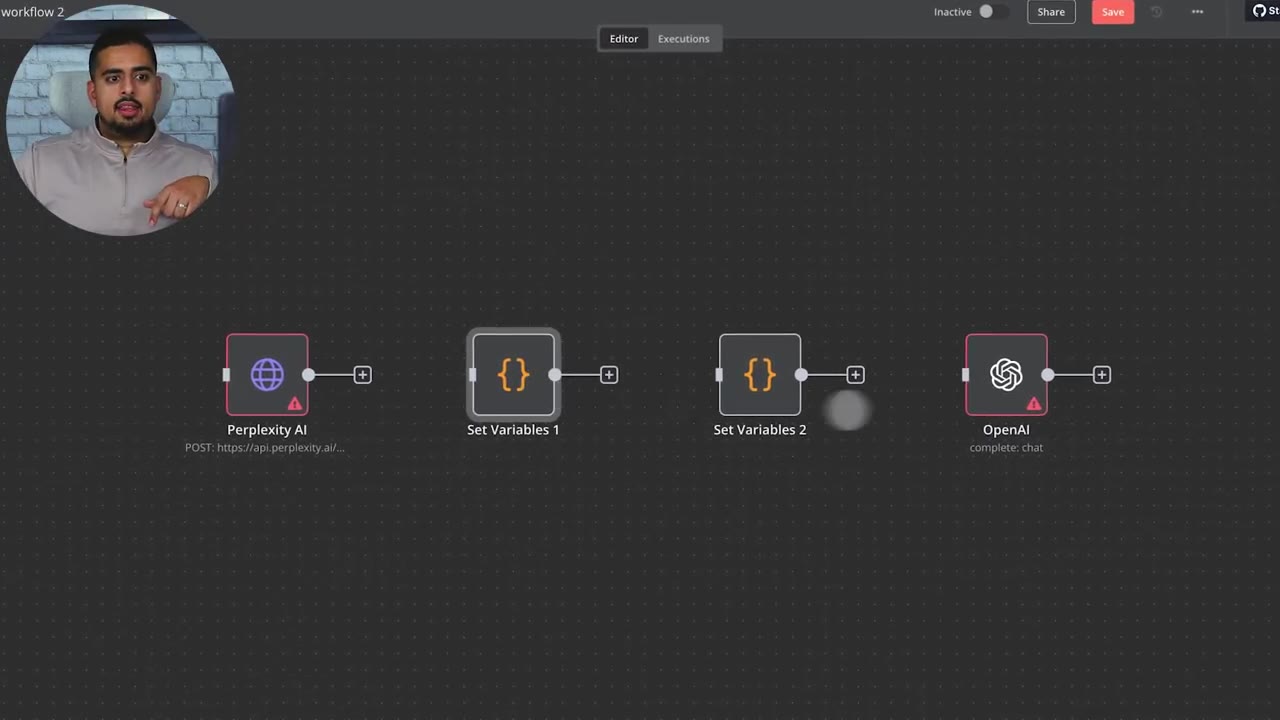
The Perplexity automation imports with a near-like-for-like structure, but Perplexity itself is represented through an API-style call rather than a perfect native Make-module equivalent.
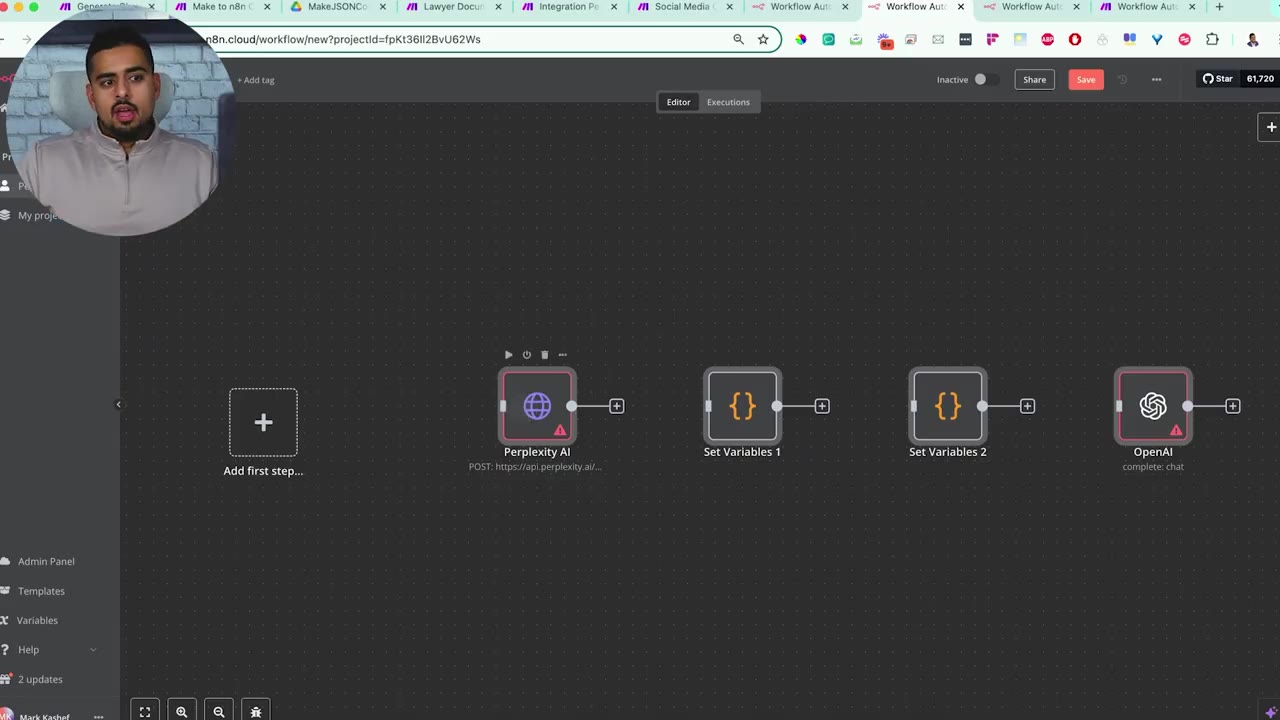
The OpenAI step maps more cleanly because n8n has OpenAI nodes that resemble the Make OpenAI module more closely.
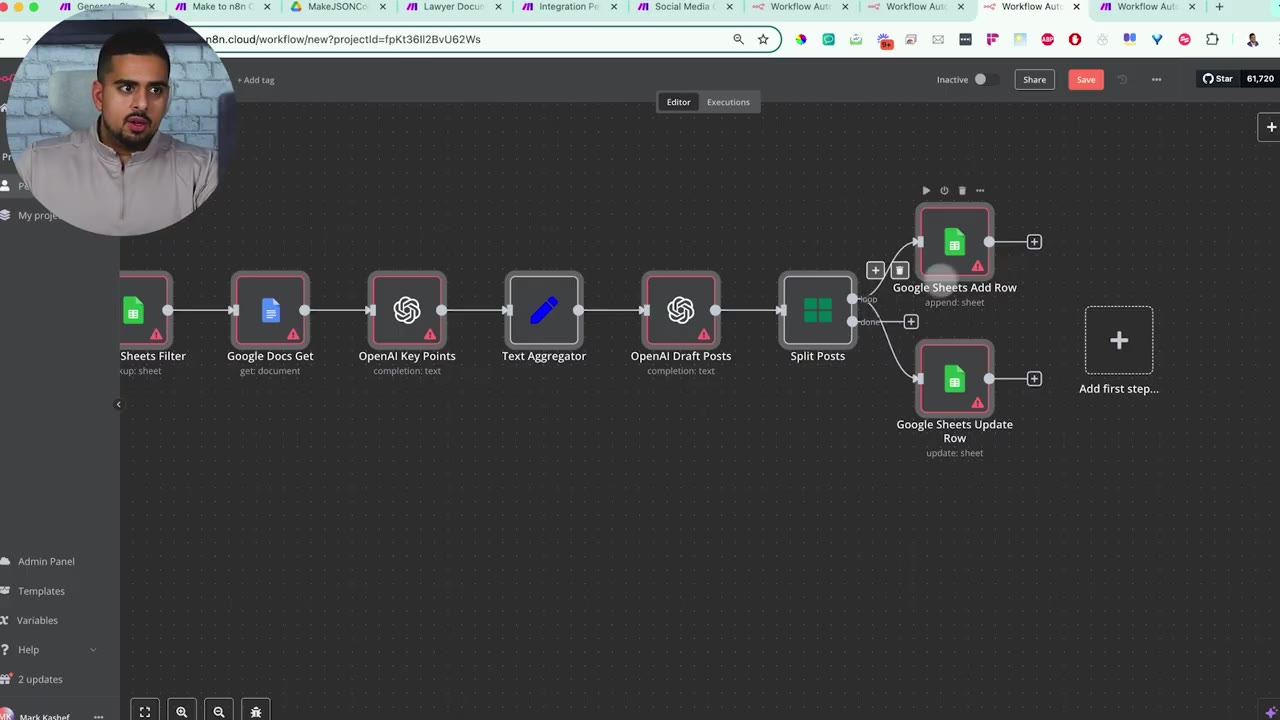
The social media content planner example shows a more complex workflow with Google Sheets, Google Docs, OpenAI, branching, and aggregation logic.

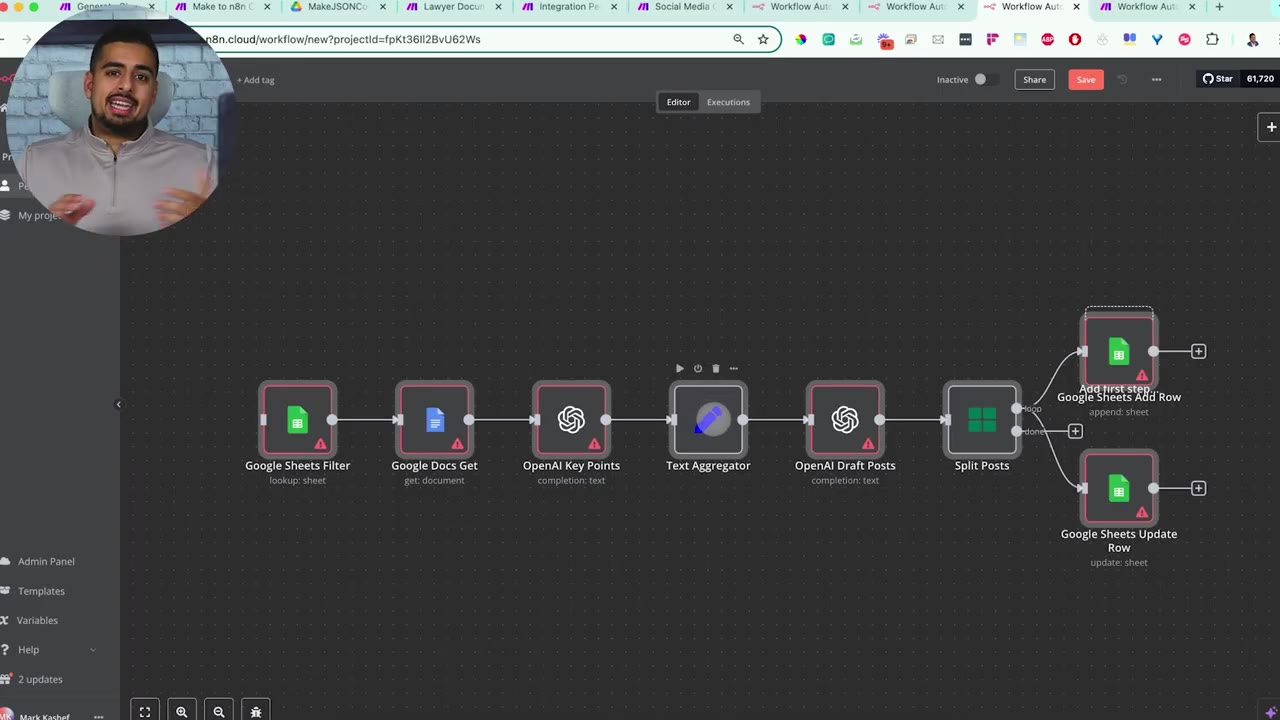
For Make iterators, aggregators, and routers, the converter may choose the closest n8n equivalent, such as Text Aggregator, Split, Merge, or IF-style branching. Review these manually because the closest equivalent may still need tuning.
Troubleshooting Conversion Problems
If your converted workflow does not import, start with the JSON output length. Large Make scenarios can produce thousands of lines of JSON, and a model may stop before finishing the output.
- If the JSON is cut off, increase the max completion token setting for the reasoning step.
- If JSON parsing fails, add another validation step before the final Parse JSON module.
- If n8n imports the workflow but shows warning nodes, check whether the original Make app exists in n8n.
- If an app does not exist in n8n, replace it with HTTP Request, Code, or a documented API call.
- If variables are missing, inspect expressions and references between previous nodes.
- If credentials are missing, reconnect them manually in n8n after import.
When to Use Make vs n8n
Make has a large template gallery and a friendly onboarding style. If you are new to automation and only running smaller workflows, Make can be a very approachable place to learn concepts like triggers, routers, iterators, and aggregators.
The cost discussion matters as workflows scale. Make’s own documentation describes an operation as a module run that processes or checks data, and modules can run once for each bundle. That means multi-step, multi-bundle scenarios can consume operations quickly.
n8n’s pricing page currently describes pricing around monthly workflow executions, regardless of workflow complexity. Always check the latest pricing pages before choosing a platform, but this execution-based model can be a major advantage for complex workflows.

n8n also has an open-source ecosystem, public documentation, custom code options, and a strong community. That makes it attractive when you need lower-level control, custom APIs, or more flexible workflow architecture.
The practical recommendation from the video is: use Make while you are learning if it fits your scale, then move toward n8n when your workflows become more complex, more custom, or more expensive to run in an operations-based tool.
Final Migration Checklist
- Export the Make scenario blueprint as JSON.
- Place the JSON file in the converter watch folder.
- Run the converter scenario.
- Confirm the output is valid JSON.
- Copy the edited JSON and paste it into n8n.
- Reconnect every credential manually.
- Replace unsupported app modules with HTTP Request, Code, or placeholders.
- Test each branch before publishing the workflow.
- Compare output data between the original Make scenario and the converted n8n workflow.
Useful References
Before making platform decisions, check the current official docs: Make Operations, n8n Executions, and n8n Pricing. Pricing and usage models can change, so verify them when planning a production migration.

Olaitan Oladipo holds a BSc in Sociology from Olabisi Onabanjo University. He is a self-taught automation builder who has spent years inside n8n doing the work that most tutorials skip: debugging OAuth errors at 2am, migrating client automations from Make.com mid-project, fighting reverse proxy misconfigurations on AWS EC2, and figuring out through trial and error what actually holds up in production versus what only looks clean in a demo.
He is not a developer by training and not a SaaS founder. He is the person in the Discord server who actually answers the question instead of linking to the docs.
His writing on n8n Automation Tutorial covers self-hosting, AI agent workflows, tool comparisons, and the security vulnerabilities the automation industry would rather not discuss. He has built AI-assisted invoice approval flows using OpenAI function calling, connected Claude via HTTP Request nodes, and holds considered opinions about Zapier, Make.com, LangChain, and CrewAI that their marketing teams would not appreciate.
He writes for people who are technical enough to follow a tutorial but experienced enough to want the honest version.