

Errors are normal in automation. APIs time out, rate limits happen, required inputs go missing, and services occasionally return bad responses. The goal is not to pretend failures will never happen. The goal is to build n8n workflows that retry temporary failures and alert you when a real failure needs attention.
This article shows how to add retry logic to an n8n HTTP Request node and route failed executions into a dedicated Error Handler workflow that sends an email alert with the exact failure details. For the previous guide in this series, read n8n vs Power Automate: 6 Key Differences in Pricing, Features, and Use Cases.
What You Will Build
- A scheduled n8n workflow that calls a weather API through the HTTP Request node.
- A controlled HTTP Request failure by removing the required query parameters.
- Retry on Fail settings so n8n retries temporary failures before giving up.
- A separate Error Handler workflow that starts with the Error Trigger node.
- A Gmail alert that includes the failed node, error message, execution URL, and stack trace.

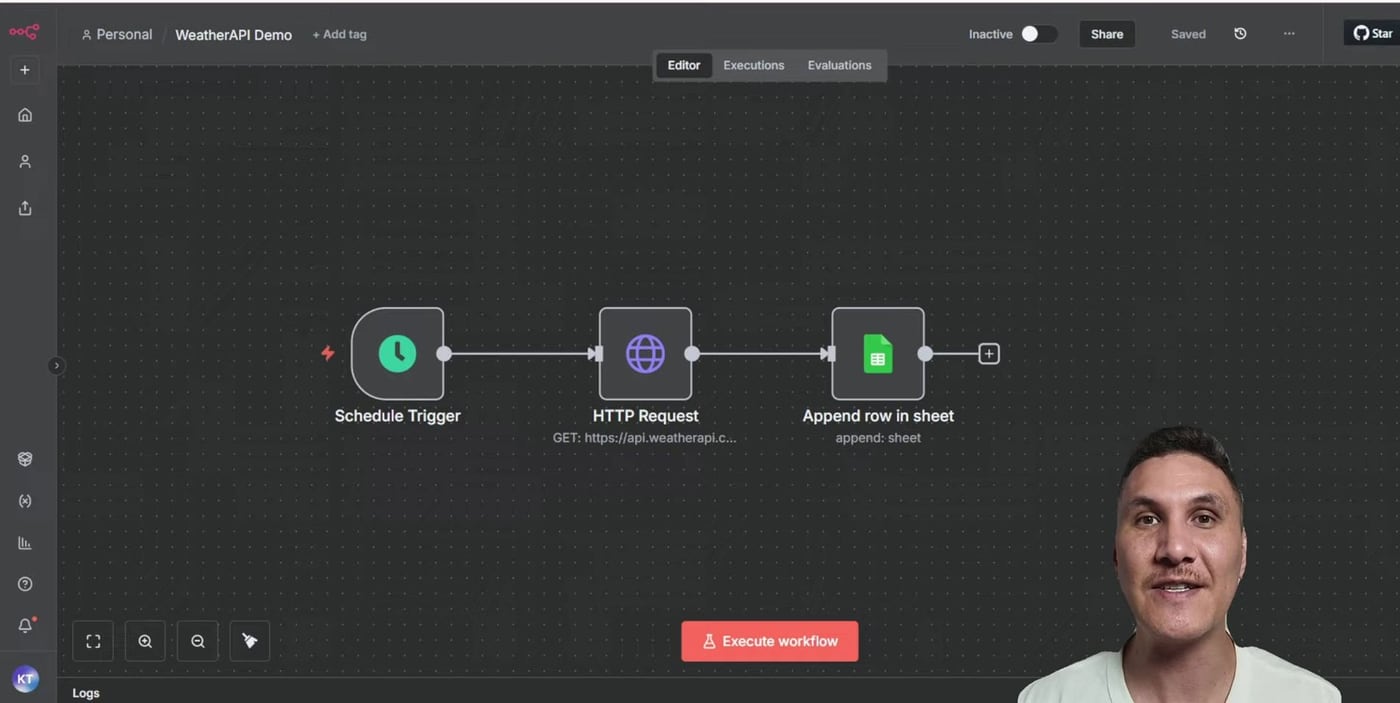
Step 1: Use a Schedule Trigger Instead of a Manual Trigger
Error workflows are designed for automatic workflow executions. If a workflow is only run manually, the Error Trigger workflow is not triggered in the same way. Use a Schedule Trigger when you want to test the full error-handling flow.
For a quick test, set the Schedule Trigger to run every 30 seconds. In production, use a safer interval that matches your real automation needs.
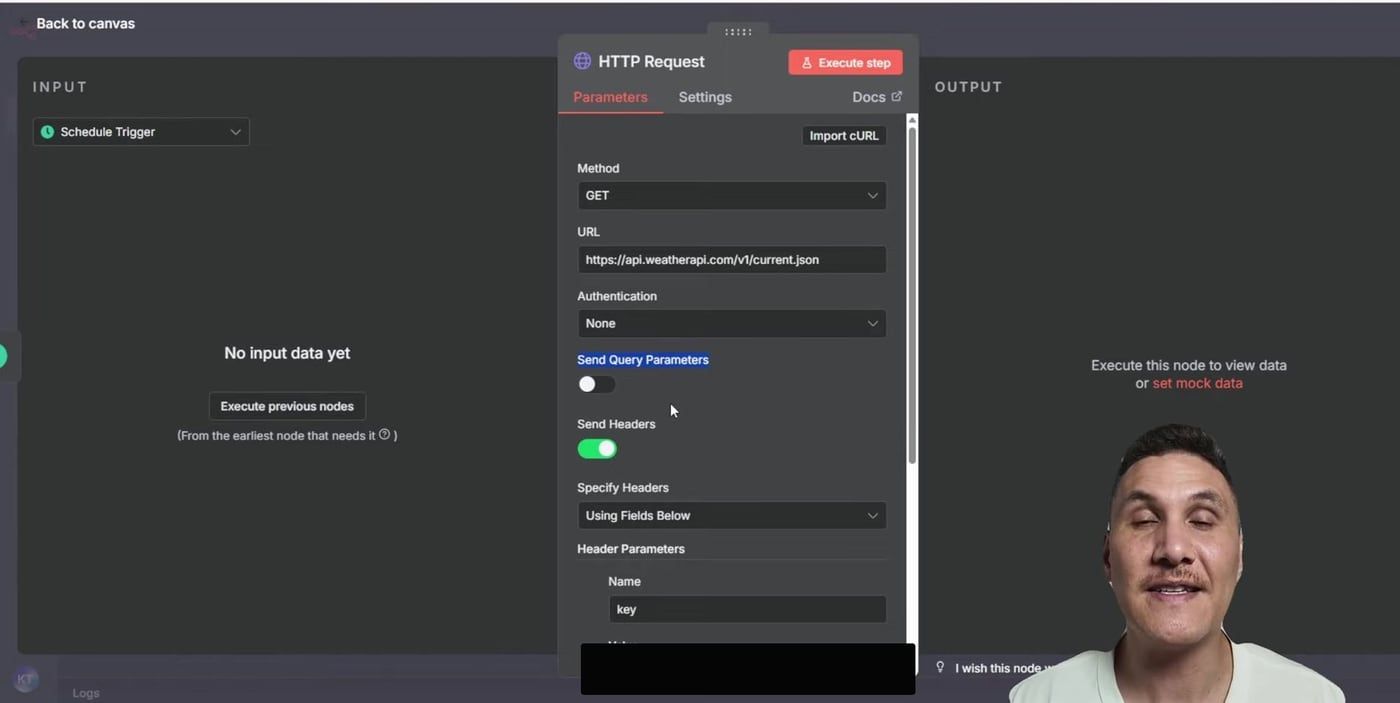
Step 2: Create a Controlled HTTP Request Failure
The sample workflow calls WeatherAPI through the HTTP Request node, then appends the response into Google Sheets. To test failure handling, turn off Send Query Parameters. That removes the required location query and causes the API request to fail with an error such as Parameter q is missing.
Practical tip: use controlled test failures when building alerting. Do not wait for a production outage to discover whether your error handler works.
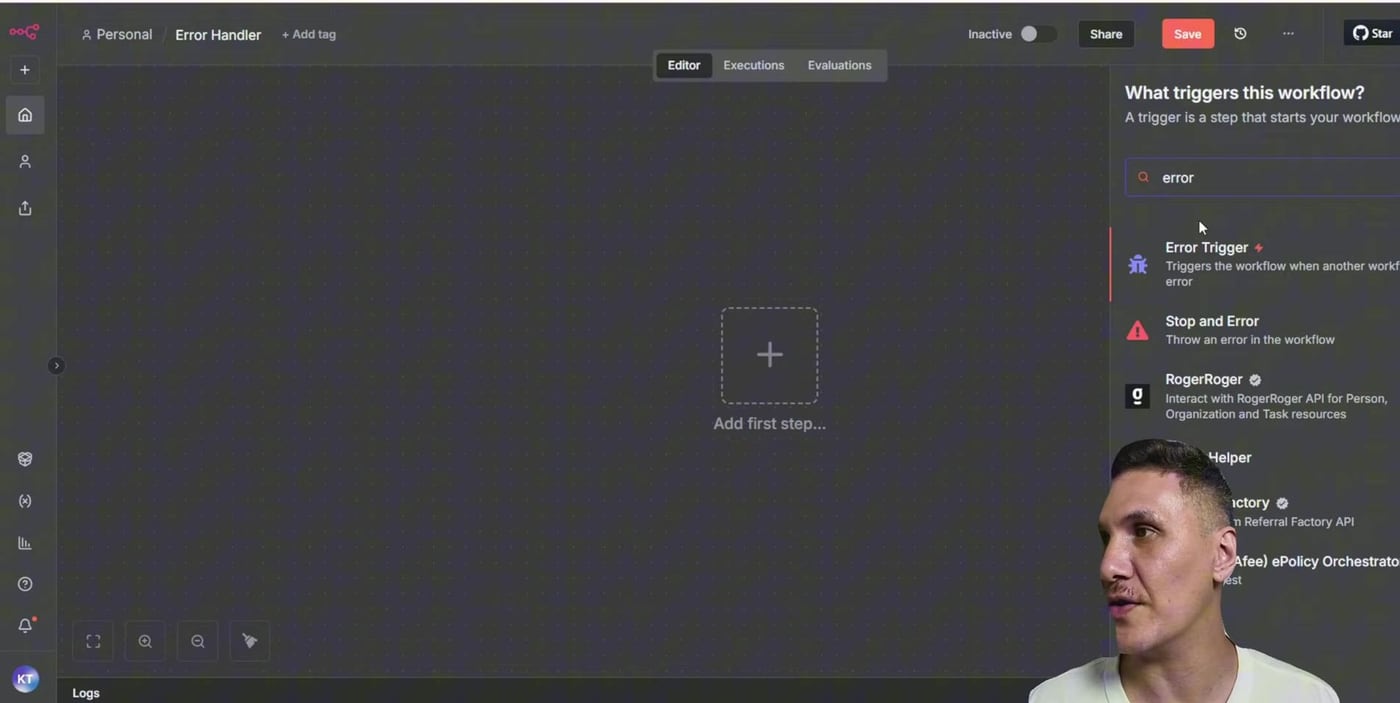
Step 3: Create the Error Handler Workflow
Create a new workflow and add the Error Trigger node as the first node. This workflow becomes the alerting workflow. It receives the failed workflow name, execution information, last executed node, error description, and stack trace.
Next, add a Gmail node and choose Send a Message. The alert email should be short enough to scan quickly, but detailed enough to take you straight to the failed execution.
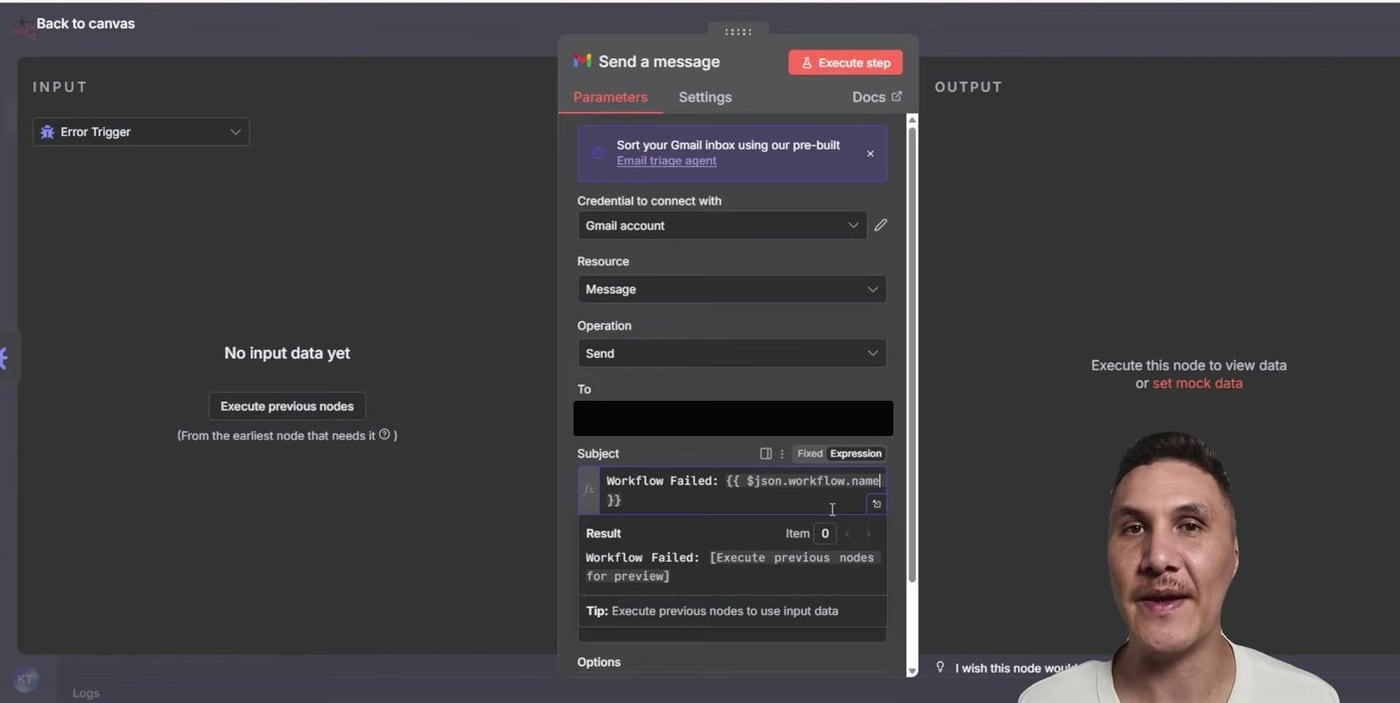
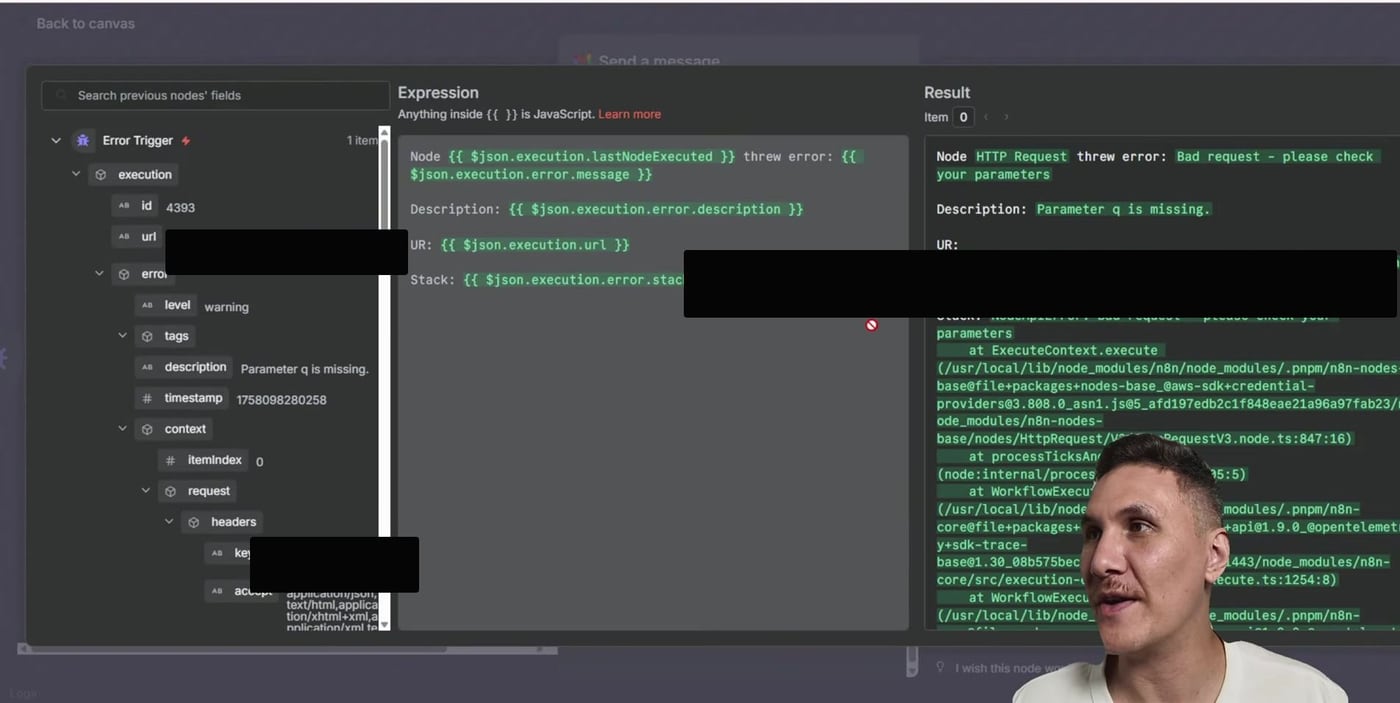
Step 4: Use Expressions in the Alert Email
The subject line can include the failed workflow name. The body can include the failed node, the error message, the description, the execution URL, and the stack trace.
Subject:
Workflow Failed: {{ $json.workflow.name }}

Message:
Node {{ $json.execution.lastNodeExecuted }} threw error: {{ $json.execution.error.message }}

Description: {{ $json.execution.error.description }}

URL: {{ $json.execution.url }}

Stack: {{ $json.execution.error.stack }}
If execution saving is disabled, the execution URL may not be available. For debugging workflows, make sure failed production executions are saved so the email can link back to the exact run.
Step 5: Enable Retry on Fail in the HTTP Request Node
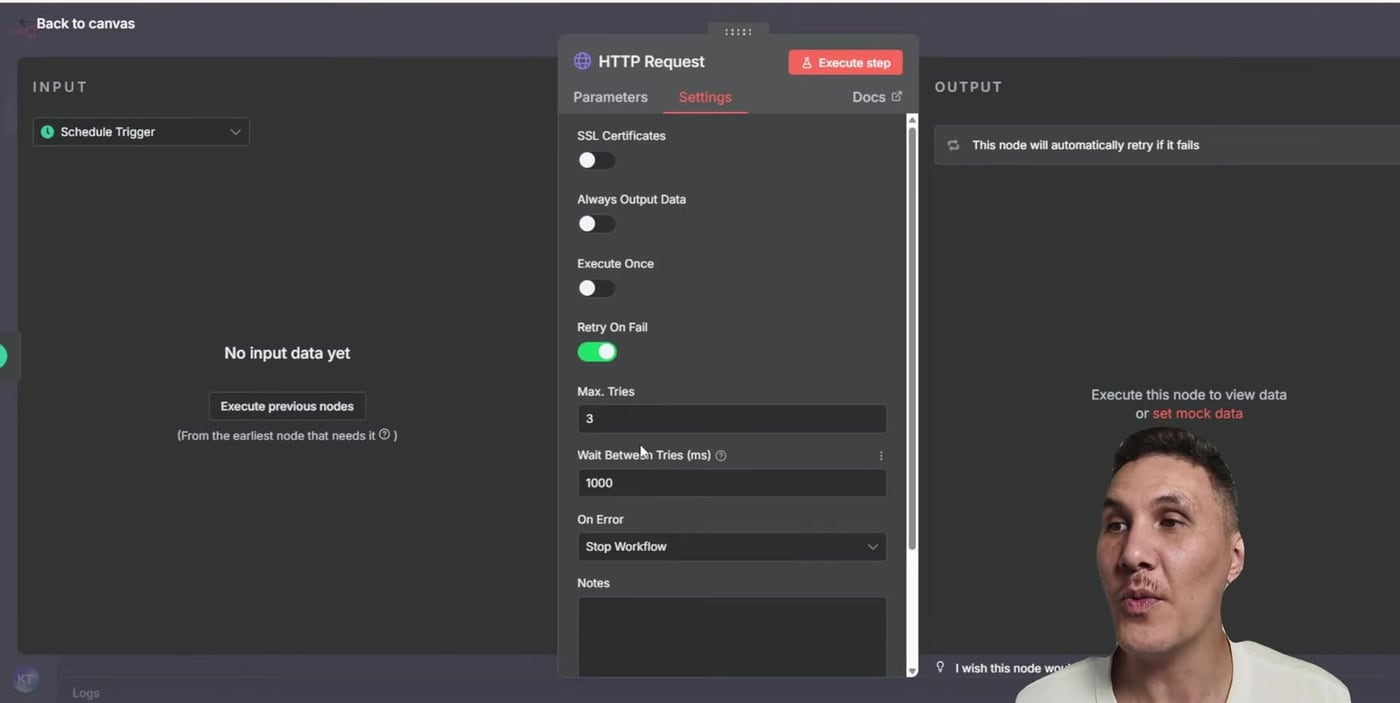
Before sending an alert, let n8n retry the HTTP Request node. This is useful for temporary network blips, slow services, and rate limits. Open the HTTP Request node, go to Settings, then enable Retry on Fail.
A good starter setup is Max Tries: 3, Wait Between Tries: 1000 ms, and On Error: Stop Workflow. With that setup, n8n retries the request before stopping the workflow and handing the failure to the error handler.
Step 6: Attach the Error Handler to the Main Workflow
Open the main workflow settings and find Error Workflow. Select the workflow you created earlier, such as Error Handler, then save the settings.
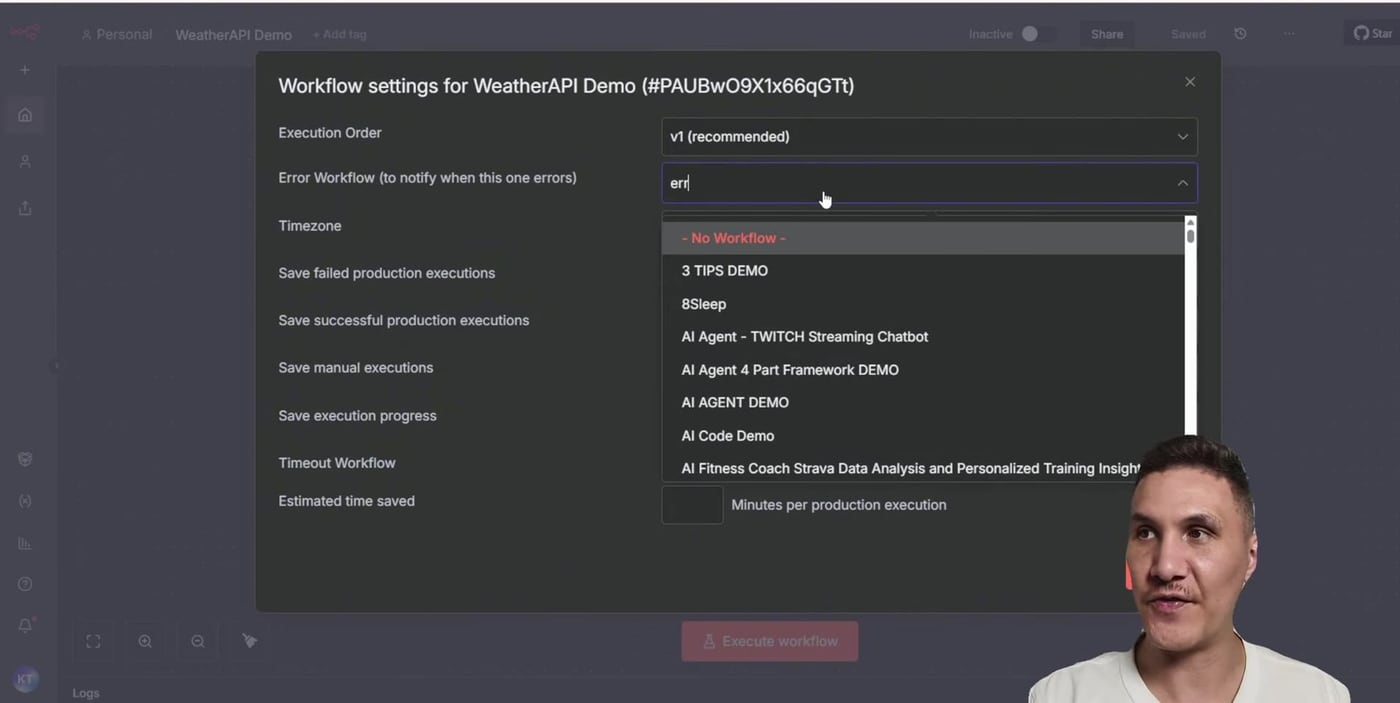
Now the main workflow has two layers of protection: the HTTP Request node retries first, and the Error Handler workflow sends an alert if the workflow still fails.
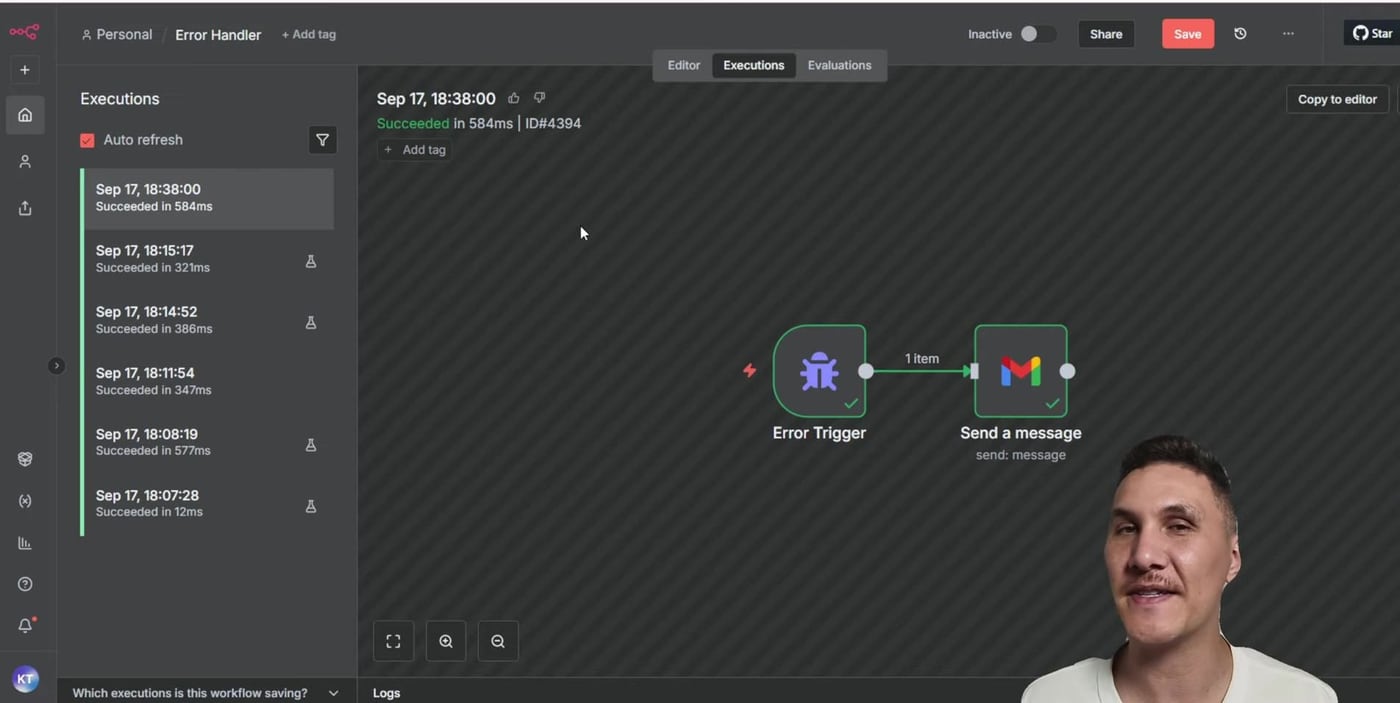
Step 7: Activate the Workflow and Confirm the Error Handler Runs
Activate the scheduled workflow and wait for the next scheduled run. Because the HTTP Request is intentionally missing the query parameter, the workflow should fail after its retry attempts. The Error Handler workflow should then show a successful execution because it successfully sent the alert.
Step 8: Inspect the Error Trigger Payload
Open the Error Trigger node inside the Error Handler execution. The output contains the failed execution metadata and the error details. This payload is what powers the Gmail message expressions.
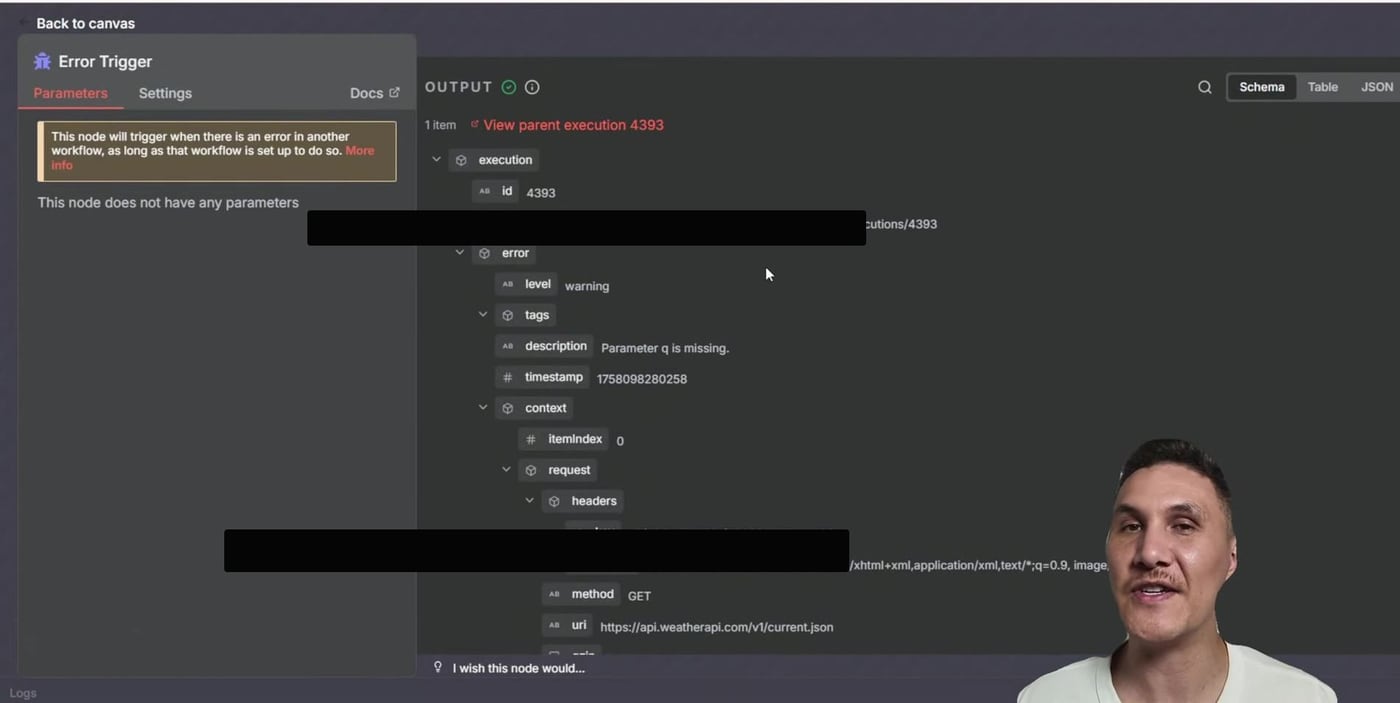
The Gmail node preview is a good place to verify that your expressions resolve correctly before relying on the alert in production.
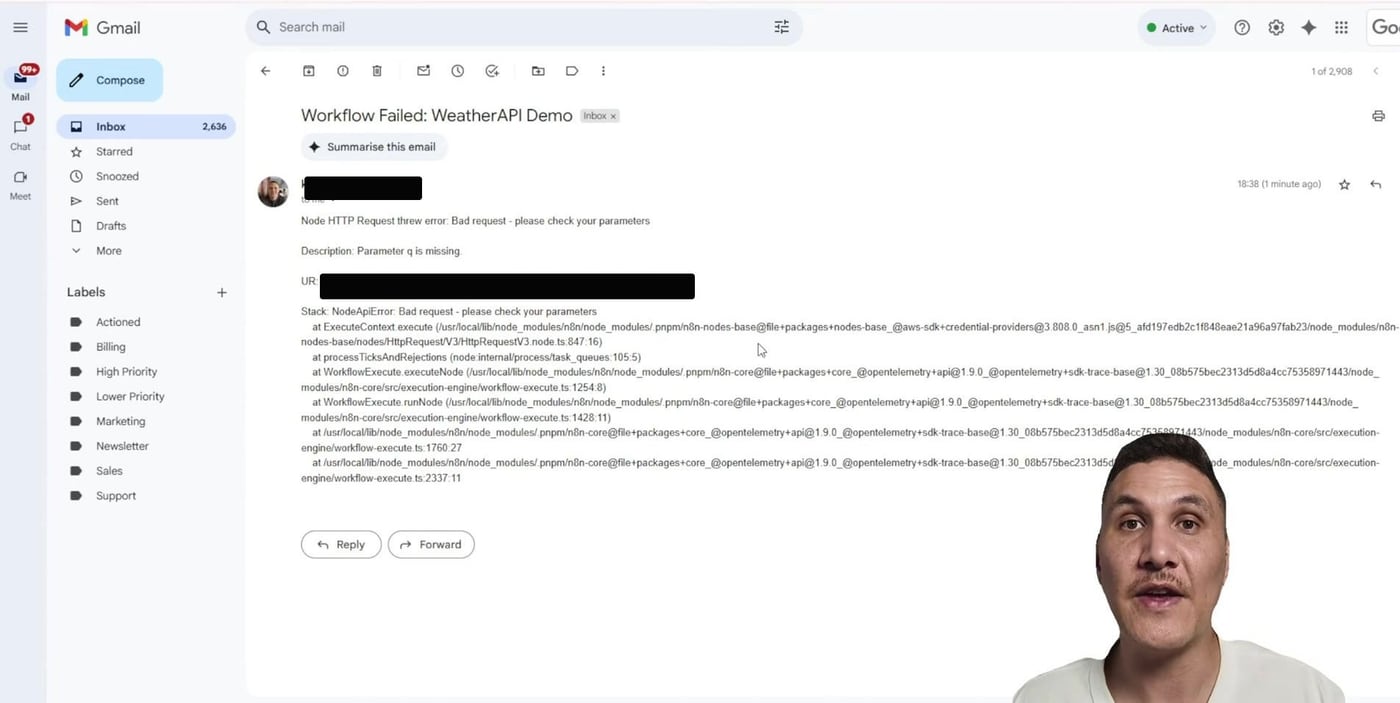
Step 9: Check the Email Alert
The final email should tell you which workflow failed, which node failed, why it failed, and where to click to inspect the exact execution. That is the difference between a vague alert and an alert you can actually act on.
Recommended Production Settings
- Use Retry on Fail for HTTP calls that may fail temporarily, but do not hide real data or authentication issues behind unlimited retries.
- Keep retry delays realistic. One second is fine for a quick test, but production APIs may need longer waits or batching.
- Save failed executions so the alert email can link directly to the failed run.
- Avoid sending secrets, API keys, or full request headers inside alert emails.
- Route high-priority workflow failures to email, Slack, or another channel your team actually monitors.
- Create one reusable Error Handler workflow and attach it to important production workflows.
Troubleshooting Notes
- If the Error Handler workflow does not run, confirm the main workflow is activated and triggered automatically, not manually.
- If the email is empty, open the Error Trigger output and verify that the expression paths match the available JSON fields.
- If the HTTP Request keeps failing after retries, inspect the API response and confirm the URL, query parameters, headers, and credentials.
- If alerts are too noisy, adjust retry counts, wait time, workflow schedules, and the types of errors that should trigger notifications.
Useful References
Official docs used for this article: n8n HTTP Request node, HTTP Request common issues and Retry on Fail, n8n Error Trigger node, n8n Schedule Trigger node, and n8n Gmail Message operations.


Olaitan Oladipo holds a BSc in Sociology from Olabisi Onabanjo University. He is a self-taught automation builder who has spent years inside n8n doing the work that most tutorials skip: debugging OAuth errors at 2am, migrating client automations from Make.com mid-project, fighting reverse proxy misconfigurations on AWS EC2, and figuring out through trial and error what actually holds up in production versus what only looks clean in a demo.
He is not a developer by training and not a SaaS founder. He is the person in the Discord server who actually answers the question instead of linking to the docs.
His writing on n8n Automation Tutorial covers self-hosting, AI agent workflows, tool comparisons, and the security vulnerabilities the automation industry would rather not discuss. He has built AI-assisted invoice approval flows using OpenAI function calling, connected Claude via HTTP Request nodes, and holds considered opinions about Zapier, Make.com, LangChain, and CrewAI that their marketing teams would not appreciate.
He writes for people who are technical enough to follow a tutorial but experienced enough to want the honest version.


